Freemote - Custom BLE remote for the Sony A7 III mirrorless camera
Earlier this year I bought a remote for my mirrorless camera and was very disappointed in the functionality of the remote. It tries to do a lot but fails at the most important task: reliably taking a picture. I could have spent another $80 to try another remote but at this point I was frustrated over how this remote got it so wrong in the first place that I had to explore this for myself. This was around the time I was working on improving Limescan and throughout that madness I gravitated towards trying something else to clear my mind. It turns out that there is very little information on the internet about how this remote protocol actually works. Sony seems to have introduced this pretty recently and it was even added retroactively to the A7 III through a firmware update, meaning that few people actually use this right now. There is one source out there which for some reason decided to omit the required information, meaning that I had to reverse engineer this anyway.
I had to put a hold on this project for a while due to “life” but came back to it last month and also decided to experiment with using Youtube to document the build. I’ve done a lot of video over the years but have missed being able to do shoot-edit-publish which is partly why I’m trying this out. If you have any feedback about this format, please send me an email or leave a comment.
Details
The NRF52840 does limit the potential size to a certain degree, this coupled with my desire to use Cherry MX Blue switches (for that crisp click) meant that I had to design this to be a bit larger than the remote I’m replacing. This ended up not being that much of an issue however, it feels good in the hand and I used the available space effectively to hide some of the oddly shaped components.
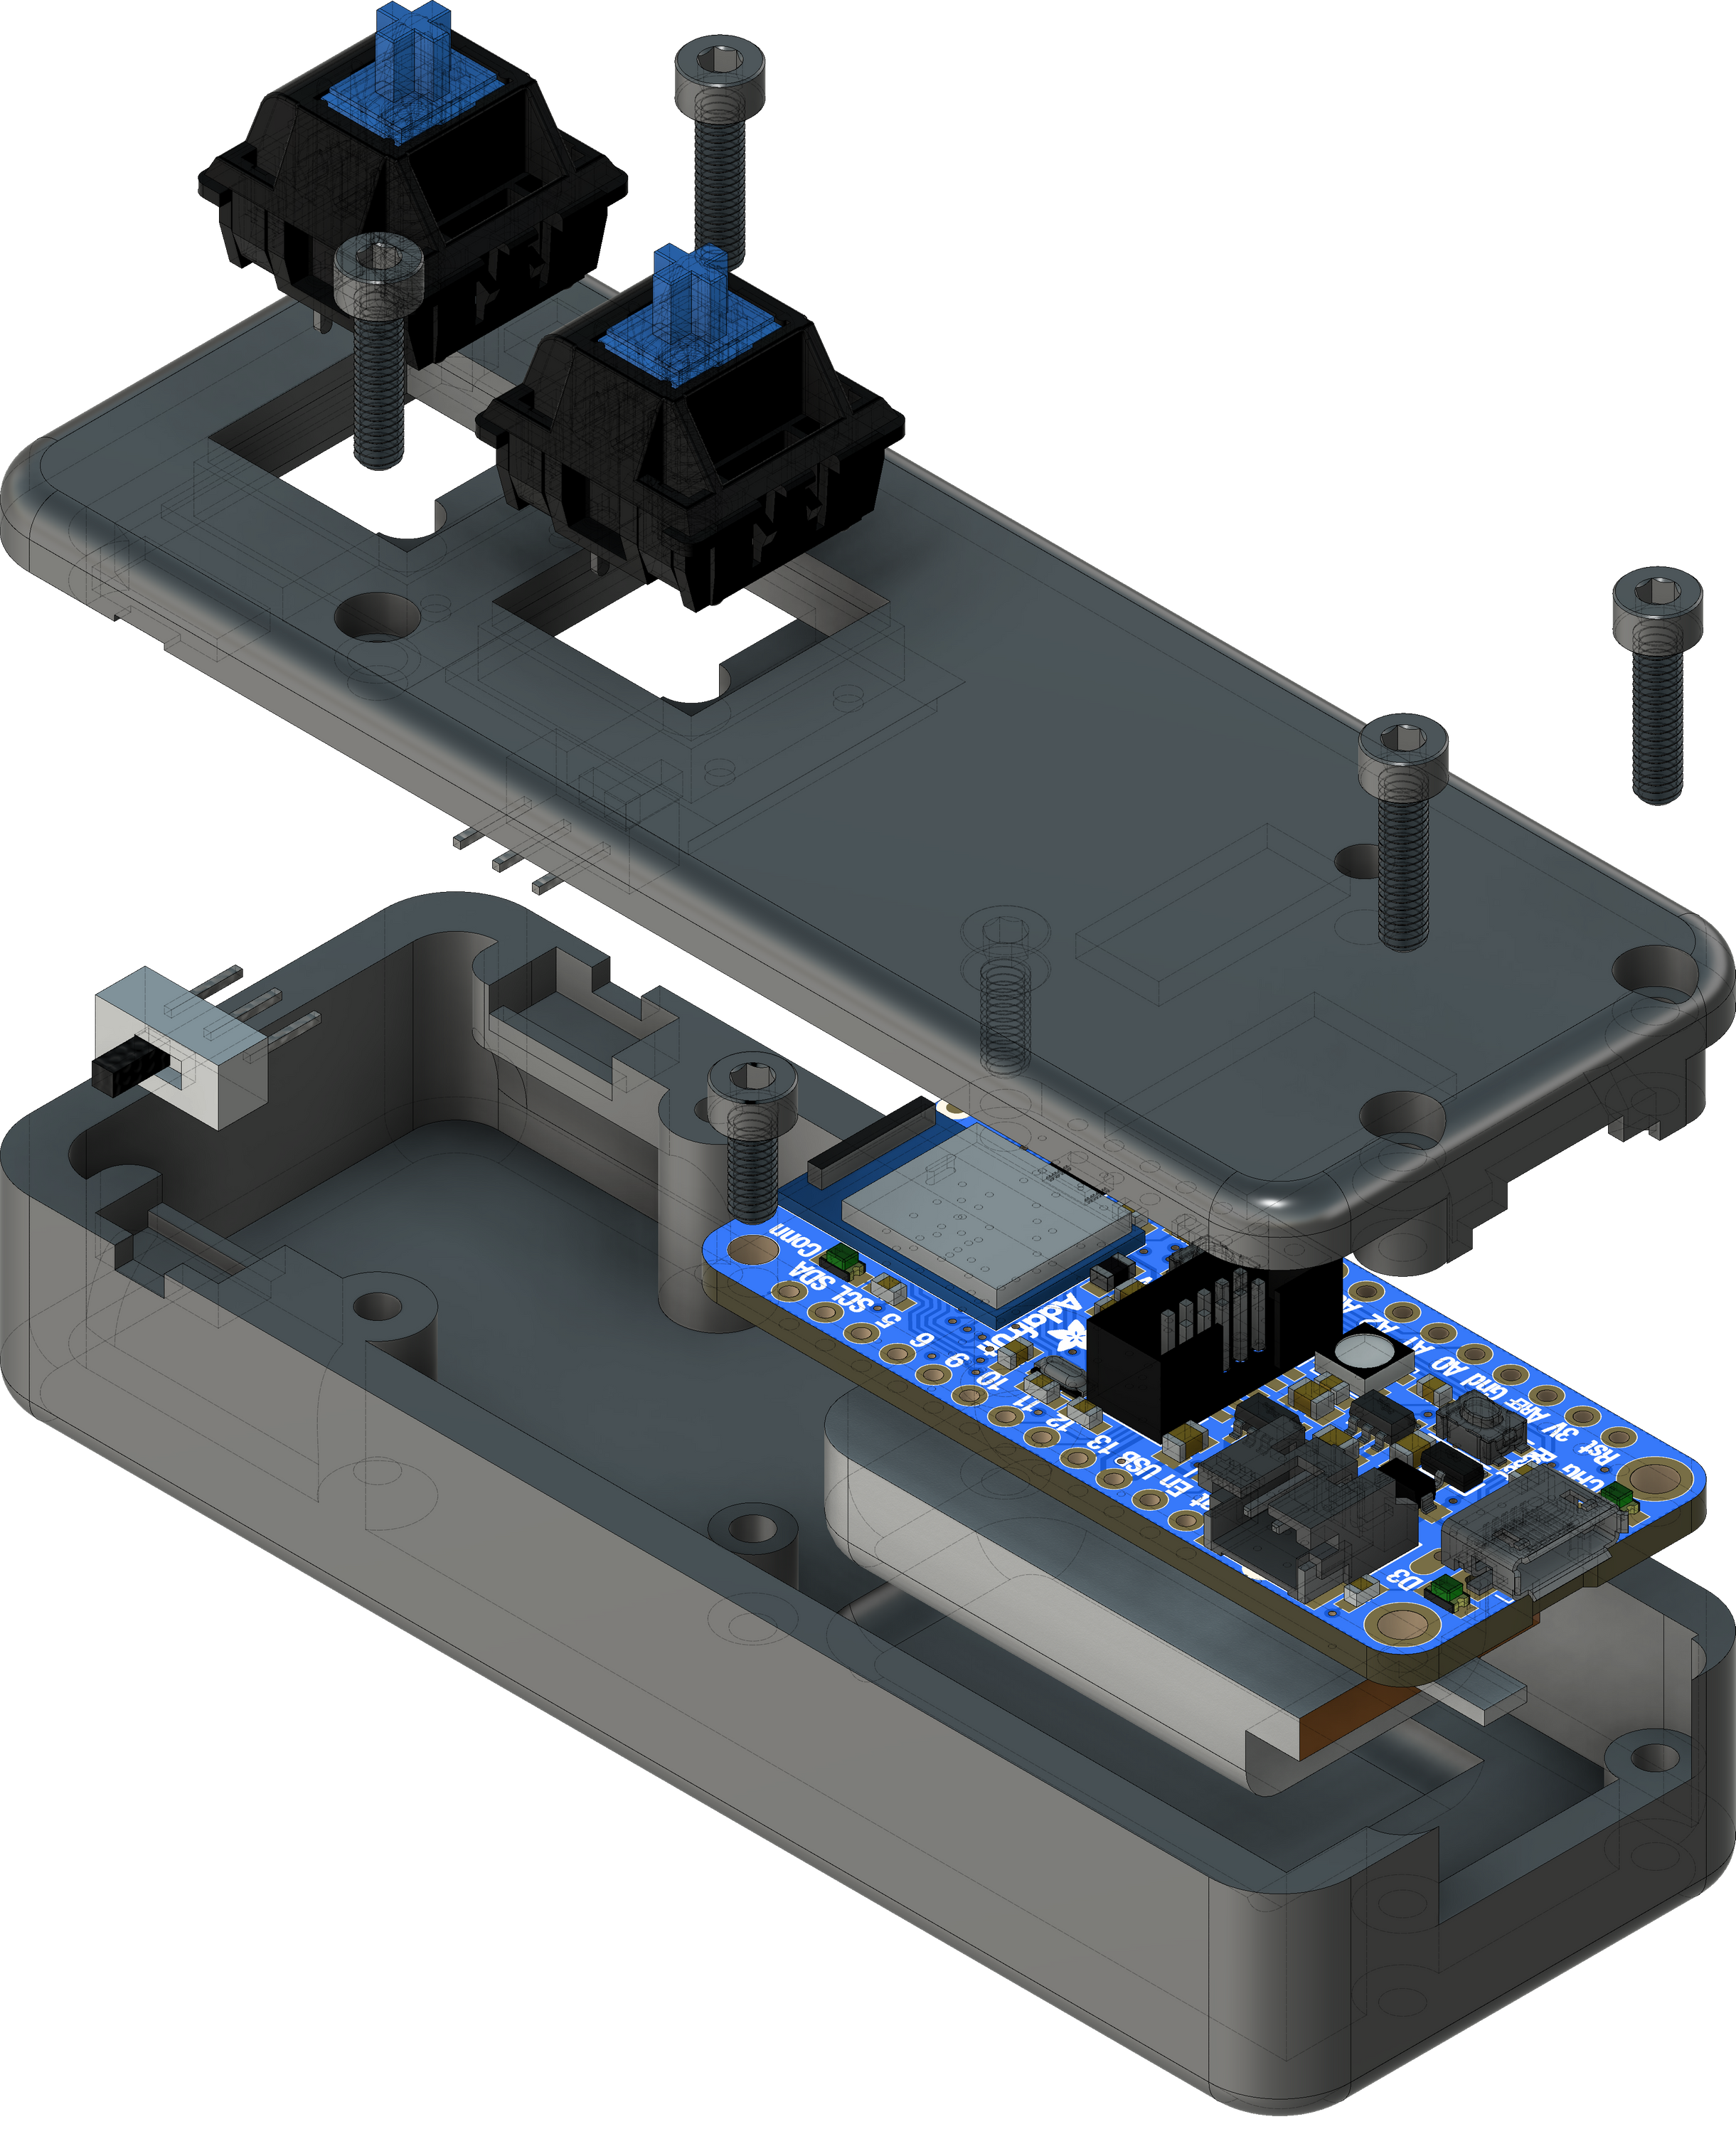
It prints in about 4 hours in two parts, takes about 10 minutes to finish up (removing supports etc) and the soldering took about 1 hour. I didn’t have cables in the right size so ended up using cables that were a bit over-dimensioned as well.
Code is of course available on github
Sony Alpha BLE Remote Protocol
For anyone stumbling upon this from nowhere, let this be a guide for you to figure out how this works. When trying to discover the camera, you have to specifically scan for the “manufacturer data” as Sony uses this to indicate state etc for the camera. So for example an advertisement header might look like this: 0x2D, 0x01, 0x03, 0x00, 0x64, 0x00, 0x45, 0x31, 0x22, 0xEF, 0x00. Decoding this you get:
| Code | Meaning |
|---|---|
| 2d 01 | Sony Corporation Company Identifier (0x012D) |
| 03 00 | Camera |
| 64 | Protocol Version |
| 00 | ??? |
| 45 31 | Model Code |
| 22 EF 00 | <tag> CODE </tag> |
The camera does not advertise the services you need before you’ve successfully paired with the device, meaning that you have to query this specifically to find the camera you are looking for. So in reality to find the camera you can start by looking for 0x2D, 0x01, 0x03, 0x00. The interesting part here is 0x22 0xEF 0x00 which indicates that the camera is open to pairing. If the camera is not in pairing mode you will get 0x22 0xAF 0x00 instead. So for some easy logic, find the first 4 bytes, search forward for 0x22 and connect to anything that advertises 0xEF.
Remote Control Service
We are specifically interested in consuming the 8000FF00-FF00-FFFF-FFFF-FFFFFFFFFFFF service which contains two characteristics.
Codes from remote (RemoteCommand 0xFF02)
| Code | Description |
|---|---|
| 0x0106 | Shutter released |
| 0x0107 | Transitioning to focus |
| 0x0108 | Focus held |
| 0x0109 | Shutter fully pressed |
Answers from camera (RemoteNotify 0xFF01)
| Code | Meaning |
|---|---|
| Focus | |
| 0x02 3F 00 | Lost |
| 0x02 3F 20 | Acquired |
| Shutter | |
| 0x02 A0 00 | Ready |
| 0x02 A0 20 | Shutter active |
| Recording | |
| 0x02 D5 00 | Recording stopped |
| 0x02 D5 20 | Recording started |
All together
Hence in order to take a picture, you start by sending 0x0106 to the camera and then 0x0107. If the camera is set to “autofocus” the camera will first send back 0x02 0x3F 0x00 followed by 0x02 0x3F 0x20 with manual focus skipping this. You then proceed to send the camera 0x0108 and then 0x0109 which takes the picture. Camera will indicate that the picture has been taken by first sending 0x02 0xA0 0x00 followed by 0x02 0xA0 0x20. From here you need to send 0x0106 for the camera to reset, otherwise the menu system on the A7 III seems to lock up (???).