Garmin Varia Seatpost Extender
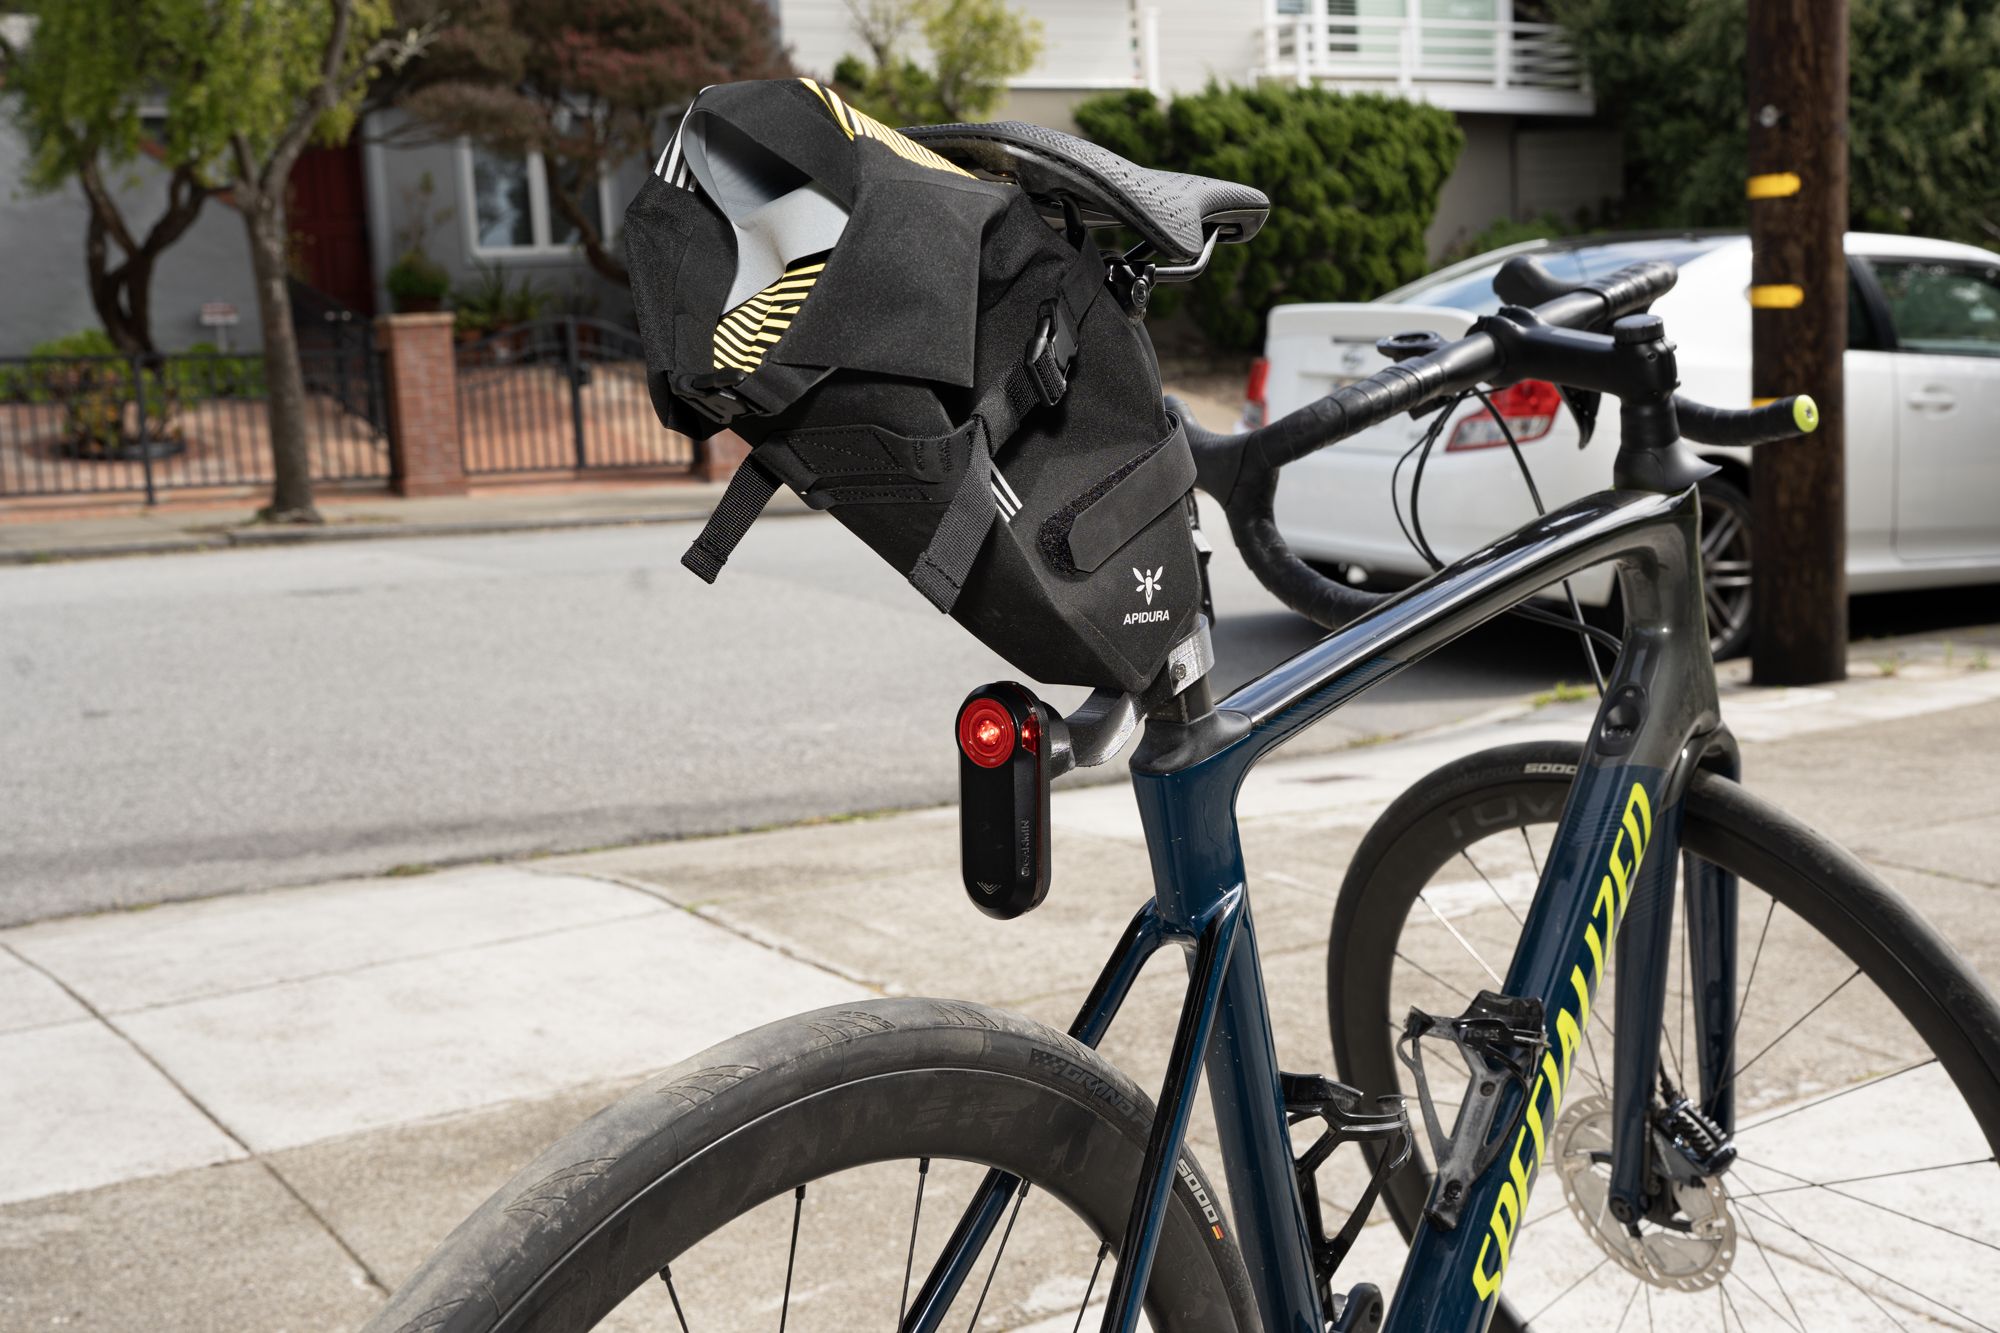
I’m doing a longer bike ride (200 miles / 320 km) next week in an unsupported fashion. I’m expecting this to take a fair bit of time given I have to go through 6 large cities, so I’m preparing for a long day out. The challenge of this is how to pack, if this was a race (let’s say Vätternrundan), the time to completion would be shorter and there are support stations along the way. To do this unsupported in a day I will have to carry a bit more than 3 gels and a thermal vest, with temperatures ranging from 4C to 23C over the day. My current smaller saddle bag only fits a spare tube, CO2 cartridge and some tools so that’s sadly a non-starter.
Bought a larger saddle bag on a whim after having good experiences with their frame mounted top bag. It arrived great but there was only one problem: it was deep enough that it obscured the Varia and blocked the light. The Garmin Varia RTL515 is a small bike light combined with a 24 GHz radar that wirelessly transmits the distance of cars coming from behind to a Garmin bike computer. I held off on this for a long time but after getting one in 2022 it is one of the few things I rarely ride without. You get a very predictable idea of what’s behind you when on the road.
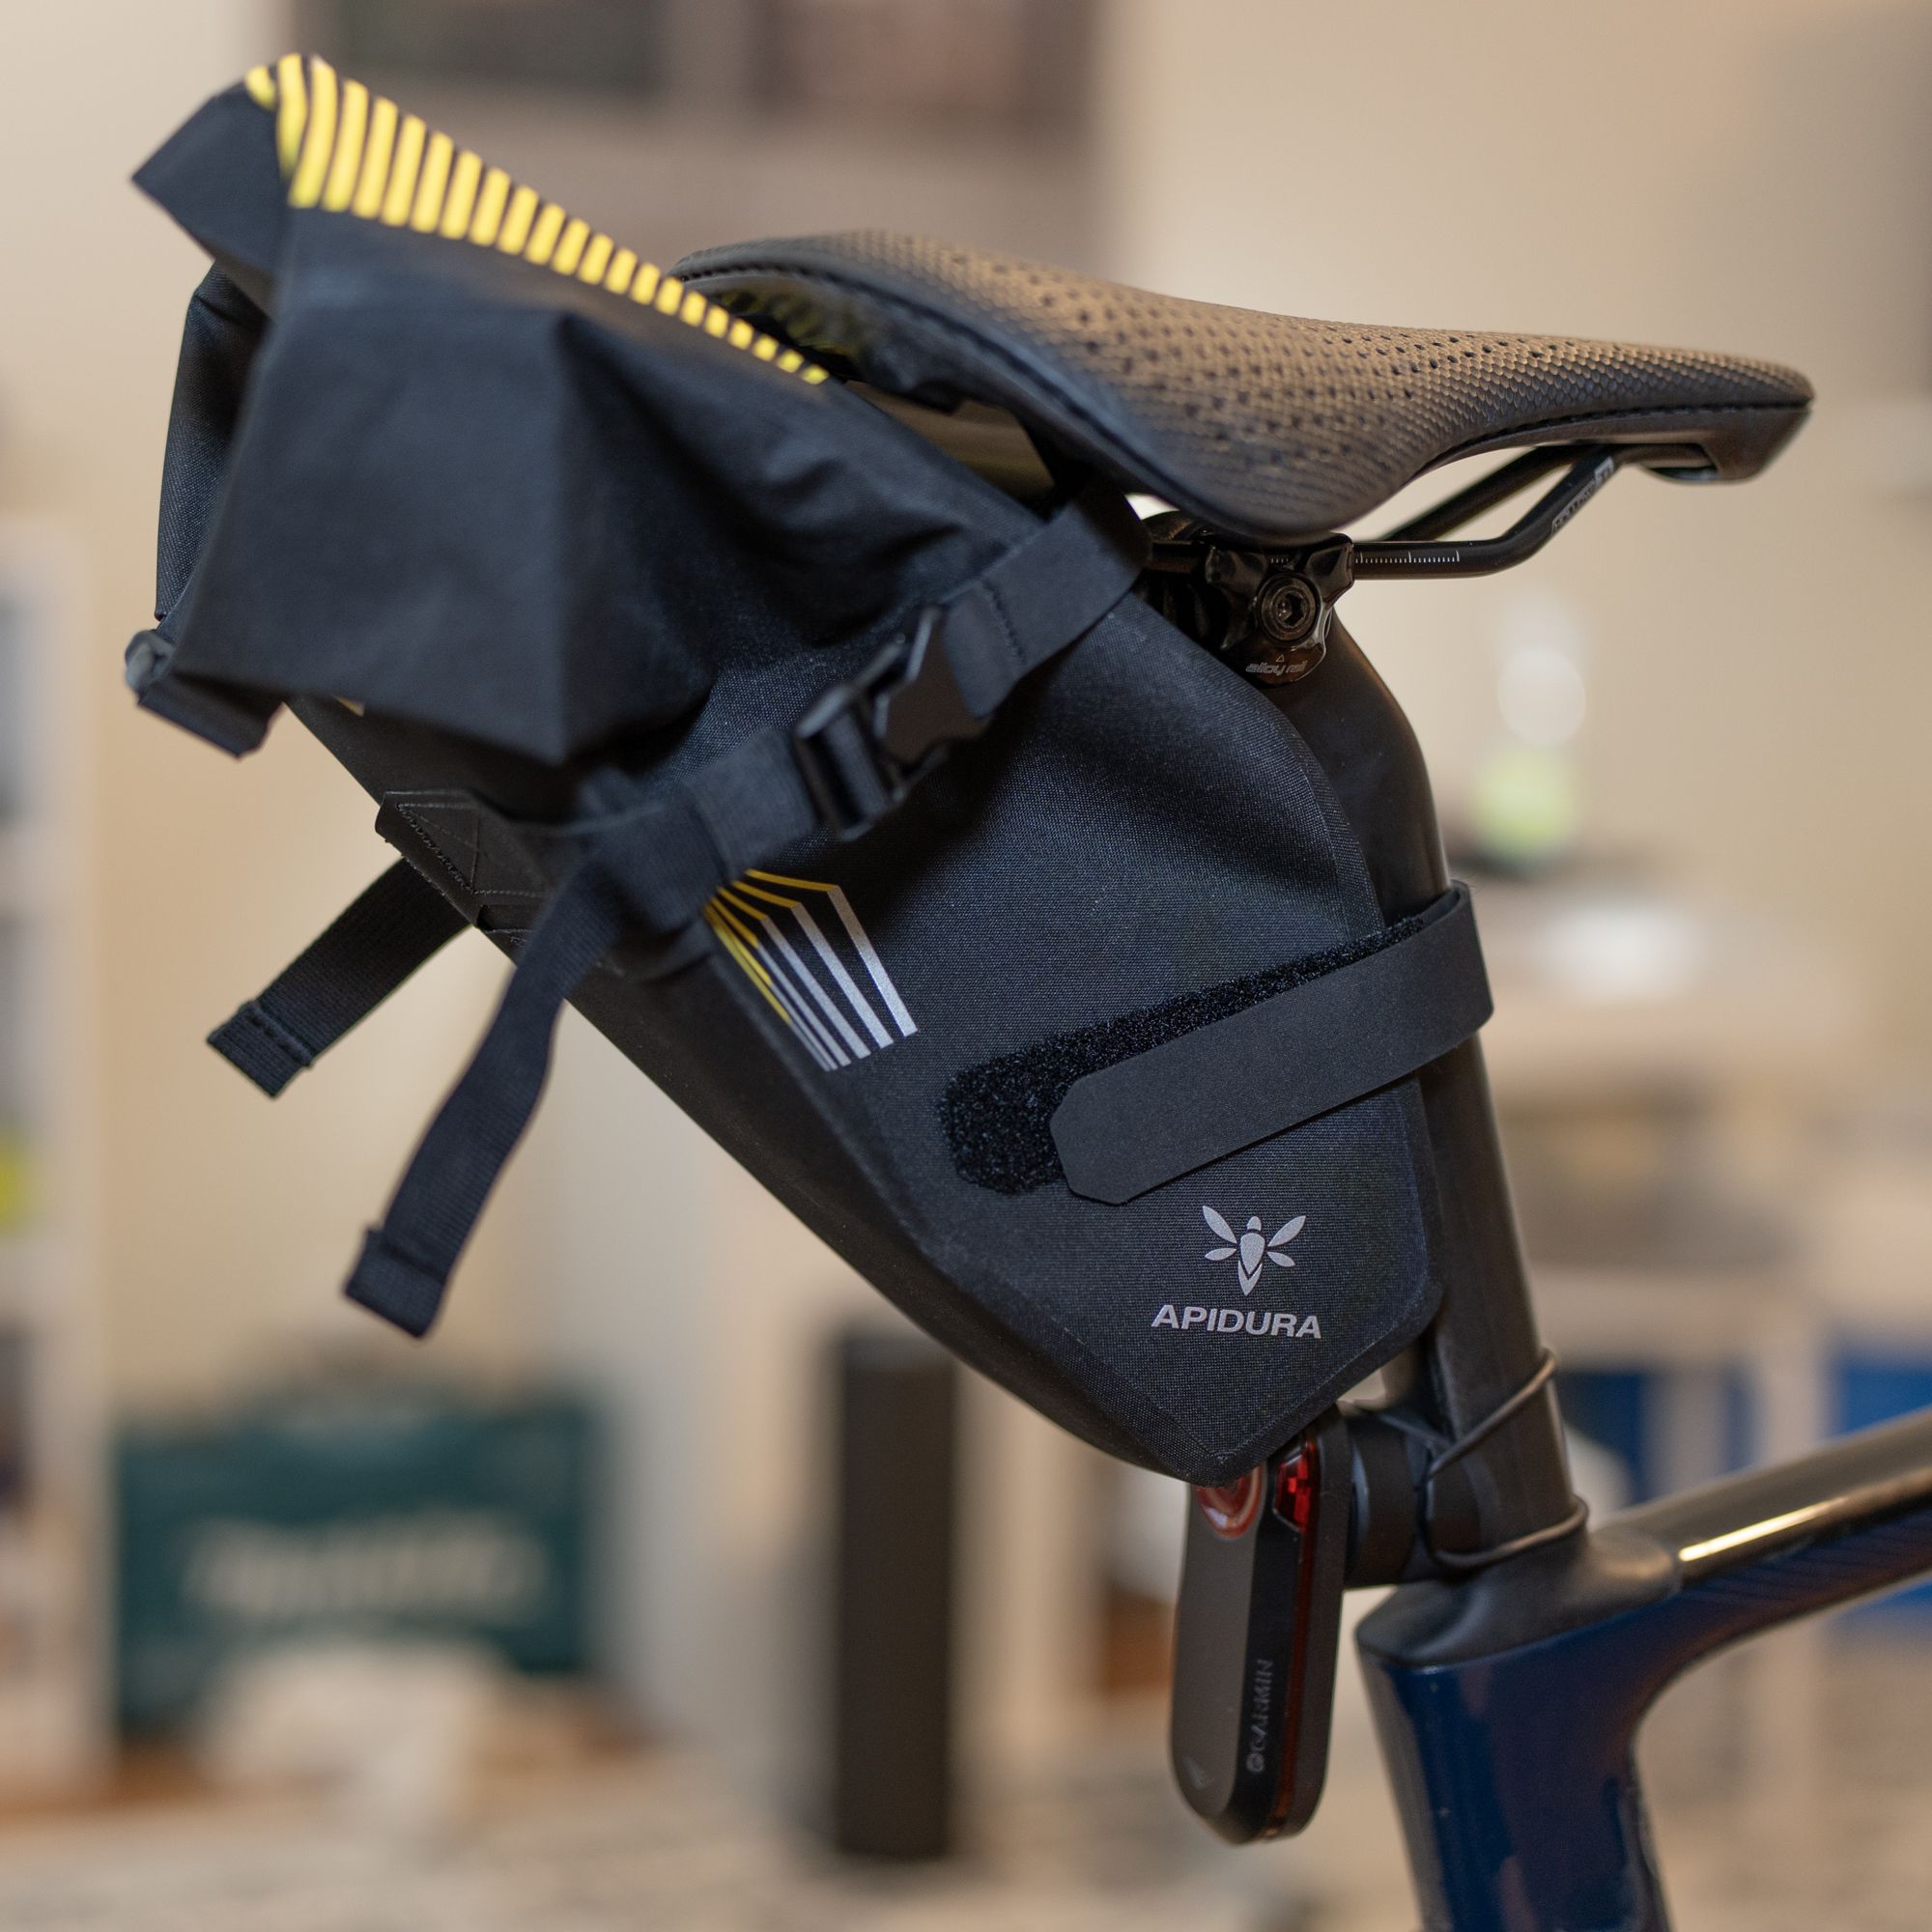
How does one solve this? I could strap the radar to the saddle bag but I was worried that the less rigid nature of the saddle bag would have the radar bouncing around, thus reducing the predictability of the radar. I looked at some ideas and realized that garmin mount inserts are dirt cheap which would allow me to build my own mount.
The bike I’m planning on riding for this distance is my Specialized Roubaix Expert from 2020. It excels when it comes to comfort over long distances without sacrificing too much efficiency (other than a less aero position). As is becoming more and more common, the bike is using a non-standard seatpost shape, in this case a D-shaped S-Works Pavé SL Carbon Seatpost. It’s therefore a bit tricky to figure out how to make a perfectly shaped clamp for this seatpost in 3D. As I lack a traditional engineering background, I honestly don’t know how to capture angles from something into CAD using tools only, the way I’ve found work is to just slap the thing I am trying to measure on a flatbed scanner and use that as a reference to draw it out.
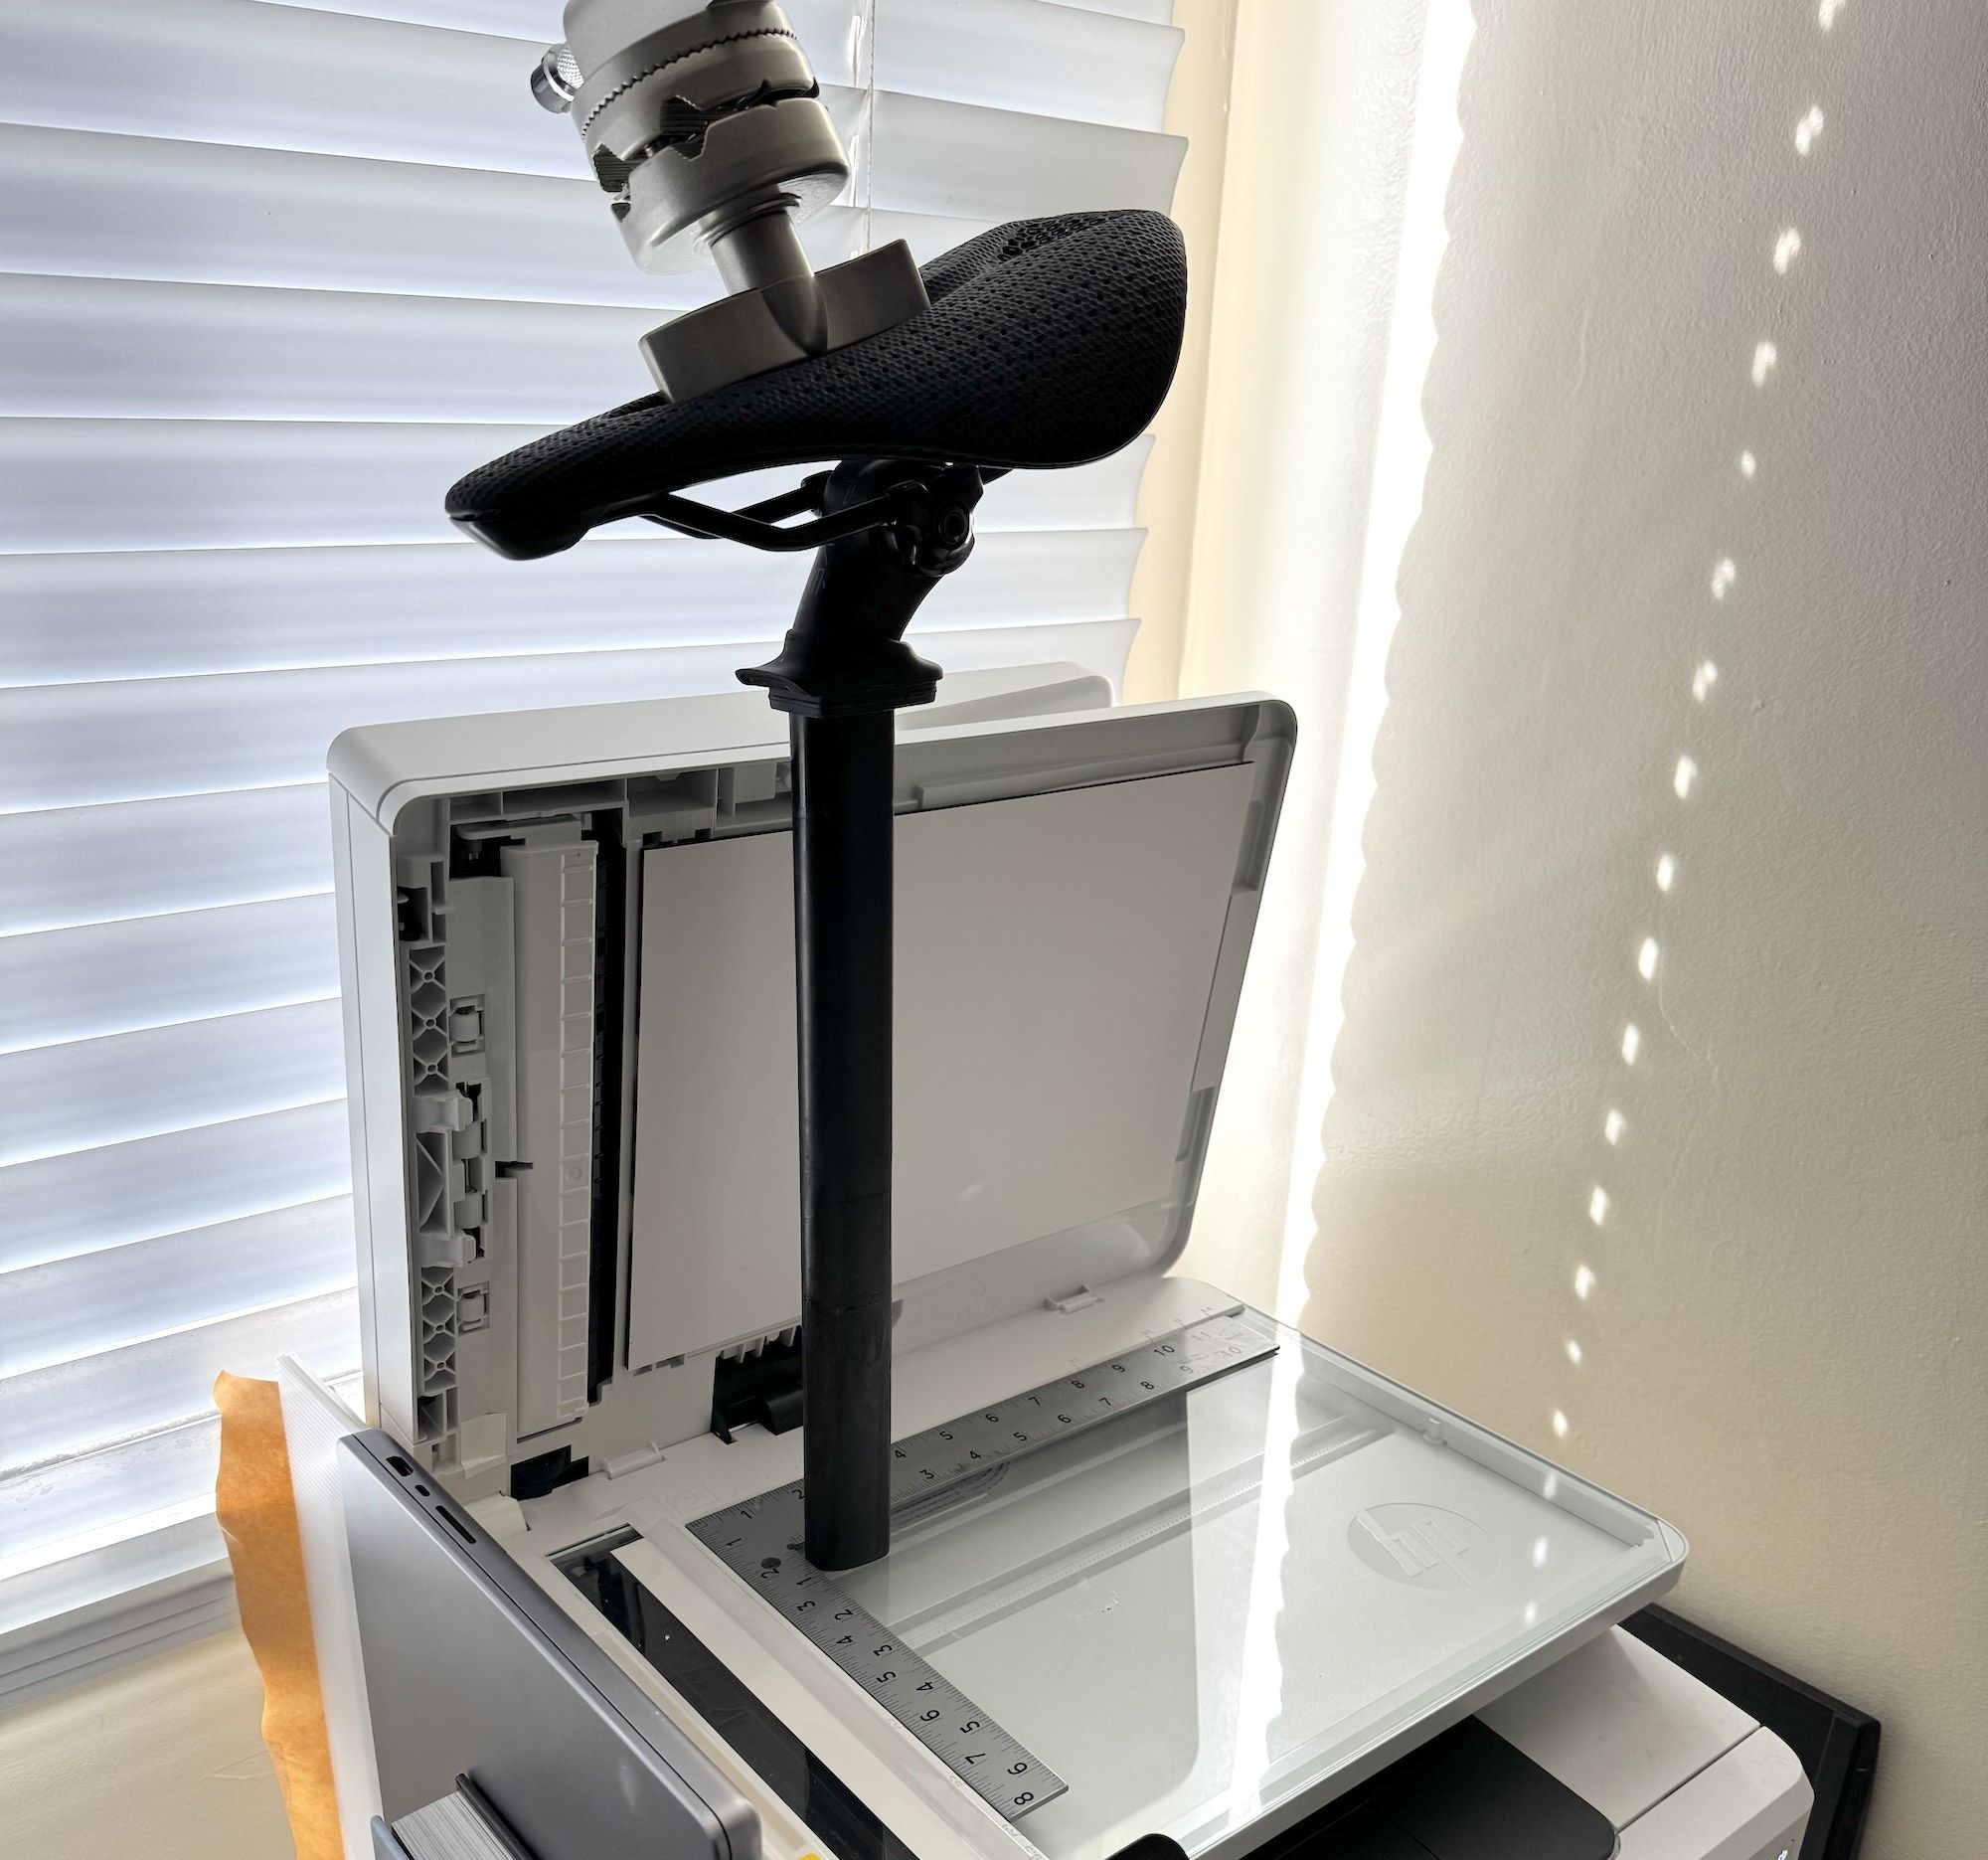
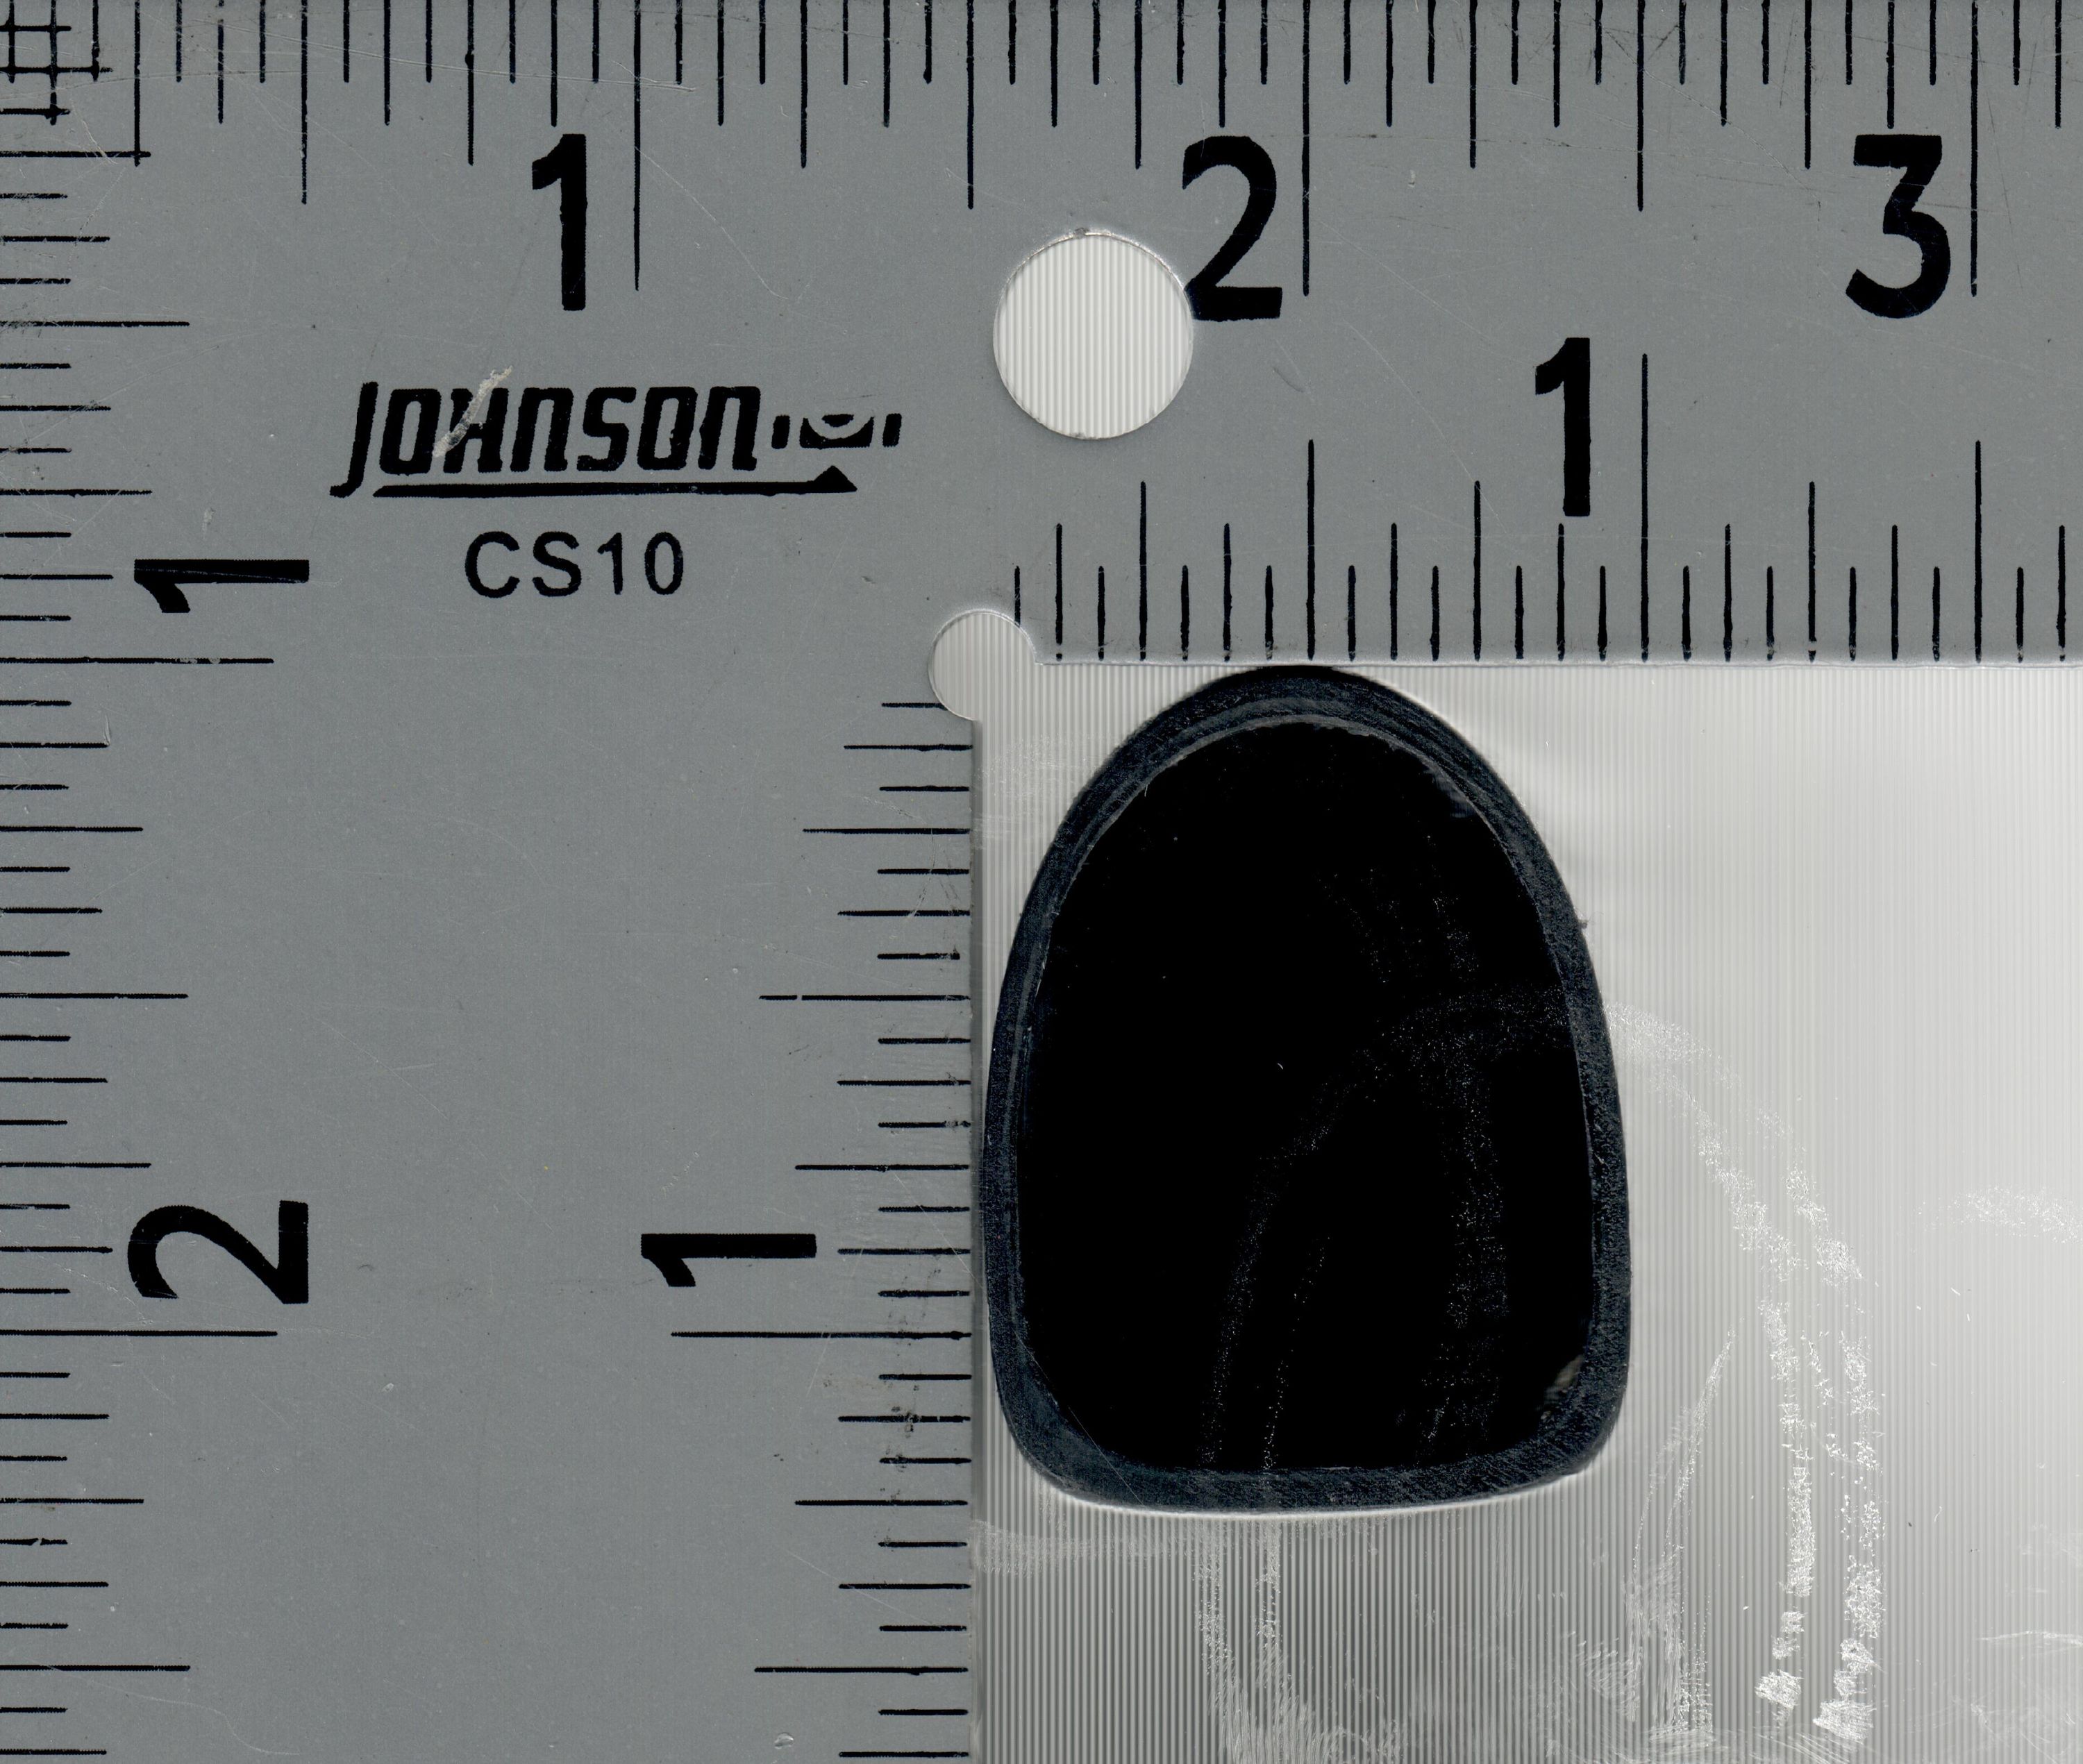
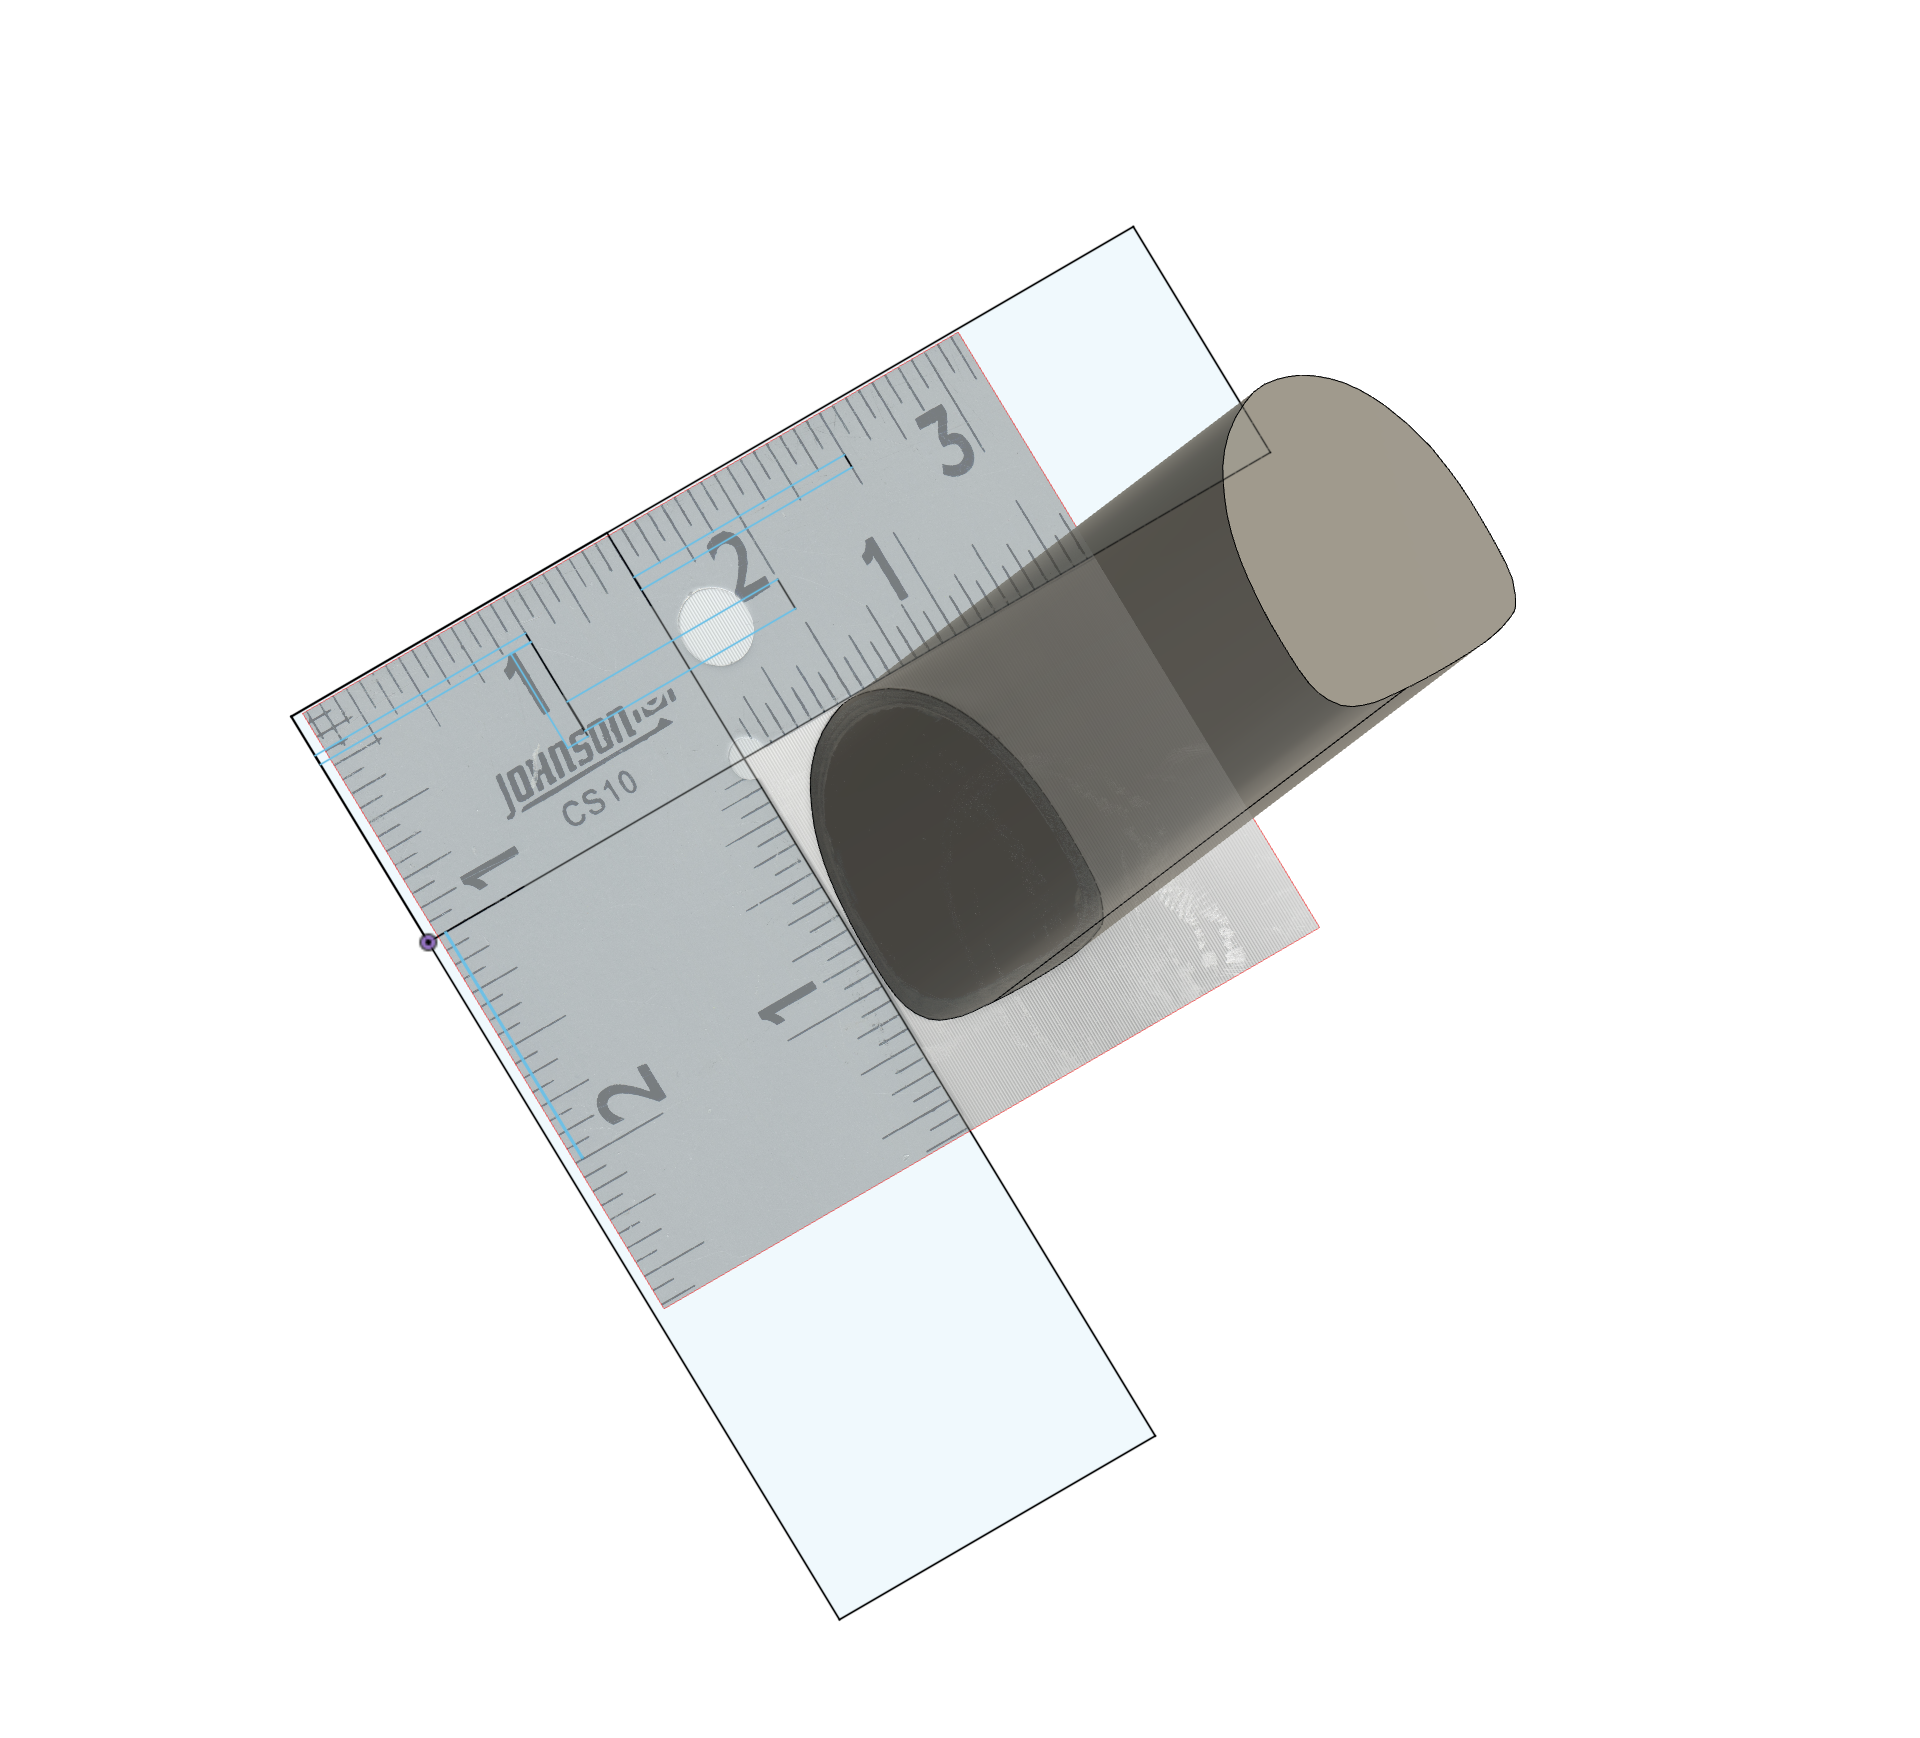
By scanning it besides something with visible measurement, in this case a ruler I had in a drawer. It is then easy to align the scan with “known” sizes in Fusion360, which then gives a good start to sketch out the seatpost and extrude into a shape that can be used for modelling. After that was done, I printed a bunch of smaller prototype fittings to iterate my way into something that would fit perfectly. There’s always some give when you are working with tolerances going from a scanner to 3D printed and making small prototypes is the fastest way of adjusting.
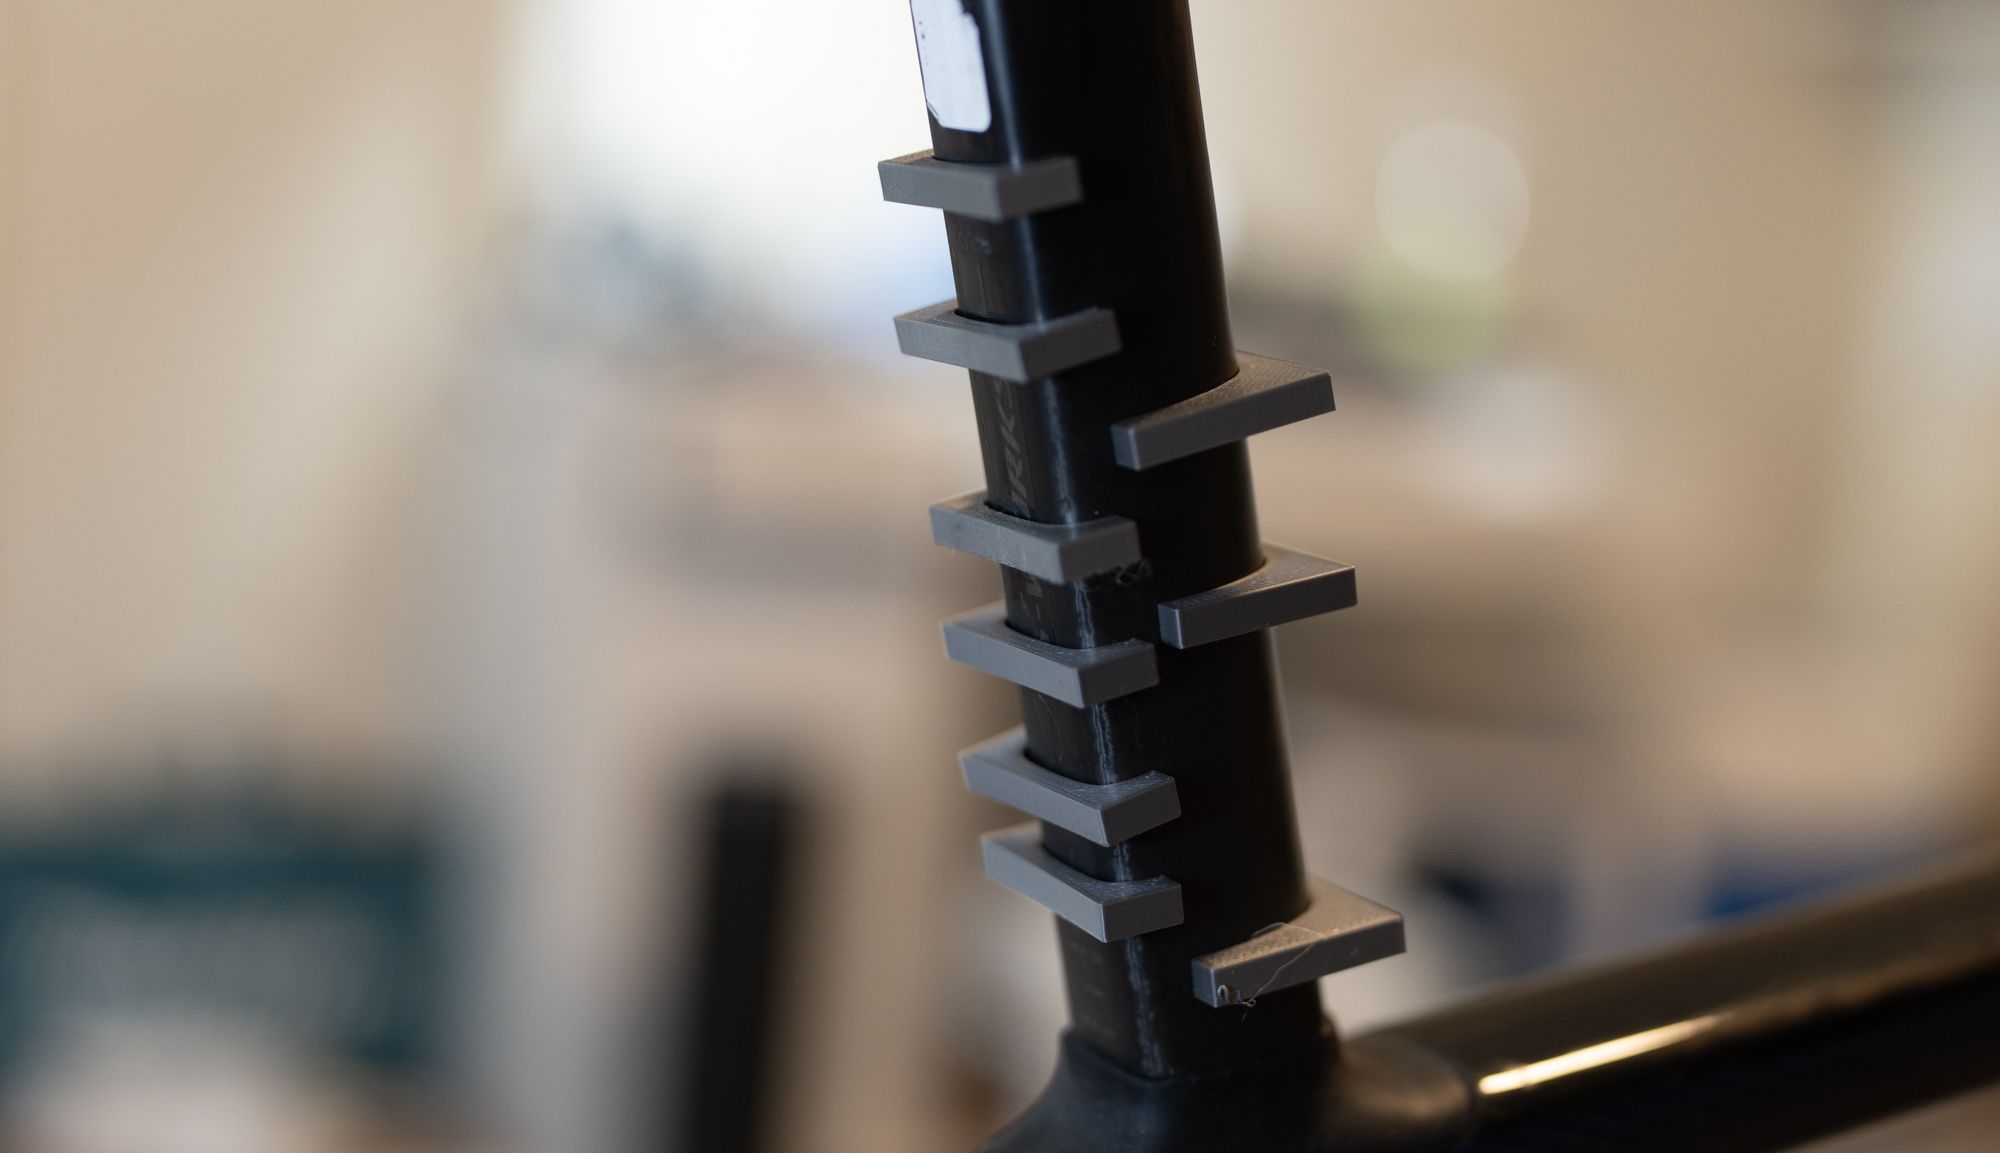
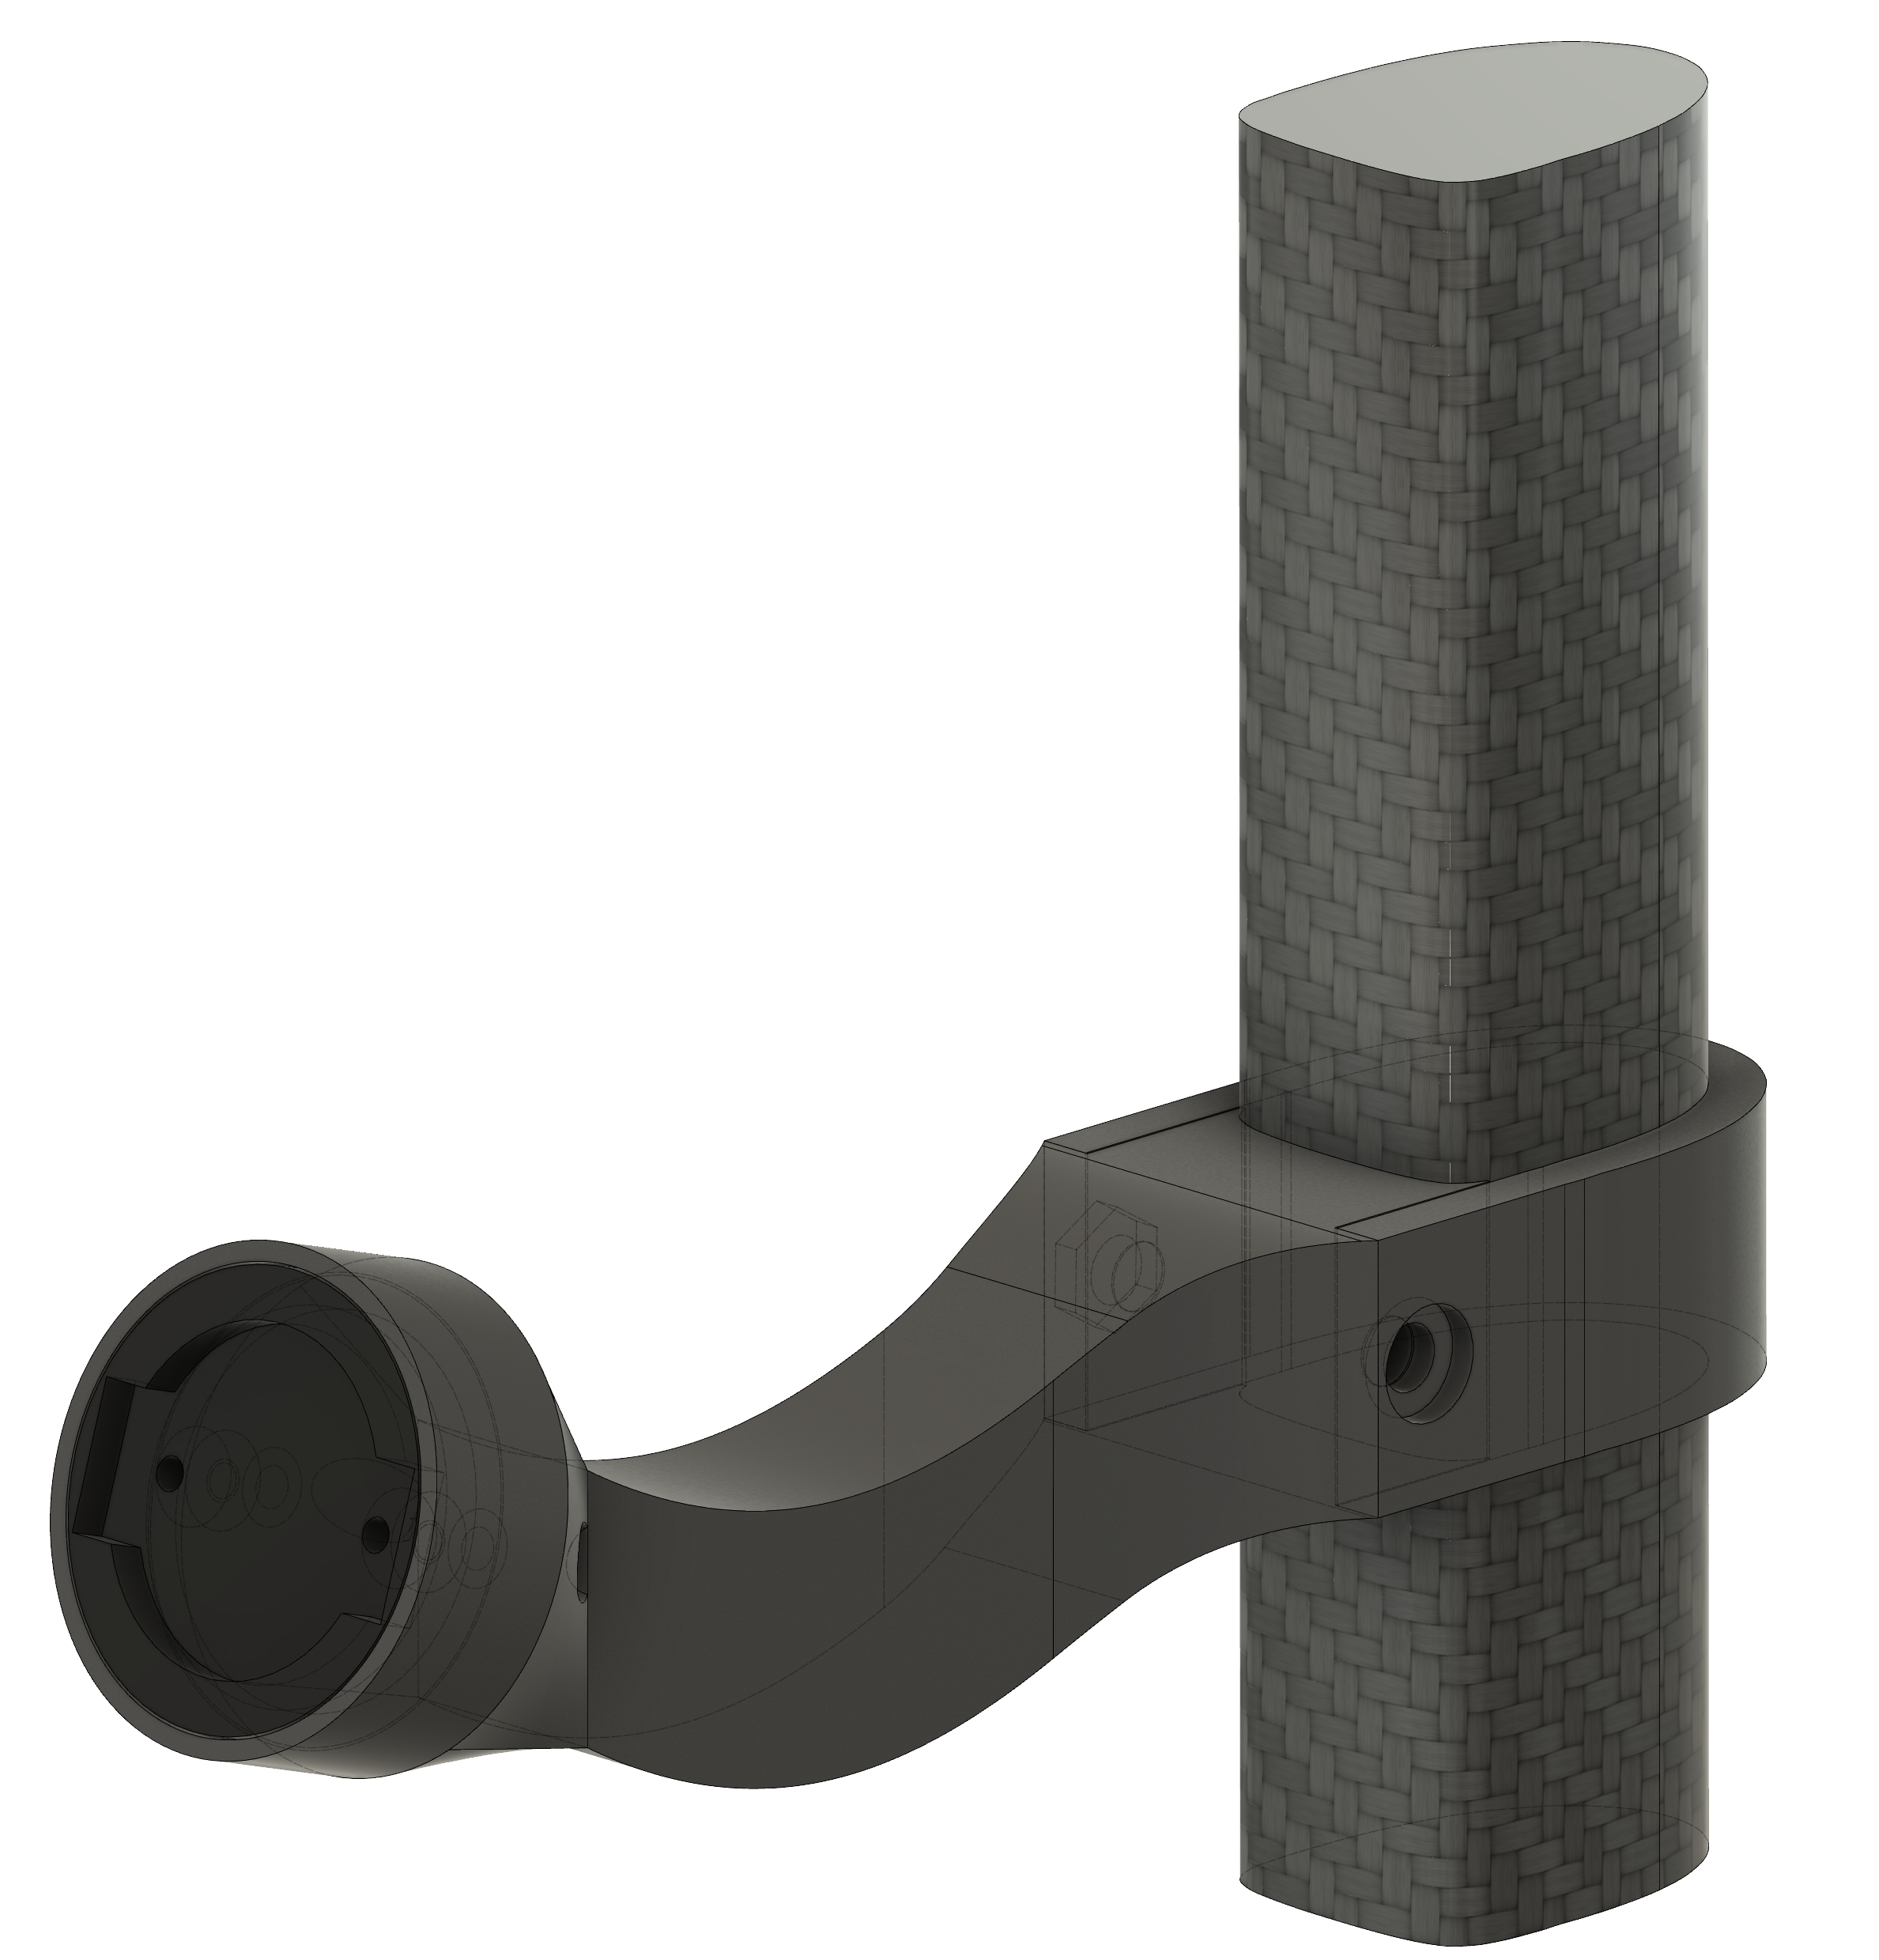
After finding a good fit I made an initial full prototype of how this could work, a ‘clamp’ that would mount around the D-shaped seatpost with a straight extension that morphed into a cup that held the garmin insert together with screws from the behind. The clamp would be held in place with an M5 hex head screw which allows me to adjust tension as needed.
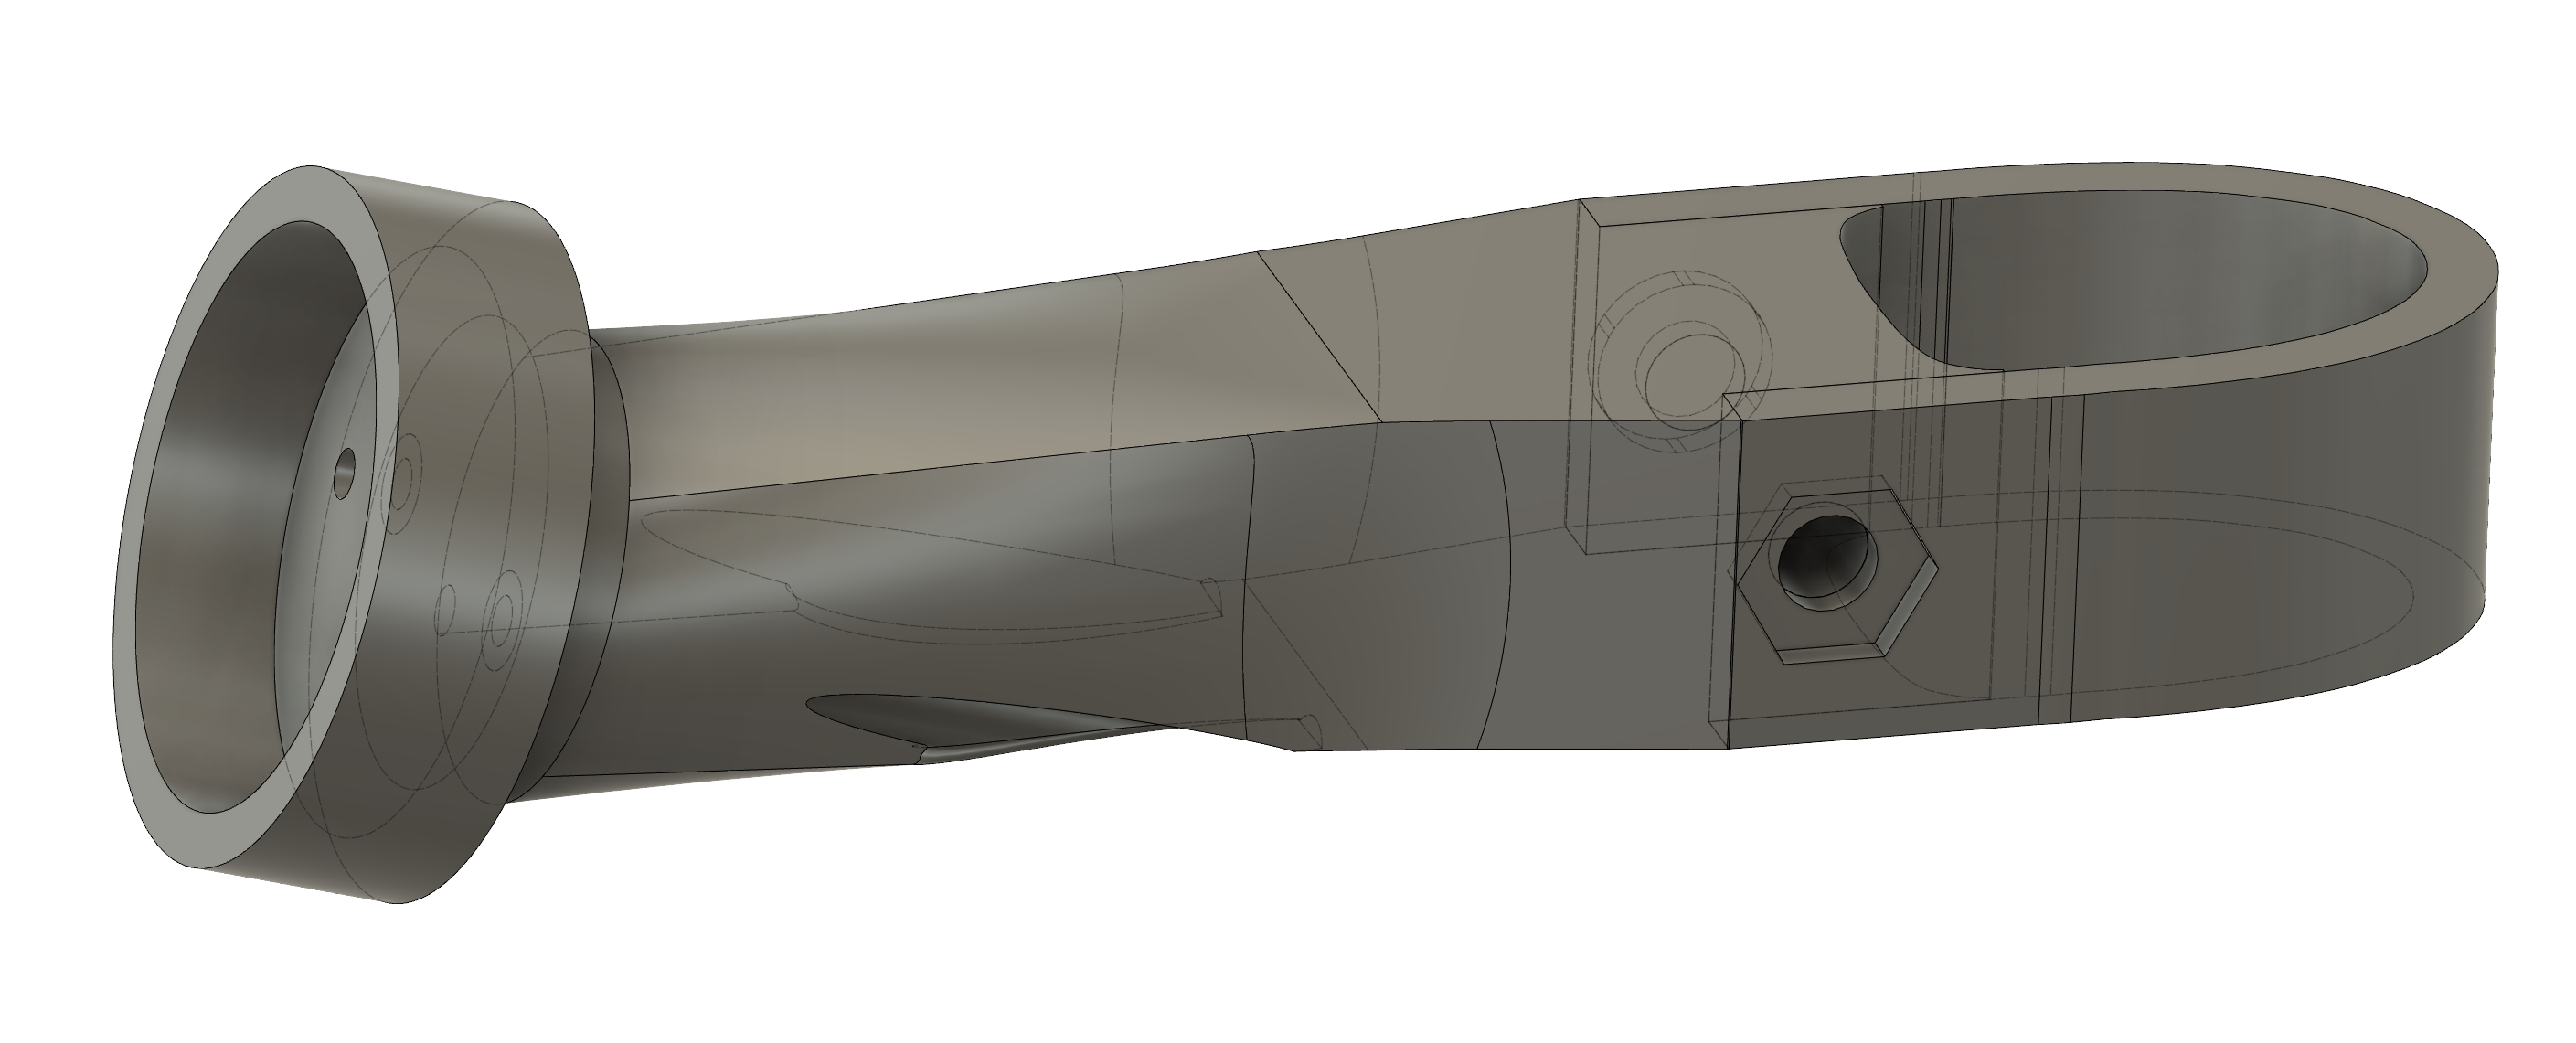
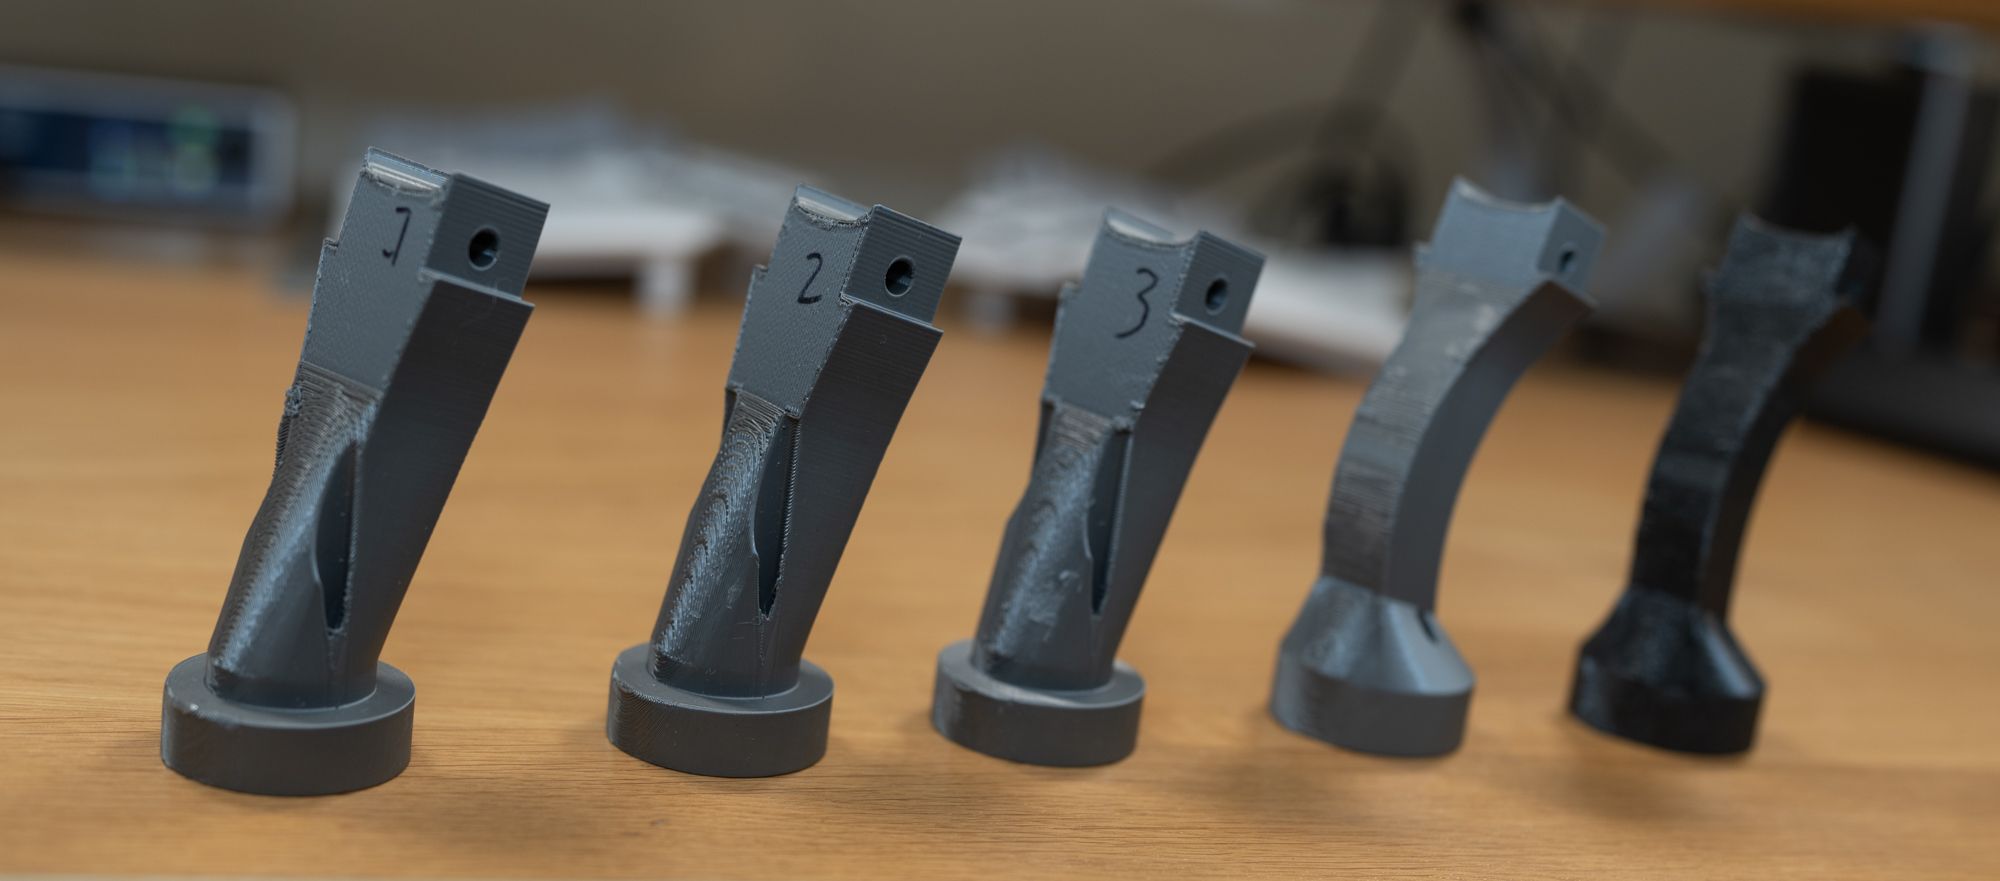
I printed some iterations of this one (grey) This one seemed good when I worked on it but after printing it I realized that it actually didn’t solve the problem. Since the bar is straight, it can’t get past the saddle bag which extends further down. I would have to curve my way around the saddle bag to solve for it. I redesigned it with the learnings from the printed prototypes and made a pretty ugly banana curve. I feel some cringe over the shape but it is also something that’s very functional so I have to just give up on this and accept the banana.
Once I got something that felt “decent” I did some final iterations on the clamp and the cup around the insert and printed a higher quality print. Unlike all the other Specialized models I’ve seen online, I’m publishing this one for free with the Fusion360 file on Printables. Hopefully this helps whoever is reading this in the future to avoid having to trace out the seatpost shape themselves.