Working remotely is draining in many ways but endless video conferencing is probably what one will miss the least about this entire experience. I’ve also learned that very few people seem to have grown up with long form voice conferencing and is as a result absolutely terrible at muting when not speaking. I’ve sat through so many meetings where people fail at muting and has microphones that sounds like they are screaming while skydiving next to a helicopter.
My theory around this is that personal video conferencing quality is tied to ones organizational level. In general: The higher up you are in the company organizational structure you are, the shittier your AV setup is. (Coral’s law for short).
Growing up with Ventrilo -> Teamspeak -> Discord has teached one the importance of using PTT (Push To Talk). It might sound annoying to have to hold a button every time you want to speak but after a short time it becomes second nature, even to the point where I will press this button even though the application I’m using at the moment doesn’t support PTT.
Using PTT can be annoying at times. When trying to type at the same time as talking or not having your hands close to the PTT button is frustrating. A friend gave me the advice to try using a foot pedal, however I couldn’t find one that fit my requirements. I wanted one that could map to any obscure button without using active software to trigger the button. The ones that did were too expensive, which leaves me with only one option: building one myself.
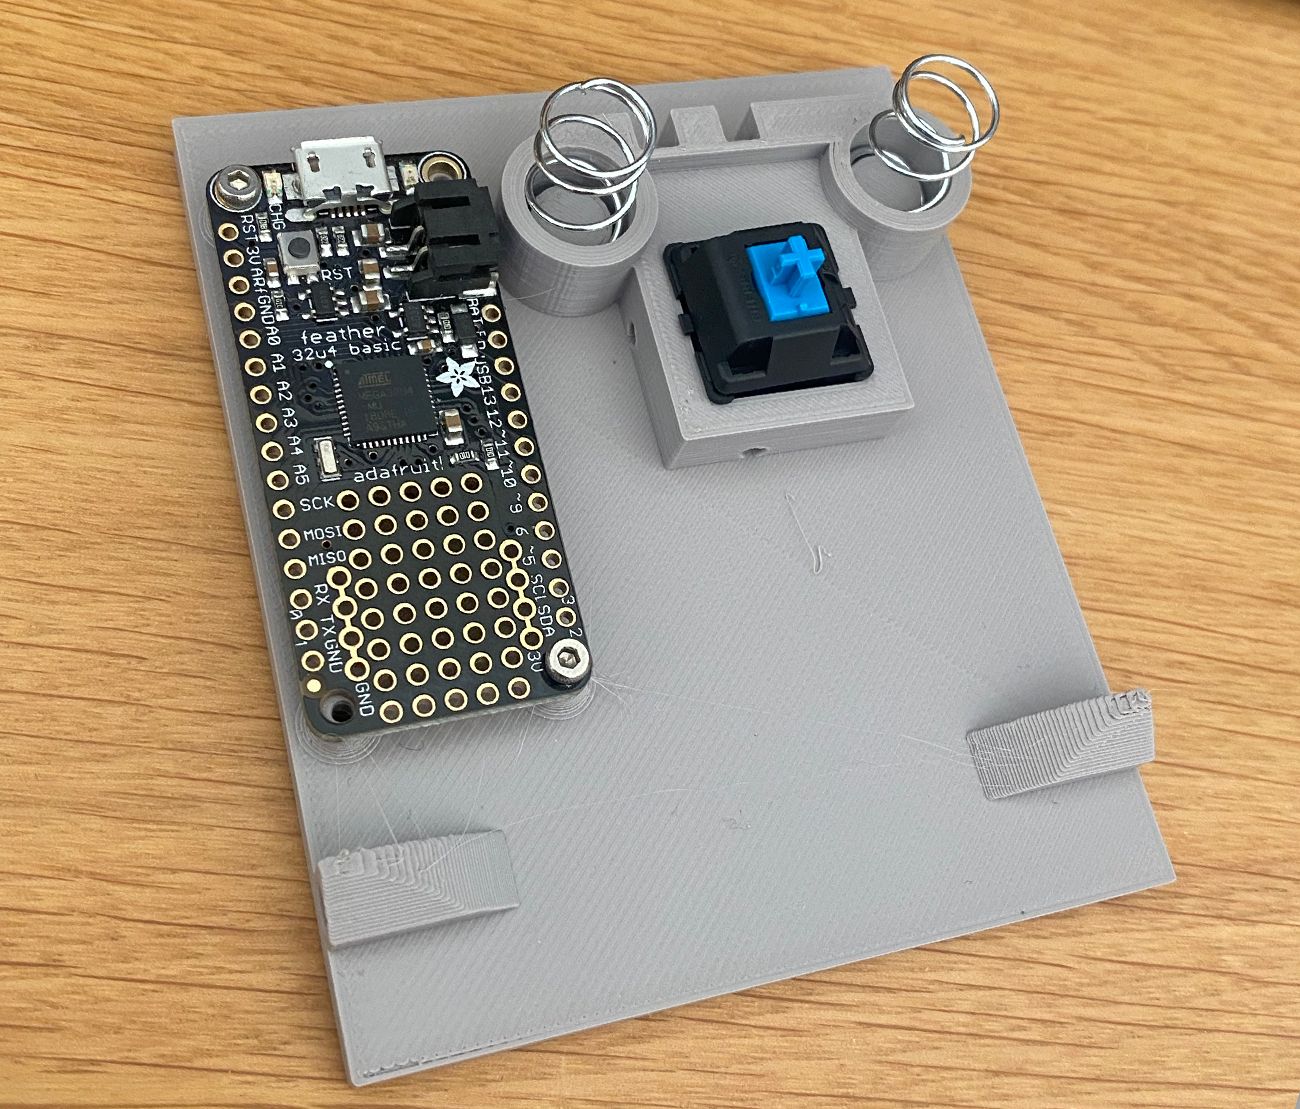
I’m using what I had on the shelf for this one, meaning:
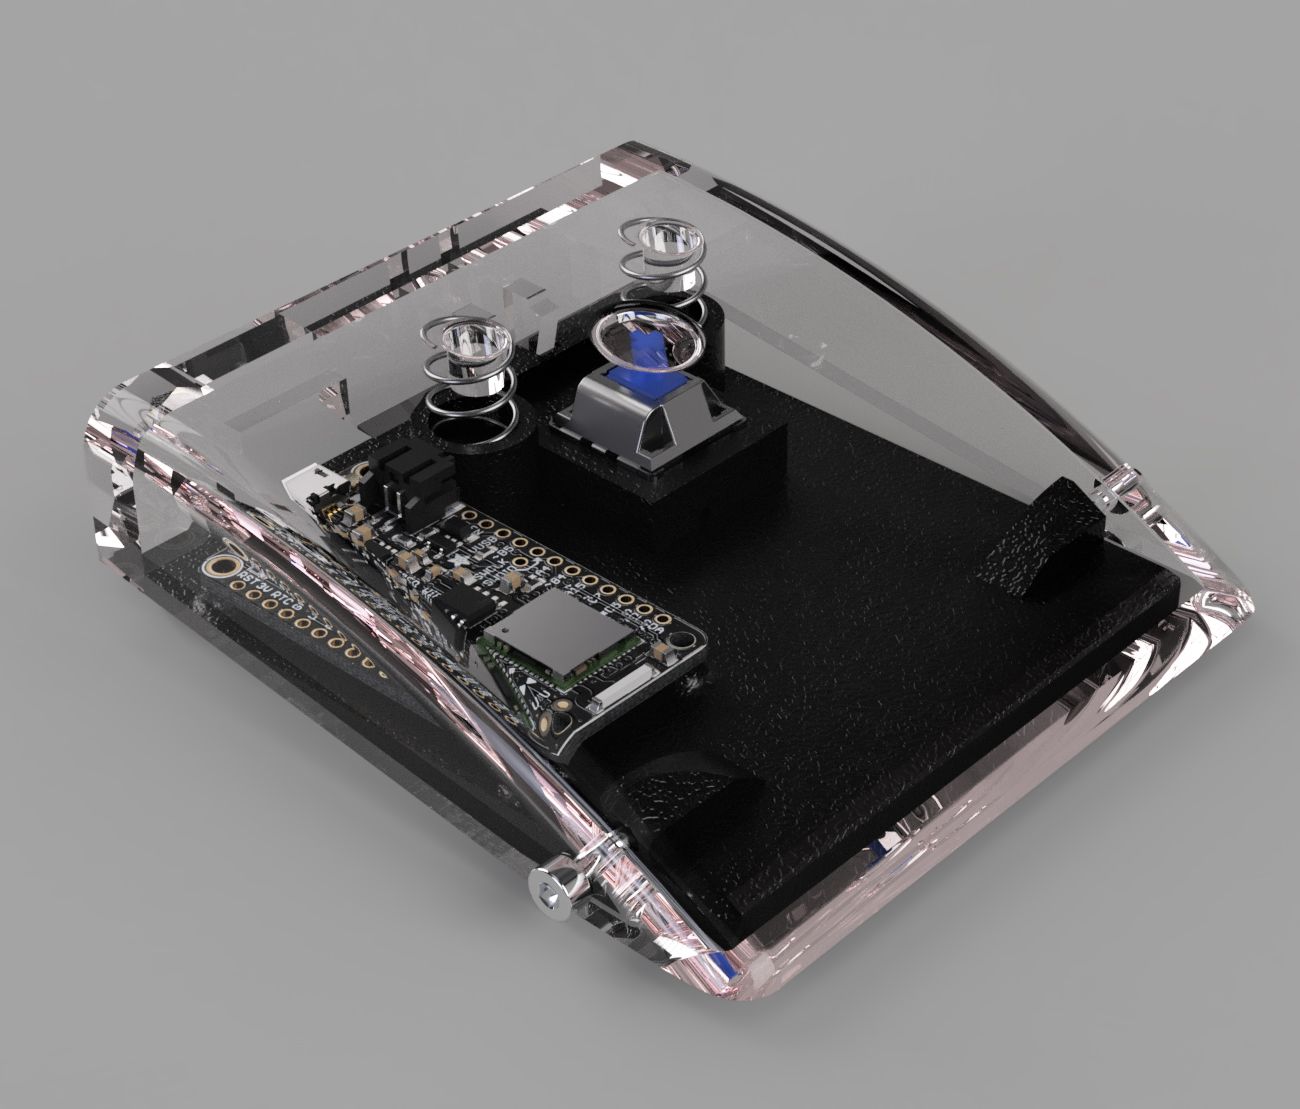
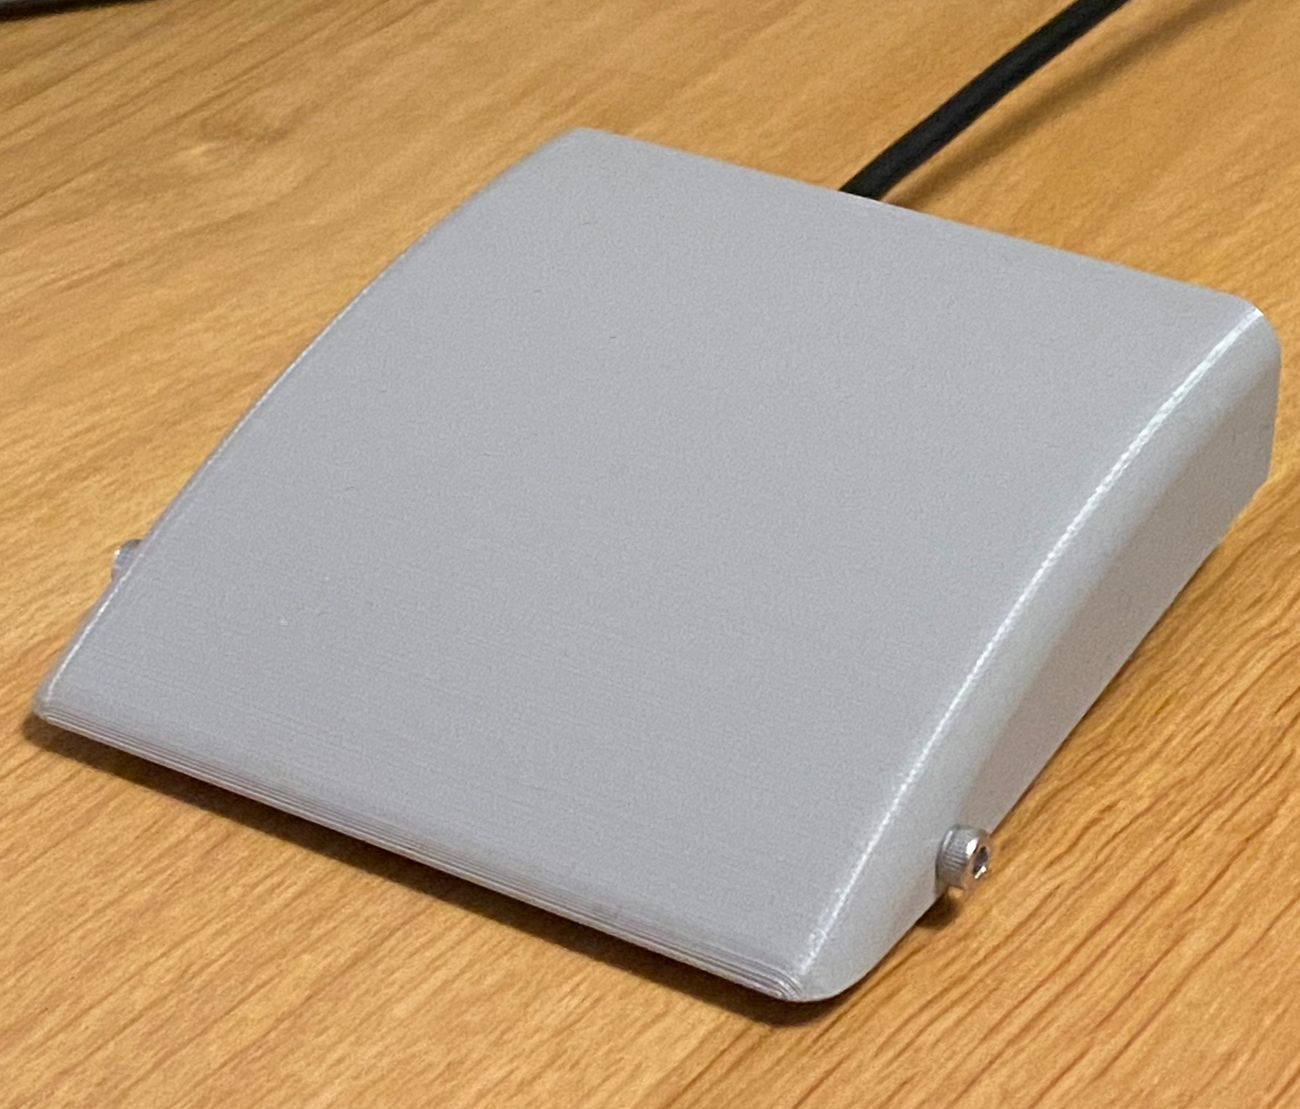
I designed a very simple enclosure that printed in two parts, one serving as both the base plate and the enclosure for the electronics and the second as the hood. I took the inspiration from pedals commonly seen for sewing machines and expression control for synthesizers.
Wiring it up was easy (essentially one pushbutton) and I’m using NicoHood’s HID library which made the code short. I’ve uploaded the project on my github along with the STL files if you want to build one yourself.
Sweden has this absolutely terrific yet horrifying and awful liquor named “Bäska Droppar” which I make a point of introducing to as many people as possible. On top of being almost undrinkable there is a Swedish studentesque tradition of drinking this in weird ways at weird times. The bottle doesn’t beat around the bush and proudly shows:
“Noone is indifferent to the characteristic taste of Bäska Droppar which has made it a classic.”
- The tagline on the back of the bottle. Really.
There are three major milestones to keep in mind when consuming this trash liquor:
23 Besken
This is a true Swedish classic. When turning 23, one is supposed to drink 23 cl of what used to be article number 23 in Systembolaget (The Swedish liquor monopoly). 23 cl is just above a half marathon (21.0975 cl) which leads us to the next milestone.
The Marathon
If 23 cl wasn’t enough for you, you can always go the full marathon. This means drinking exactly 42.194988 cl of this experience. I do promise that after having consumed this volume of Bäsk, you’re going to wish that you didn’t.
The Victory Lap
After consuming 42.194988 cl you might experience a rush of adrenaline from having cleared this much of the horrible taste. If you still feel in good shape you should go for the victory lap, meaning clearing the remaining 7.805012 cl still left in the bottle
If you get the chance to consume this bottle of pure horror, do take the opportunity. It’s after all a Swedish classic.
In February of 2021 I resigned from Twitch after 6 years of employment and joining Discord tomorrow after writing this post. It’s scary leaving any company where you spent 1/6th of your life inside of. The question has come up enough times now about why I’m leaving and to explain that I first have to talk about how it all started.
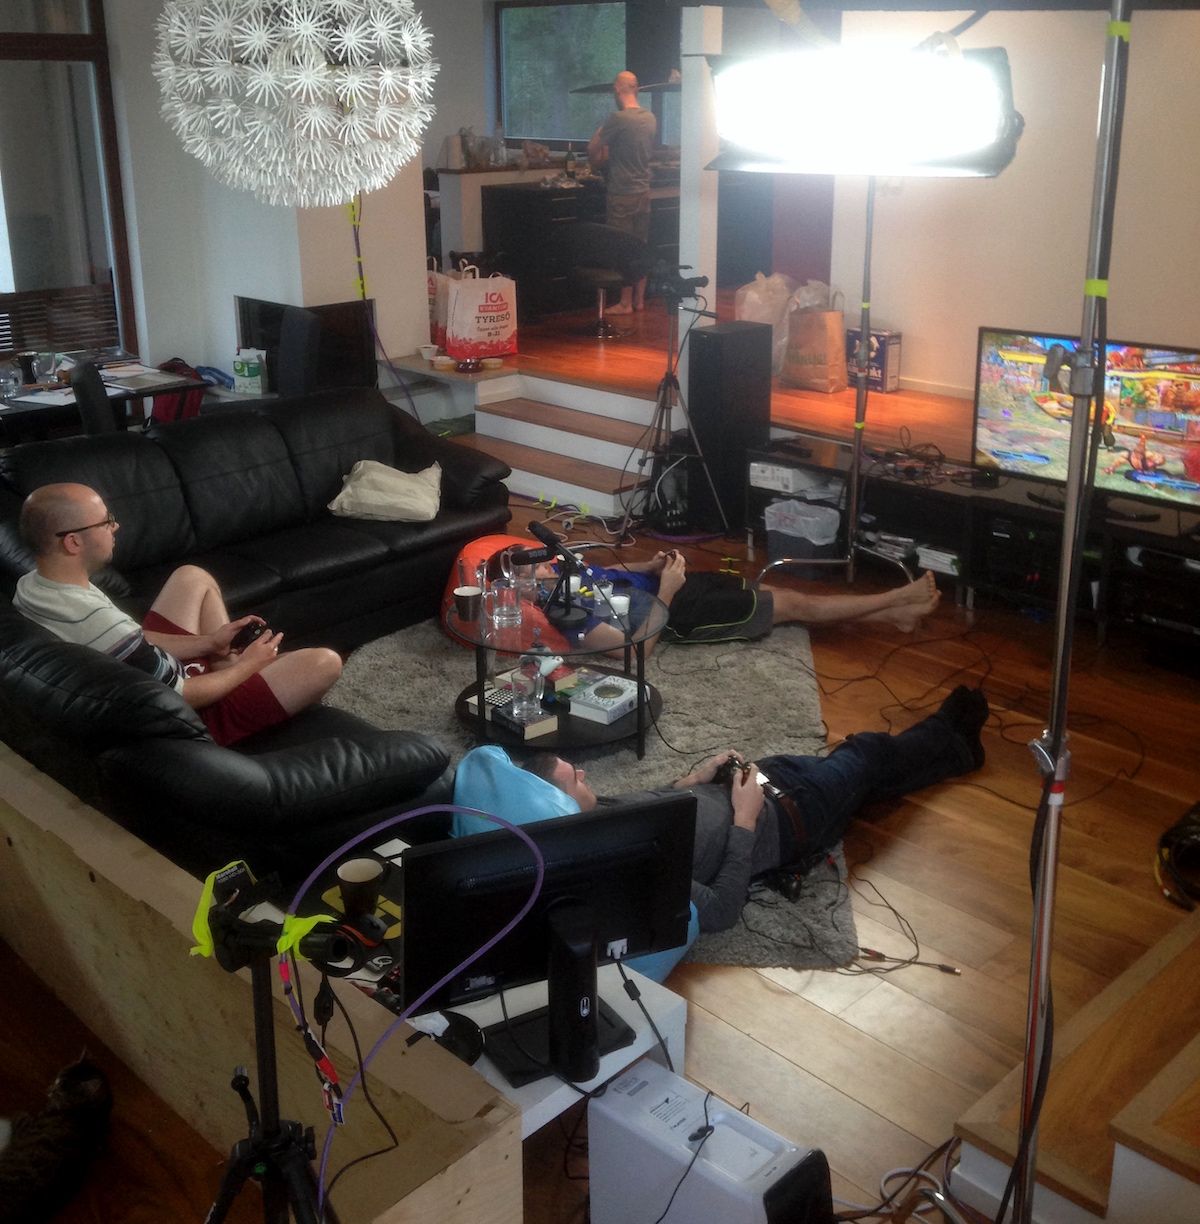
To understand why I joined Twitch I need to start with how I met Trance. Cristian Tamas, also known as “Trance” on the internet was one of the founders of “The GD Studio”, which back in 2012 was one of the few influential broadcasters within the Starcraft 2 esport scene. I got introduced to Trance through my work at DreamHack and helped him and James “2GD” Harding with some of the shows up until 2014. Trance was one of the first employees of Twitch in Europe with the intent of acting as a tech/BD arm in Europe, as esport was heavily European at the time. In 2014, the studio was awarded the contract from Valve Software to produce a “pre-show” to their DOTA2 tournament with $10 million USD in prize pool that would stretch over 2 weeks. The GD Studio’s idea here was to produce a 24/7 show, flying in all the talent to their house up in Tyresö, Stockholm.
Trance reached out to me to help assemble the production behind the show, as there were tons of parts the studio needed to make this concept work. Although the budget was significant for the studio, they had somehow still managed to bite more than they could chew. Apart from shuttling 20-30 people from Stockholm to Lidingö at any hours of the day they had to cook, commentate games, entertain the people and somehow also produce a show. On top of this they also had 10 newborn kittens behind the sofa. In reality I have no idea how they pulled it off but the technical architecture of the show worked and I became good friends with Trance as a result of this event.
I ended up leaving my job at DreamHack in September to pursue more freelancing gigs similar to the one above. Kept talking to Trance a lot and helping him out with streaming configurations and whatnot. In November of 2014 I got a call from a man named Cyrus Hall in the middle of the night. A recruiter had reached out a while earlier and asked if I was interested in working for Twitch through recommendation from Trance and I said sure, knowing that nothing would come of it. Cyrus had scheduled to talk to me for about an hour but we ended up spending closer to 2-3 hours on the phone, talking about networks, video and my general thinking about where esport broadcasting was headed. It’s hard to remember today when esport broadcasting often rivals or beats traditional broadcasting what scrappy operation it used to be and I felt that my role in all this was to help the esport orgs with the broadcast knowledge I had. At the same time I stood on the other side of the fence, communicating
from the esport orgs to the streaming platforms about the requirements that a “broadcast” has in comparison to UGC (user generated content) gaming stream.
In February of 2015 I accepted the offer to join Twitch to help them figure out how to make esport broadcasters happy from a technical standpoint. As both esport and Twitch grew at a rapid pace, the scope of my work expanded quicker than I was able to personally tackle, which had me build up a team with people that could help me build the relationships and architect the tooling. There were a lot of onsite events and meetings at this period in life, mostly to build a relation with the organisations on the other end and understand their problems.
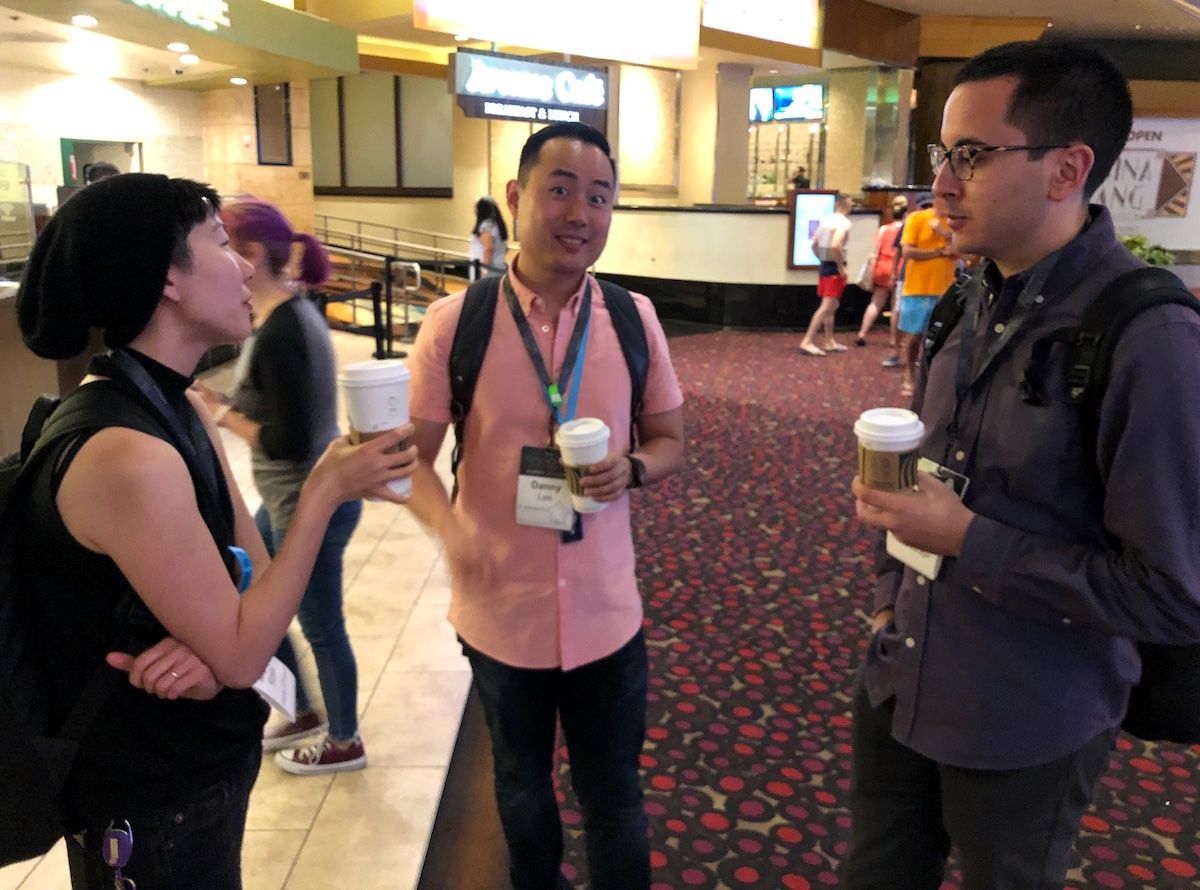
One needs to mention all the great colleagues I met at Twitch. Since Twitch encompassed my sober year and I had a lot of time on my hands, I took up playing DOTA2 with coworkers from Twitch while visiting San Francisco. Staying in the office until 04.00 in the morning while bashing out game after game, dreading the meeting starting in less than 5 hours or the flight to some random location. Had the absolute pleasure to meet one of the best directors (now VP) who served partly as my boss but more as my mentor and great friend. If it wasn’t for this individual I wouldn’t be at Twitch past 2016 when he flew out to Sweden. Me and Trance took him to the Twitch afterparty in Jönköping and while I don’t have a great picture of him, I saved this gem taken at 5AM with Trance.
How the sausage is made
Everyone who has met me knows that I never shy away from solving time sensitive problems. It’s a skill that has come from my years in working with live shows & touring gigs and broadcast. One gets used to the high pressure and develops systematic ways of approaching situations like that after a while. That’s the same reason why first responders can act swift but stay calm, they’ve practiced it so many times that it’s not foreign. The same goes for working with live shows, the tone is often tense and agressive but people are only interested in resolving issues as fast as possible.
Of all the weird things that happened over my time at Twitch, the best “how the sausage is made” moment I experienced was during E3 2018. During one keynote that was broadcasted on Twitch with a large number of viewers, the feed started exhibiting visual artifacts. Since the viewership on Twitch was significant, people started getting really worked up about this issue, as viewers were spamming the chat about it. I was in the production studio for another reason and got asked by an engineer if I had any idea what could be going on. In broadcast you don’t get to redo. There is no “let’s fix that one for next time” when you have a show that runs once a year with massive viewership.
When approaching broadcast problems I’ve found that it helps to always approach it “left to right”. As in you start with verifying the absolute source and then work your way “to the right” as in down the chain to figure out where the issue is introduced. Baseband video is funny in that way that you can essentially tap the feed at any given point and view it without having to do complex network routing or subscribing to a livestream, just route the matrix to an SDI output and watch the source. This goes against the common debug strategy that people often take, working right to left from where the problem is exhibited towards where the problem isn’t visible any longer. My problem with this approach is while it seems good on paper it fails to take all the branching patterns a signal can take which makes it hard to easily trace backwards. After stepping through the signals it was clear that the issue happened before entering the SDI matrix. Tracing the cable backwards I found that the
actual input source was looped through a scan converter (broadcast term for video scaler). The actual fiber feed into the building didn’t have these artifacts and they used the scan converter to split the signal into primary/backup. In this case, both were affected.
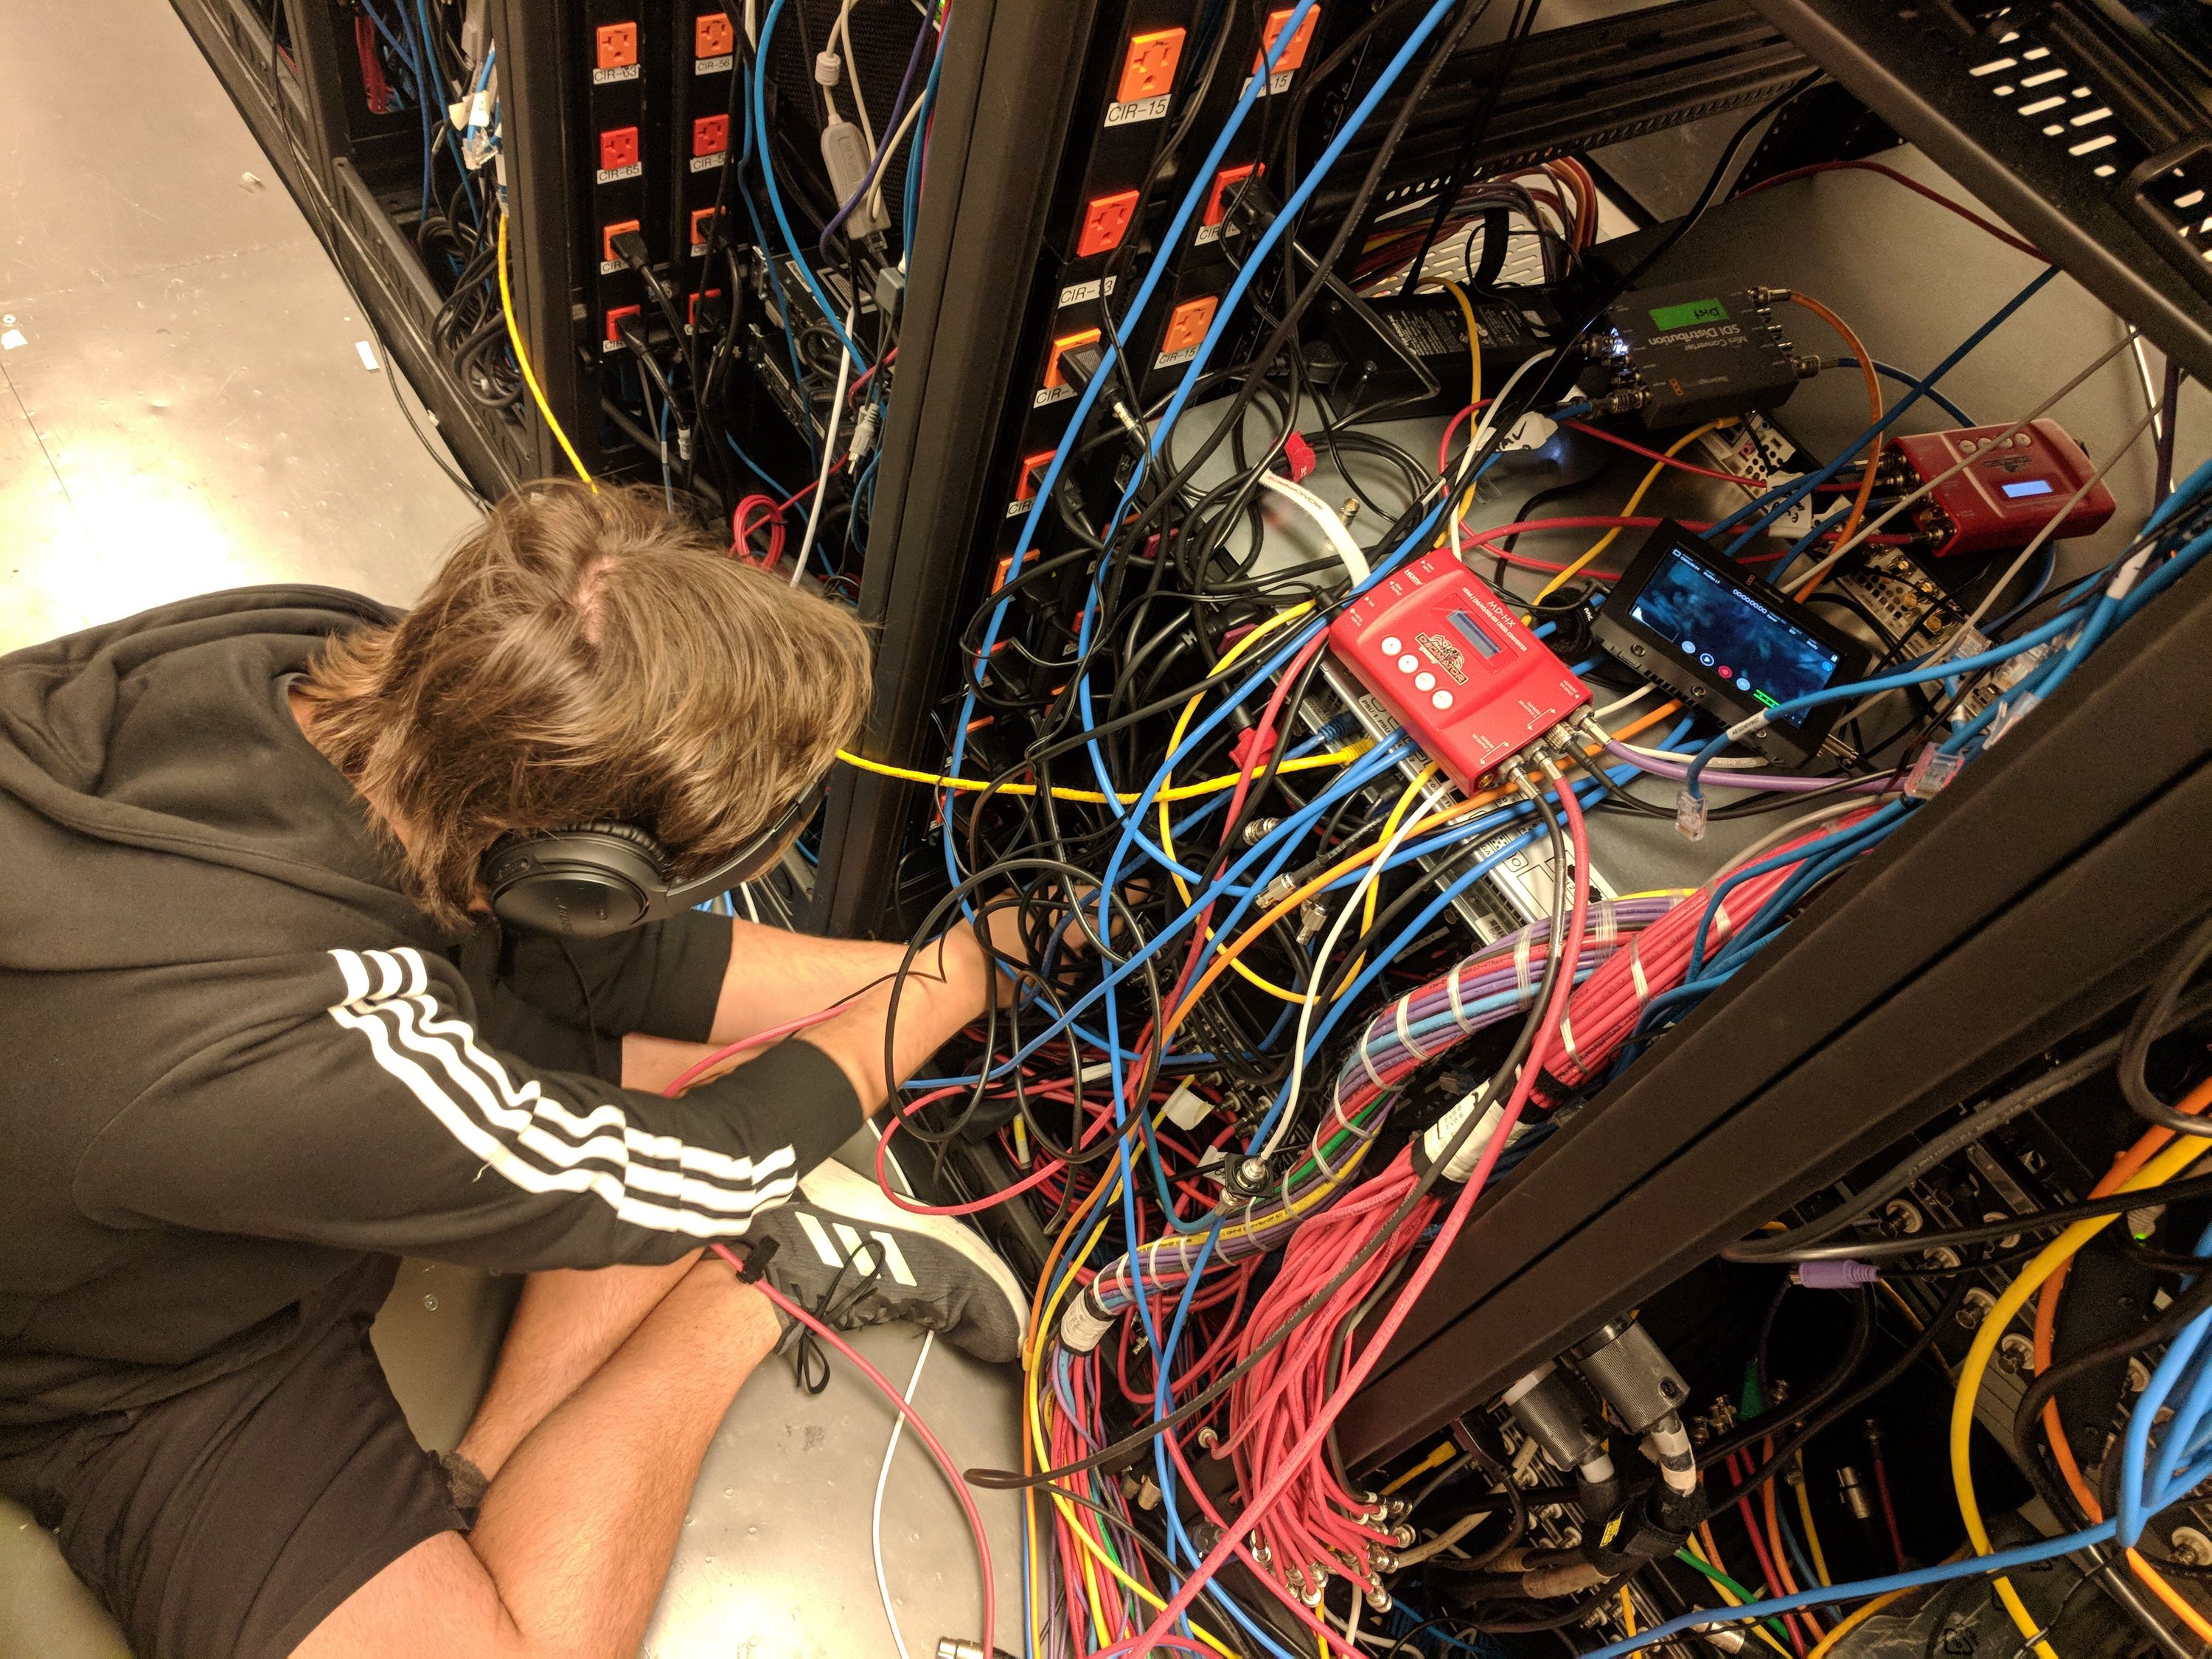
To solve this I realized that we needed to replace the scan converter that drove the entire feed for the studio (single point of failure), mid-show, without affecting the video. On top of this we had about 3 minutes to solve it. I realized that the content that was shown at the time was game trailers for up and coming games, all ending on a black slate for about a second. If we could time the switchover to occur exactly at that second, no one would notice.
Doing this however required three physical cables to actually be switched in less than a second. The fiber input needed to be switched to a new scan converter and the lines going out from the old scan converter had to be swapped into the new scan converter. Here I also realized that the feed we got had about 1.2 seconds of latency, meaning that if I dialed into the production bridge of the company who’s feed we were tapping, heard their countdown, we would be able to monkey patch it and notify our production exactly in time.
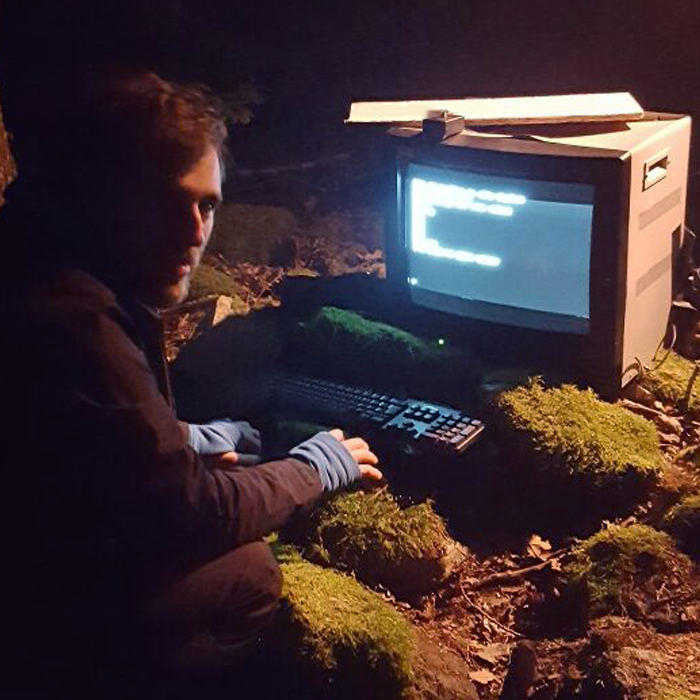
Here I am, sitting on the floor while waiting to switch the SDI cable. Once we felt that it was time, I notified our production that it was going to happen in less than 30 seconds and waited for the cue on my other headphones. The switch went flawless, the new scan converter locked onto the signal and no one watching saw the switch happen. Of course this was dumb and the show should never had split the signal in that way but this is sadly the way it goes a lot of the times in broadcast. It’s a balance between budget and time and often the right decisions gets made but on the wrong risk profile.
Moving on
Twitch realized that we had built one of the worlds best platforms for live video on the internet and went on to build Amazon IVS which I was lucky to be part of. This was a big undertaking and has taken a lot of my focus for the past years, working in a variety of different functions but primarily managing other people and eventually managers. IVS almost speaks for itself, it’s the battle tested video system that drives Twitch packaged up as an AWS service for customers to use in new and unexpected ways. As I had spent the years prior to this meeting customers I helped the person leading the product on a number of customer meetings for IVS.
So why leave Twitch? Isn’t life great? Exciting work on the horizon? Sure, that’s the problem.
I joined Twitch to be part of the transformation from “linear TV” to online media and the already transformation happened. Society went from “old media” with news anchors and linear programming to Netflix, YouTube and Twitch. Streamers, influencers and individual content producers have become part of our daily life and have started overshadowing the traditional media machine. I’m sure there are tons of exciting new developments happening but the large ship has already sailed. It might not seem like it but consider where you get the majority of your entertainment today, chances are it’s OTT services or UGC services mixed and matched after your interests.
COVID was probably an eye-opener for many people but what this worldwide event has highlighted is a glimpse of how our social fabric would look if it moved onto the internet. Zoom has become a behemoth of video conferencing and the online media services have seen tremendous growth over 2020. What I think has passed under the radar for many people though is how the concept of hanging out with your friends has started to move onto the internet. Someone like me grew up using software like Ventrilo and Mumble to connect to VOIP chat rooms with friends all the way back in 2005 but that experience never really went mainstream.
Over the winter break I realized that Discord had finally done just that, taken the experience I had when in Ventrilo when I was 15 and built a product that enables people to actually drop into a “space” and hang out with whomever happens to be there for the moment. It’s all transient which tends to eliminate. I myself communicate with my friends back home in Sweden using Discord on the daily so I personally believe that they are onto something that no other service currently manages to fill. For that reason I decided to pursue an opportunity at Discord, ending my tenure at Twitch.
If you work in programming or adjacent to programming, chances are high that you’ve either heard or read about Rust. Probably one of the worst named programming languages in the world for SEO purposes, it’s Mozilla’s attempt at redefining how we write safe and compiled code in a world where safety isn’t optional. It’s also a non-garbage collected language with almost zero interop overhead, making it a great language to wrap C and C++ with. I’ve personally come in contact with this language as early as 2013 when rawrafox wrote an audio decoder in Rust at Spotify’s “WOWHACK” at Way Out West Festival.
Rust has been one of those languages where I for a long time just didn’t see the point. If you’re going to take on the pain of writing non-GC code, why not just go full C++ and get all the flexibility that comes with writing C++ in the first place? Why bother with a language that has long compile times and imposes concepts that make certain programming flows hard? What I came to realize is that these arguments miss the point about why programming languages succeed.
Why does a language like Node.JS succeed despite being untyped and slow? If anyone remembers 2012, telling developers that you were writing Javascript as a server side language was more of a bar joke than an actual future people imagined. A language like Go? Why do developers accept the odd design decisions, lack of generics and annoying limitations? There are countless threads on the internet debating the technicalities of why these languages are bad compared to language X, however that doesn’t seem to matter?
I think these languages succeed because they have good ecosystems. Using a third-party library in Node.JS is almost imperative to the language, compared to C++ where a third-party library sometimes takes longer time to just get linking properly than the time it saves you using it. Node makes building on top of the ecosystem easier than building your own code, just a matter of typing npm install whatever. This makes it easy to iterate on ideas and try out approaches that would have taken significant investment in a language like C++. Go takes this even further by defining pragmatic solutions such as the Reader/Writer pair which makes chaining third-party libraries a breeze.
These things are what makes a developer like me productive. I write code because I envision what the end result should look like and try to write code to get to that end result, the actual act of programming itself doesn’t excite me. While I appreciate the work that goes into challenges like “Advent of Code”, those kinds of problems never excite me as they do not move me closer to the desired end result of my projects. I sometimes refer to myself as a “glue developer”, where I try to glue together as much as external things as possible and rewrite only the stressed parts of the glue. Being able to quickly try a library from the package ecosystem is almost more important than the language itself which is why I gravitate towards languages like Node, Go, PHP etc.
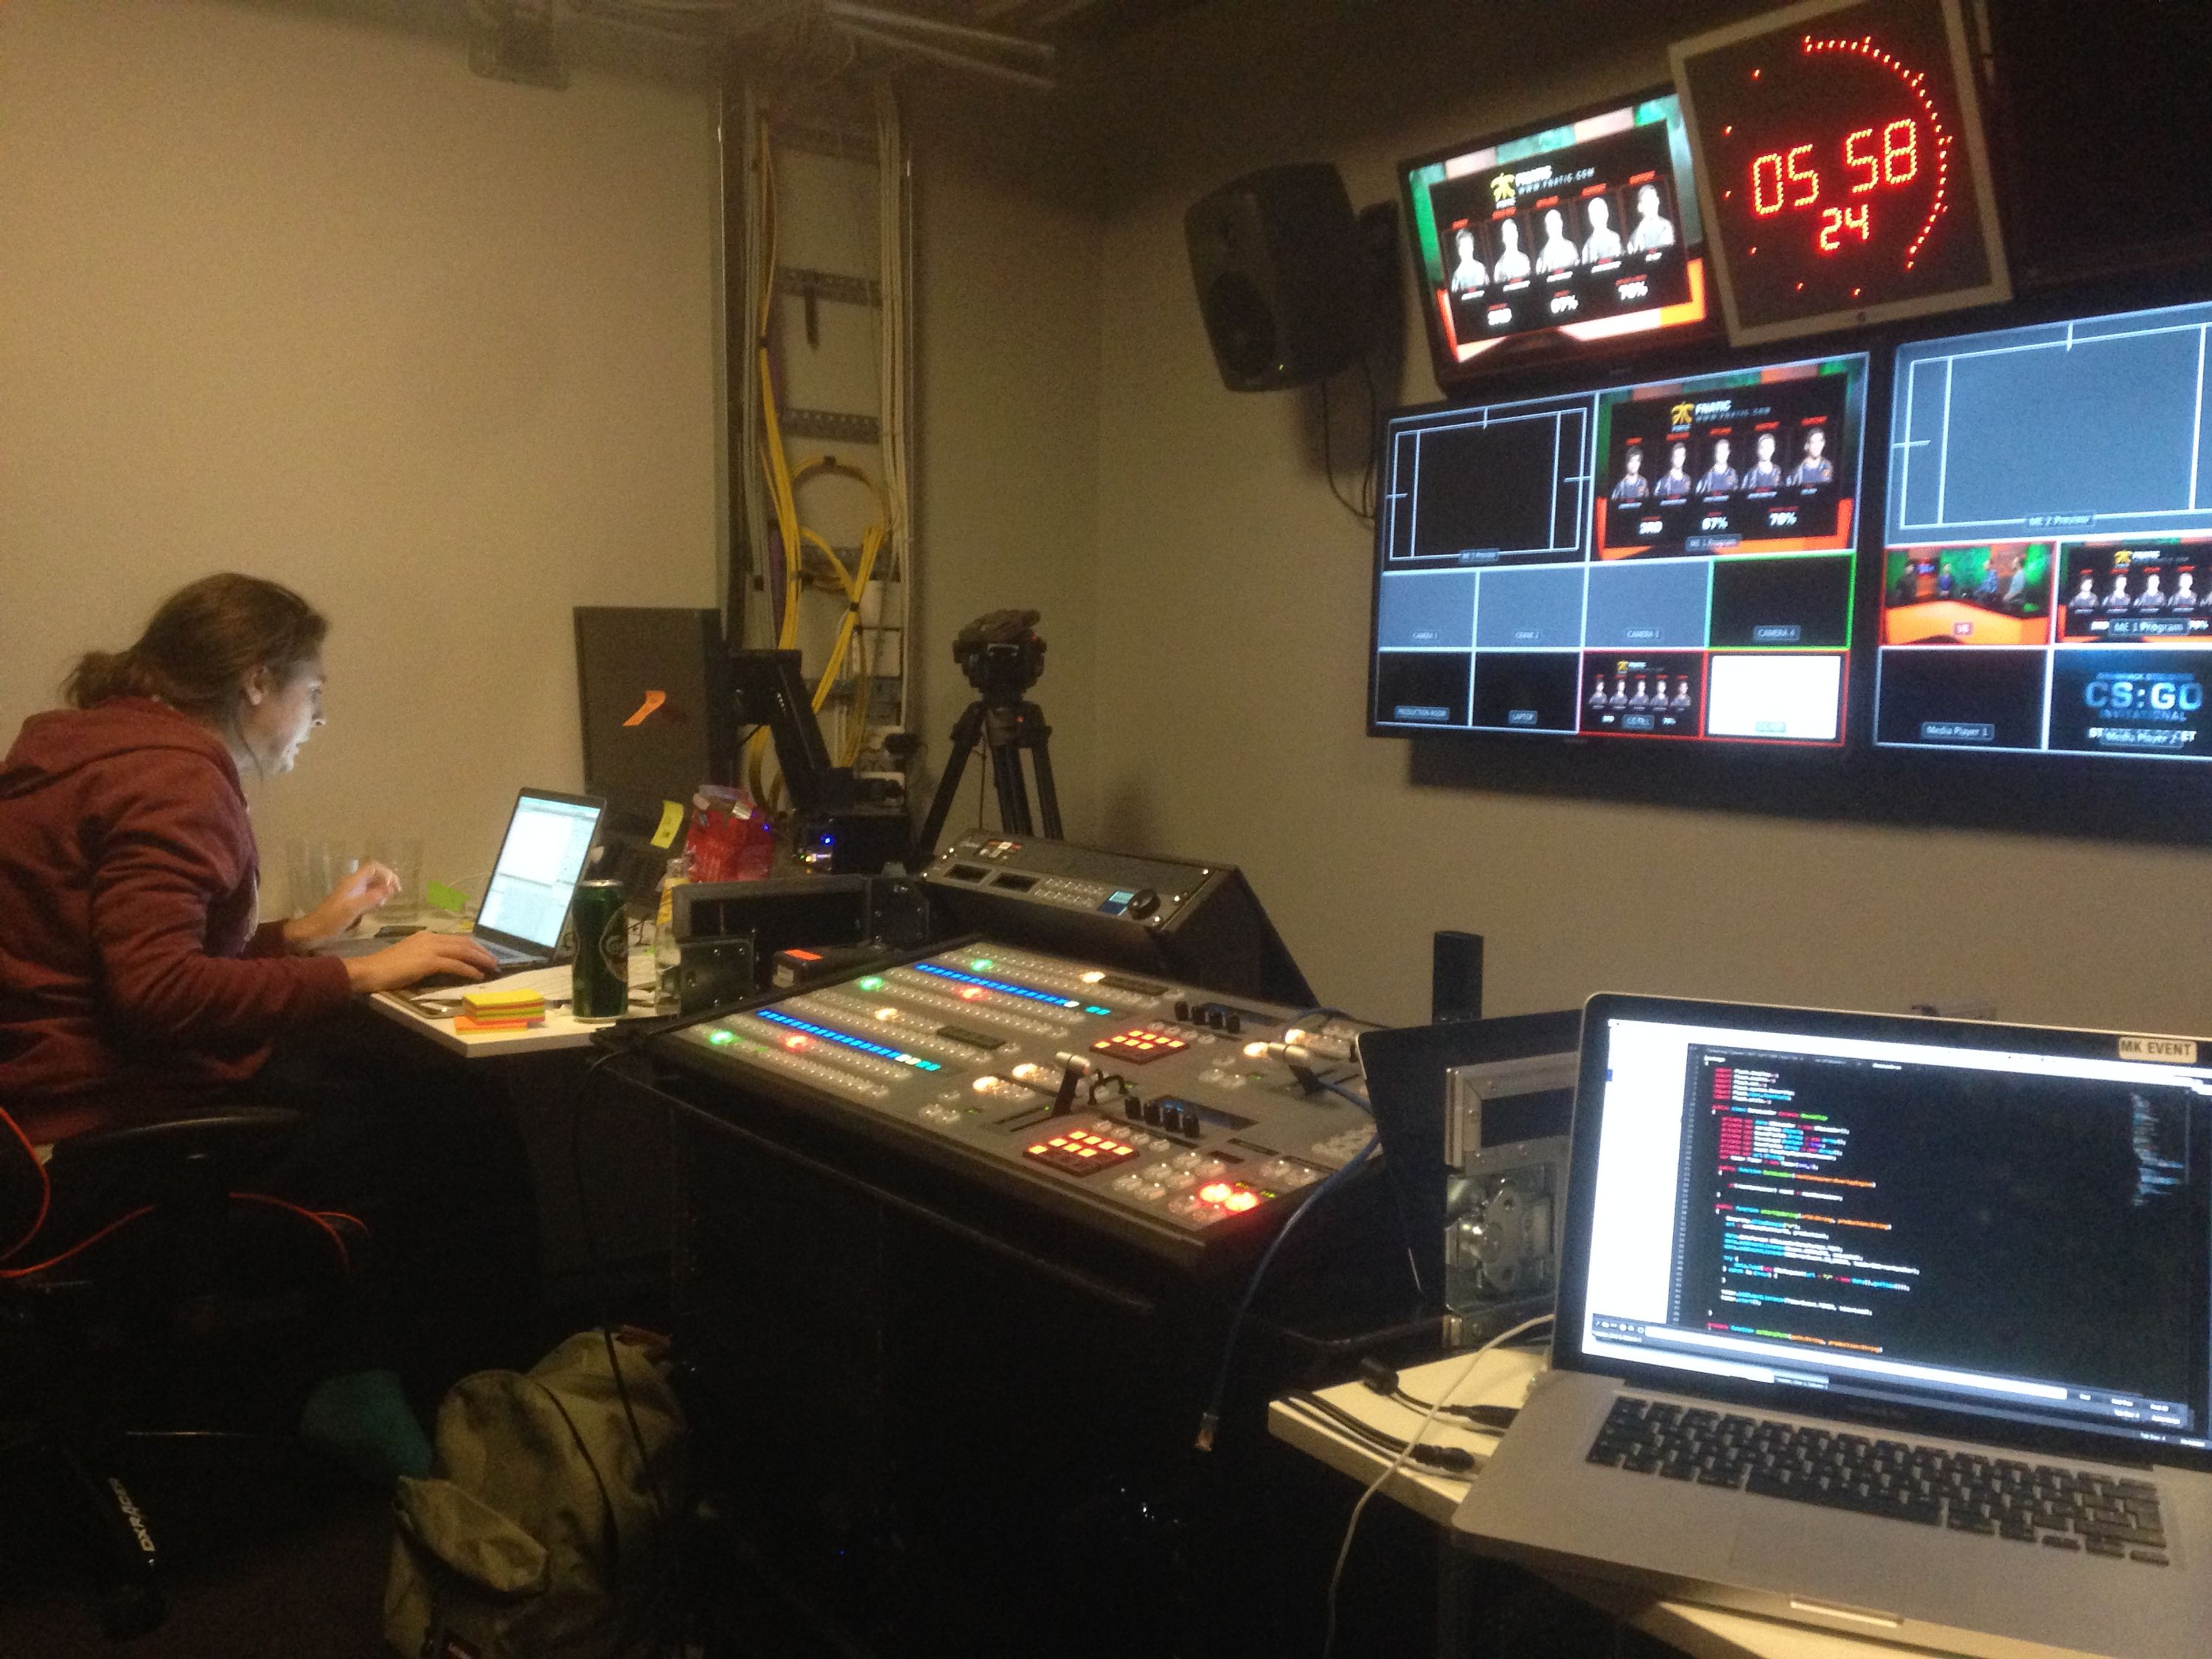
In the spring of 2014 I had just finished building the DreamHack Studio and was trying to ship a new “overlay” for DreamLeague Season 1. We had high ambitions for this overlay and relied on a ton of scraping coupled with DOTA replay processing to create a very data heavy overlay with realtime statistics. This image is me and a former co-worker nicknamed “Lulle” pushing against a deadline. The clock is correct, it’s 05:58 in the morning and we had to ship the code by 14:00 that day.
Being able to easily add in libraries needed to overcome the problems and not spending 4 hours on making the library link was how we pulled this off. Glue programming enables one to iterate extremely fast, for example in this case I had to write an integration that based on a piece of graphics being triggered would send a DMX signal to the LED controller. The ability to try out 3 different DMX libraries in less than 20 minutes to find the one with the perfect surface area for my problem. Sure the code was dependency spaghetti but we delivered a very innovative broadcast graphics overlay.
Why does this matter?
The reason I’m talking about Rust here is that I’ve hit a roadblock with Go that’s so fundamental to Go itself that it’s hard to actually overcome this without spending a significant amount of time. My goal with the software (nocube) for Pixelcube was to easily be able to iterate on patterns in the same way you can do on a Pixelblaze. Being able to just save and see the result makes it much easier to actually iterate against something nice. Since Go doesn’t support hot code reloading (only loading apart from a hacky runtime modification), the only viable approach is to either interpret another language or call into another runtime.
I’ve experimented with a couple of JS interpreters in Go and quickly realized that this breaks the performance that I was after which led me to experimenting with V8 bindings for Go. This is where it starts getting real messy. Go has no user-definable build system for packages which makes it impossible for packages to configure a complex runtime like V8. So to use V8, most approaches are to either pull a pre-built binding (in this case extract it from a Ruby gem????) or to build V8 from scratch. Building V8 from scratch is not an option either due to the time it takes.
ben0x539 comments:I think cgo mostly takes care of that, the hard part is escaping the Go runtime’s small, dynamically-resized per-goroutine stacks because C code expects big stacks since it can’t resize them
Once that hurdle is out of the way, the next problem is that the Go runtime only provides one way of linking out against other runtimes which is through Cgo. Since Go’s memory layout is unlikely to match a C struct, Go has to prepare the memory for each and every function call in both directions, leading to a lot of memory indirection and overhead. To be fair, this approach is common for GC languages such as .NET so this is not really a failure on Go’s part, just a general problem that GC languages struggle with. This FFI (Foreign function interface) call has to be done for each pattern update. This means that if you’re rendering 5 patterns at 240 FPS, you’re eating that overhead 2400 times with the bidirectional data flow.
I actually did manage to get this working but not at the performance I wanted but was happy to have some sort of hybrid model however. The issue really started to creep up when trying to include another library called “Colorchord”. Colorchord is a library that maps colors to notes which is something that I’ve wanted to use from the start but didn’t have time to include last year. Trying to write the Cgo bindings around this turned out to be a nightmare, really pushing at the build system issues of Cgo which had me almost give up. Eventually I realized that it would be easier to just rewrite the entire Notefinder part of the library in Go and even started the work but this left a sour taste in my mouth about using Go for this project in general.
The straw that broke the camel’s back was when I wrote the wrapper functions for packing data into V8 and ended up fighting the lack of generics in Go. Starting out as a Go dev it’s fun to understand that everything is very simple but after writing functionXInt, functionXFloat32, functionXFloat64 etc for the 100th time you end up realizing that generics exist for a reason. It’s not a meme.
All these examples highlight something that should have been clear to me earlier, I’m using the wrong tool for the job. The project in itself requires high performance on shitty devices, lots of FFI into libraries like Aubio, V8 and Colorchord and should preferably not be GC:d for the realtime audio processing. It was clear that I had to reconsider my decision making to avoid the fallacy of sunk costs.
Evaluating Rust
So back to Rust. The language never seemed interesting as it was a technically complex language that didn’t fit my workflow because the ecosystem just seemed to have a lot of friction. While this was probably true at the time, the ecosystem around Rust has developed significantly and the package manager around Rust called Cargo. Trying out Rust in 2020 is almost like trying out a new language compared to the language I experimented with back in 2013. I decided to spend some time on seeing how easy it would be to link against V8 in Rust and less than 10 minutes later I had basically re-created what took me hours to get right in Go.
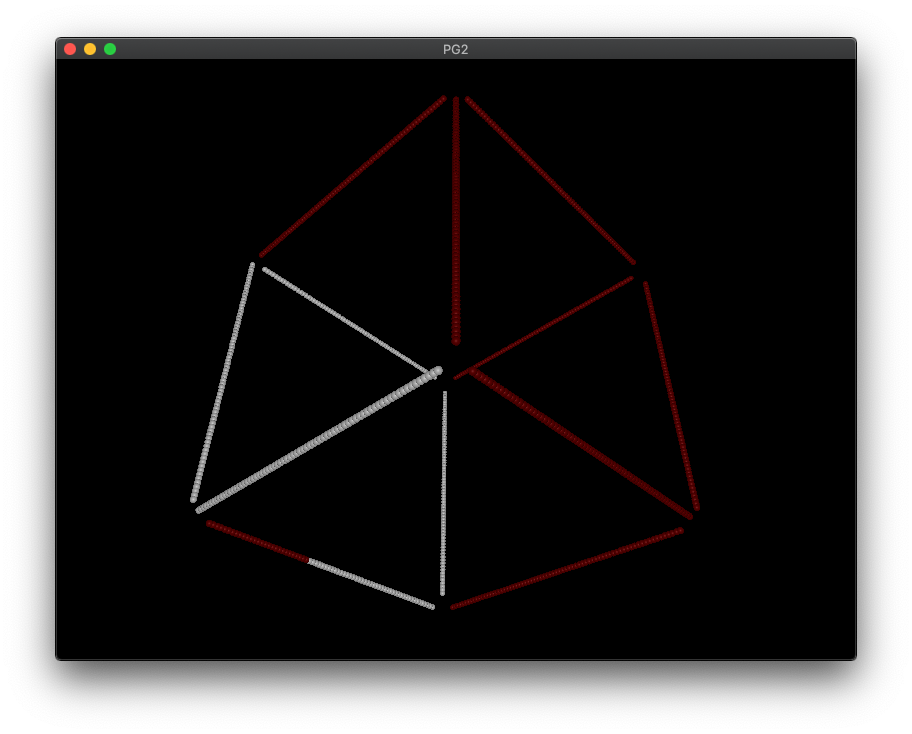
My next project in Rust was to see if I could build a OPC (OpenPixelControl) implementation. I used an old project written in C to visualize the cube and it would be fun to see how easy it would be to render this in Rust. To my surprise I finished this faster than I had expected and the 3D libraries were mature enough where I could render the cube into a window. Seeing how simple this was to get right I got eager to try out solving the project that was hard in Go, using the Notefinder from Colorchord.
Around here I started streaming my attempt on creating bindings for Colorchord and had a lot of help from ben0x539 who’s a coworker at Twitch. He’s a true RUSTLING and provided a lot of insight into how the language works which was invaluable to getting the bindings done. Want to give this person a big shoutout as Rust is a complex language and it really helps to have someone that can provide training wheels starting out.
The first step was figuring out how to create the bindings. I started out writing them by hand and then searched Google to see if there was an automated way and there absolutely is. Rust has a project called bindgen which builds Rust bindings from C headers, shaving of tons of time. There are always edge cases where automated bindings isn’t the right thing but with C it’s hard to make functions more complex than the obvious so for this it worked. Unlike Go, Rust allows you to define exactly how the project should be built. By default Rust looks for the build.rs file, builds it and runs the result as a preamble to compiling the rest of the project. With this I was able to run bindgen as part of the build pipeline. That means that the project itself just includes the Colorchord git repository and generates the bindings and builds colorchord as a library all in Rust.
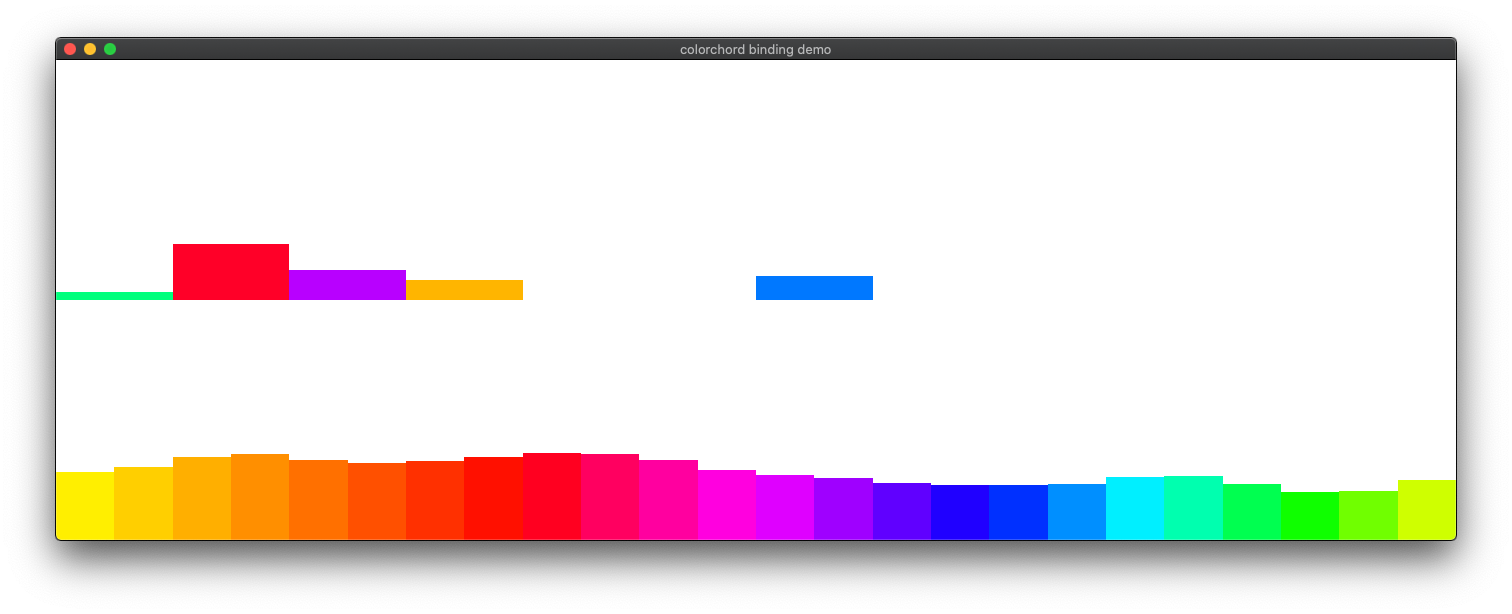
The bindings worked almost on the first attempt once the build file was correct and I got the first result out of the Notefinder. It was then trivial to use the same graphics library I used for rendering the 3D visualization of the cube above to draw a copy of the colorchord UI.
As the Notefinder struct is just a raw C struct with floats and ints that act as magic numbers for configuration I thought it would be nice if the library at this point would provide a safe interface for setting these with valid ranges. I quickly ended up writing a Go style solution where I was writing a function per item coupled for each of the different types, after writing function 4 out of 30 I stopped to think if there was a better way to do this in Rust. Enter Macros! Rust allows you to write macros for metaprogramming, which means that I can write a macro that expands to functions instead of having to write these functions 30 times.
This macro when called creates a function based on the value of the variable func_name and even allows you to specify what type that the generic implementation of NoteFinderValidationError should be. The result of this is that instead of having 30 roughly identical code blocks that looked like this one I only need this once and can do this for the rest.
In the end I was so happy with how this binding turned out that I decided to publish it as a Rust crate for other developers to use.
What’s bad about Rust?
Syntax
The syntax is the worst part about Rust. It feels like you asked a Haskell professor at a university to design the syntax for a language and then asked a kernel developer that only has C experience to make the language more desirable. The syntax is different to many other languages and often for no good reason. Take closures for example, defining anonymous functions in any other language is just the same syntax as a normal function but without the function identifier. Rust however decided that closures should look like this:
|num| {
        println!("{}", num);
    };
Why on earth would you use the vertical bar? Has any Rust developer ever used an non-US keyboard layout? The vertical bar or “pipe sign” is uncomfortable to type. On top of this it feels so misplaced in the language itself, the language is already really busy with a lot of different special characters to signify a variety of features and this one could just be afn() {} or something similar. Speaking of busy syntax, here is one of my function declarations:
pubfnget_folded<'a>(&'aself) -> &'a [f32] {
Note how many different characters are used here. The ' signifies the lifetime, the a indicates the lifetime symbol and <> wraps it. The result is just something that’s very busy to read with ' being another good example of a character that developers with non-US keyboards often get wrong.
Documentation
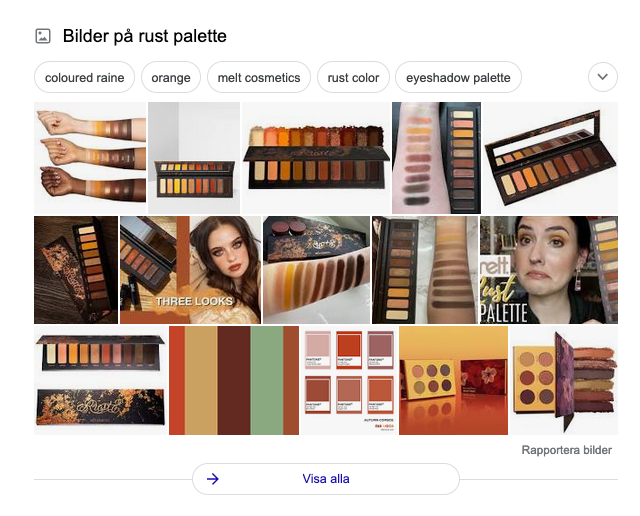
As I mentioned earlier, Rust’s largest problem is really being named “Rust”. I was trying to find a library named palette in Rust and typed in rust palette into Google which gave me the result to the right. On top of this there is also a game named Rust (which is actually a terrific game) which further confuses the language SEO when trying to lookup certain concepts. Sure this is a dumb piece of feedback that can easily be solved by just searching adding lang to a search but coming from other languages it’s annoying.
On top of this the documentation has two other problems. The first being that the main documentation hub docs.rs suffers from some really bad UX. For example, going from a documentation page to the source code repository hidden in a dropdown menu. Secondly, since every version publishes a permalink which Google indexes, you often end up at outdated documentation pages and have to be on the lookout for the small warning at the top. In my opinion the right way to solve this is to make google index a “latest” tag and provide permalinks for specific use cases. If I search for tokio async tcpstream I don’t want to know how the function worked 3 years ago, if that was what I was looking for I would add in the library version to the query.
It also seems that a lot of crates neglects specifying exactly what you need to include in Cargo.toml for the library to expose all the functions you want. Often the library has features gated behind feature flags but the first example in the documentation requires one or two features to be explicitly enabled. Developers need to be upfront with exactly how to configure a library to achieve what the documentation says. I heard some arguments defending this that Rust has a good community where everyone is helpful which makes up for this and while this is true to a certain degree, this approach never scales. Being able to search for problem x php and have more than 200 results explaining solutions to your problem is what makes a language like PHP so easy for beginners to grasp.
Going forward
This small evaluation of Rust was more successful than predicted. Two of the major problems I’ve had with Go was basically solved and on top of that you can also do real hotswapping in Rust which unlocks the use case that was impossible to do in standard Go. For that reason it makes a lot of sense to rewrite the existing nocube code to Rust and also solve some of the design mistakes I made with the first iteration at the same time.
Doing a rewrite of a program should always be something that one does with caution. It’s easy to look at a new language and think that it solves all your issues, not understanding that every language comes with their own problems. This however is one of those times where the tool itself isn’t right from the start and to me it just signifies that I should have been less lazy starting out.
My friend who goes by the nickname of “Chicken” has done this advent series on Instagram where he finds one alcoholic beverage in odd places every day for the 24 days leading up to christmas. This year I decided to cut all of the ones from 2020 together into a compilation just to share this with the world.
A while back I was researching ancient MIDI sound modules such as the legendary Roland MT-32. The sound that these older synthesizers produce is extremely dated but in the right context it functions almost as a time capsule into what used to be state of the art. Take for example the iconic opening of The Secret of Monkey Island being played back on the Roland MT-32 and you’ll know what I mean that there is a specific sound that these makes that has gone out of fashion
Synthesizers of today sounds amazing. There are tons of analog synths and newer digital wavetable synths with oversampled filters on the market today both which overcome and emulate the essential characteristics of older synthesis. Compared to this the MT-32 produces a sound that is a relic of the technology of the time. It’s based on the same synthesis approach of the Roland D-50, namely “Linear Arithmetic synthesis”. The idea is basically that you combine short PCM samples and subtractive synthesis to create sounds, where using the subtractive synthesis as a base layer and the PCM samples as an embellishment would create a more interesting sound. This technology was mainly invented due to the limitations of memory at the time, making it very expensive to produce synths based solely on PCM samples.
The MT-32 was a consumer version of D-50 and quickly found use by games at the time. Back then it was not feasible to ship streaming audio (again due to the size limitations of floppies) which meant that games took upon themselves to interface with soundcards and modules like the MT-32 to generate audio. Due to the complexity of manually figuring out what sounds every channel would have per popular sound module, General MIDI was introduced in 1991 as a way of creating a standard set of instruments that you could expect from every sound module. Roland followed with the Sound Canvas 55 (SC-55) which shipped with General MIDI and a large variety of new sounds, while the device lacked some of the flexibility in programming that the MT-32 offered it improved on the clarity of the sound.
Shortly afterwards the CD-ROM became popular which allowed for CD quality streaming audio on personal computers, essentially removing the need for separate audio synthesis in the form that the sound modules had offered. On top of that the soundcards that shipped with PCs for PCM audio contained stripped down versions of these synthesizers which eventually got replaced by software only synthesis when CPUs became fast enough.
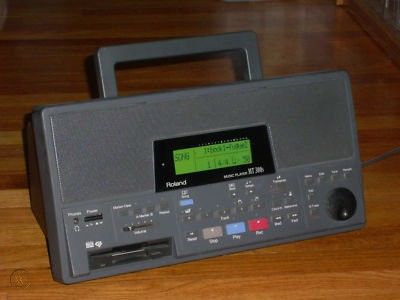
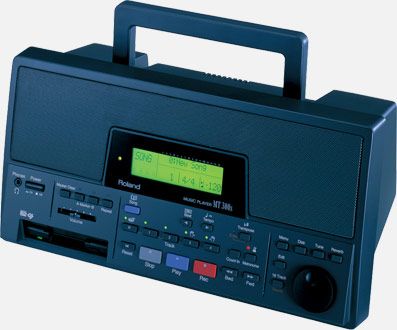
Roland did however manufacture the weirdest variation of the MT series starting with the MT-80. The Roland MT-80 was essentially a small microprocessor coupled with the sound engine from the SC-55 and a floppy drive. Aimed at musical teachers and students this device allowed users to insert a floppy disk loaded with MIDI files and play them back in a portable stereo fashion. It also offered to mute groups of instruments and adjustments of tempo.
The MT-80 followed by the Roland MT-300, an even more pimped out version with added features and stereo sound as the concept became fairly popular as a way of practicing music with virtual instruments.
Just seeing these horrible devices made me instantly scour eBay to see if I also could acquire a piece of history with these boxes of grey plastic anno 1996. Sadly they seem to start at around $200-$300 on eBay and that’s before you even factored in the cost of finding a floppy drive that you can replace the most likely non-working one with. I hosted a couple of cassette listening sessions at ATP, as a tongue-in-cheek against the desire to play vinyl only on rotary mixers and thought it would be a great sequel to play some horrible tracks from floppies instead. Since the price was a bit above my taste, the only thing left to do was to build it.
Refining the concept
Starting out I’ve always found it helpful to decide where the boundaries are. If you set out on a project to build something with the inspiration above there are tons of directions you could take but intentionally setting limits makes it more clear what tools and processes one needs to use. For this project it was clear early that:
The device should have a physical interface with real buttons. No touchscreens.
The device needed to use floppies
Bitmap displays was out of the question, if the device needed a display it would be either segment or character LCDs.
The device needed to hide the fact that it would be a repackaged Raspberry Pi.
The device should not have built-in speakers, focusing only on the playback as if it were a component of a stereo system in 1995.
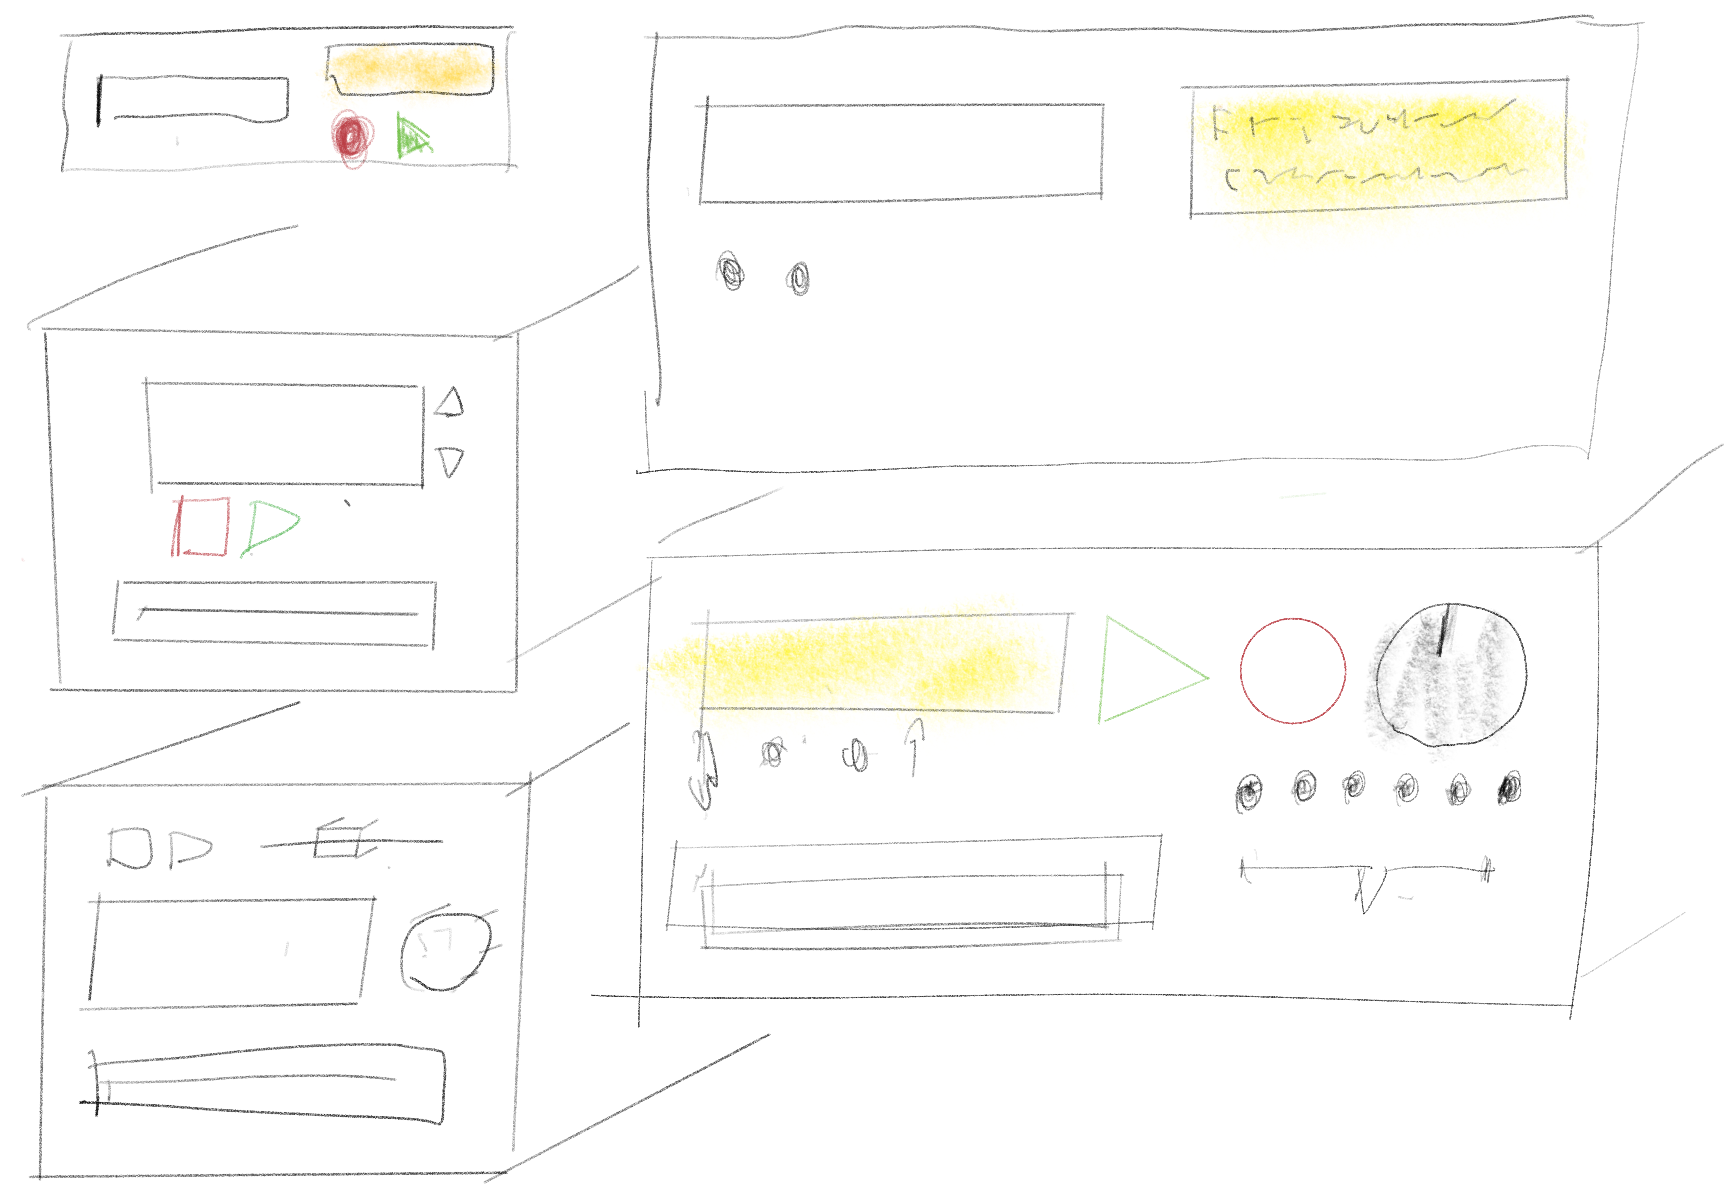
With this in mind I drew some absolutely terrible sketches to figure out what the interface would look like in order to settle on components. Once I had this done it was trivial to think about what components I would use to build something that worked like the sketches. Using an LCD would be vital to easier select files from the floppy, the buttons should be prominent and if possible in color and the device chassi should be in a grey or black material.
It was then just a matter of finding some nice components that seemed fun to use. I wanted an encoder and stumbled on a rotary encoder with a RGBLED inside, while fancy I felt that it would be a great way to signal the state of the device so I ended up ordering it. For the buttons and LCD, Adafruit had both for a reasonable price so I used these while sketching. I also found a really cheap USB floppy drive on Amazon which I bought along with a 10 pack of “old stock” Maxell floppy’s. Sadly 9 out of 10 floppies did not work which had me order a 10 pack of Sony floppies from eBay which worked better. I think this shows how there was an actual quality difference between the floppies back in the days as Maxell just hasn’t held up as well as Sony.
Knowing this it was just a matter of laying the components out with reasonable accuracy in Illustrator to get a feel for how it would end up. For this version I imagined that the rotary encoder would be to the right of the LCD and that the device would be a compact square device. I tried some of the above sketches but a more compact package felt more “90s integrated mini-stereo” with focus on being a device you could have in the kitchen.
Designing the enclosure
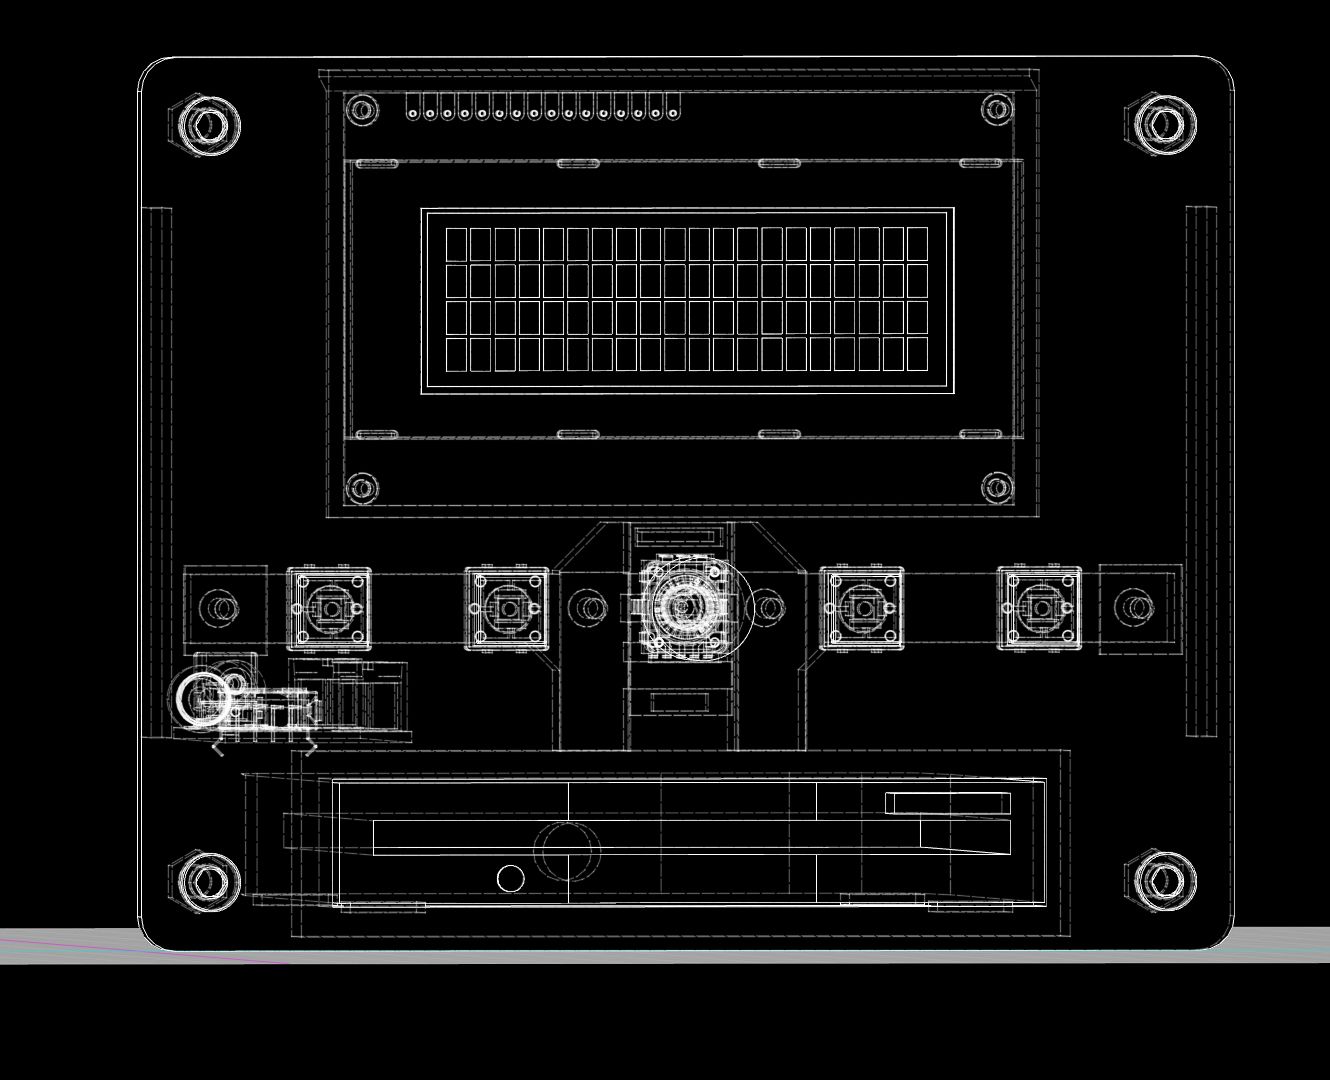
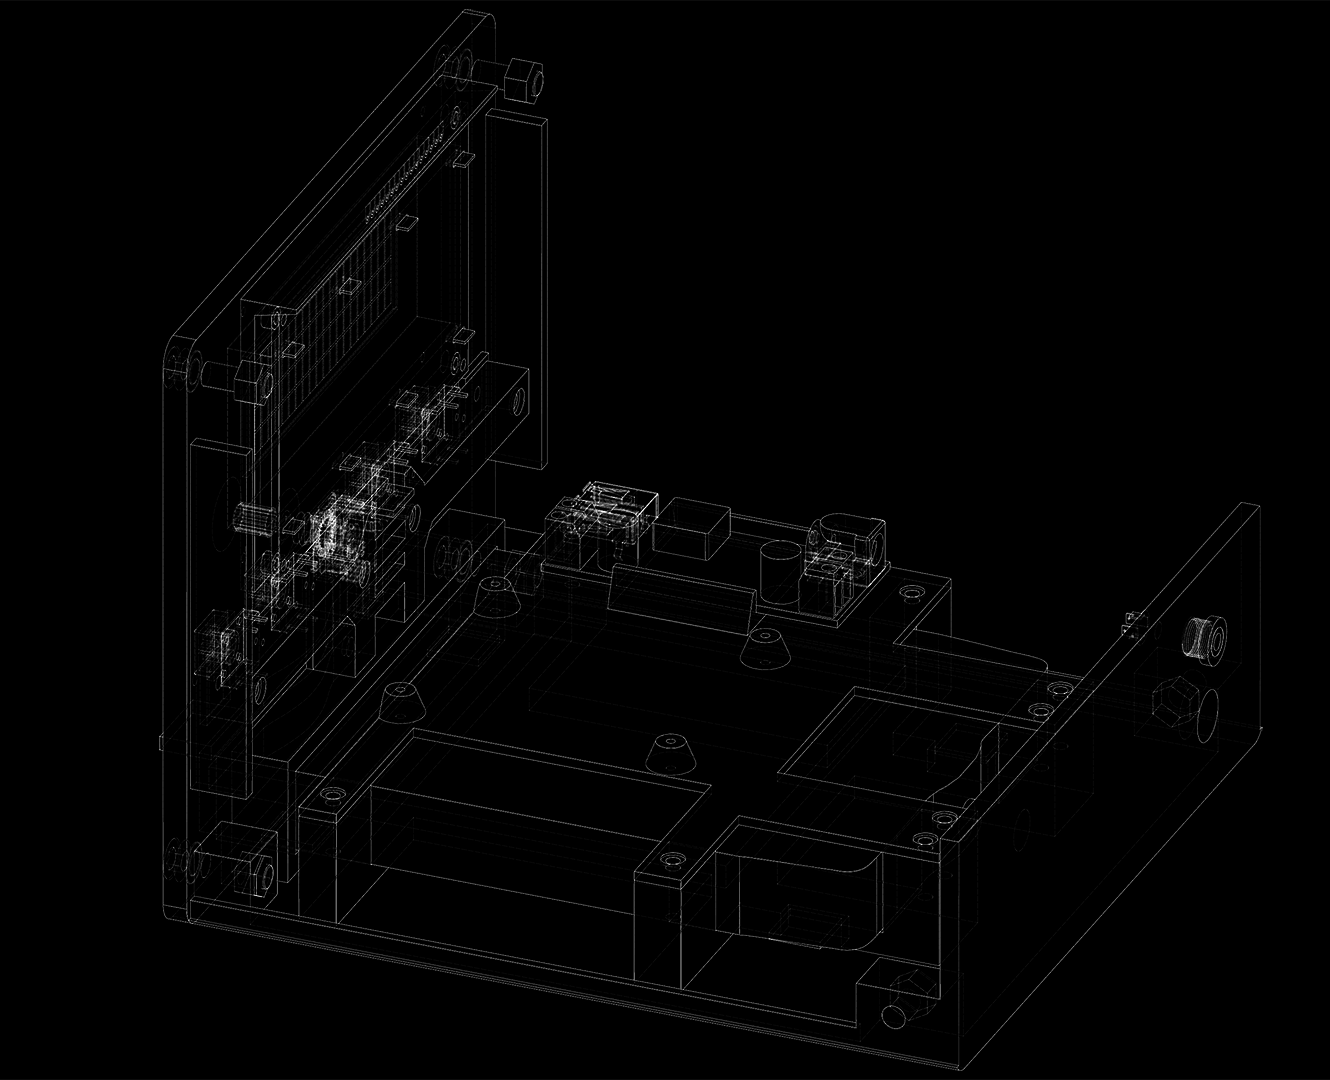
Starting from this concept it was just a matter of opening Fusion360 and getting to work on fitting the components. As usual I would be 3D printing this enclosure and to retain structural integrity I tried to minimize the printed part count, instead opting for larger printed pieces and being smart around how I designed the enclosure to fit the pieces.
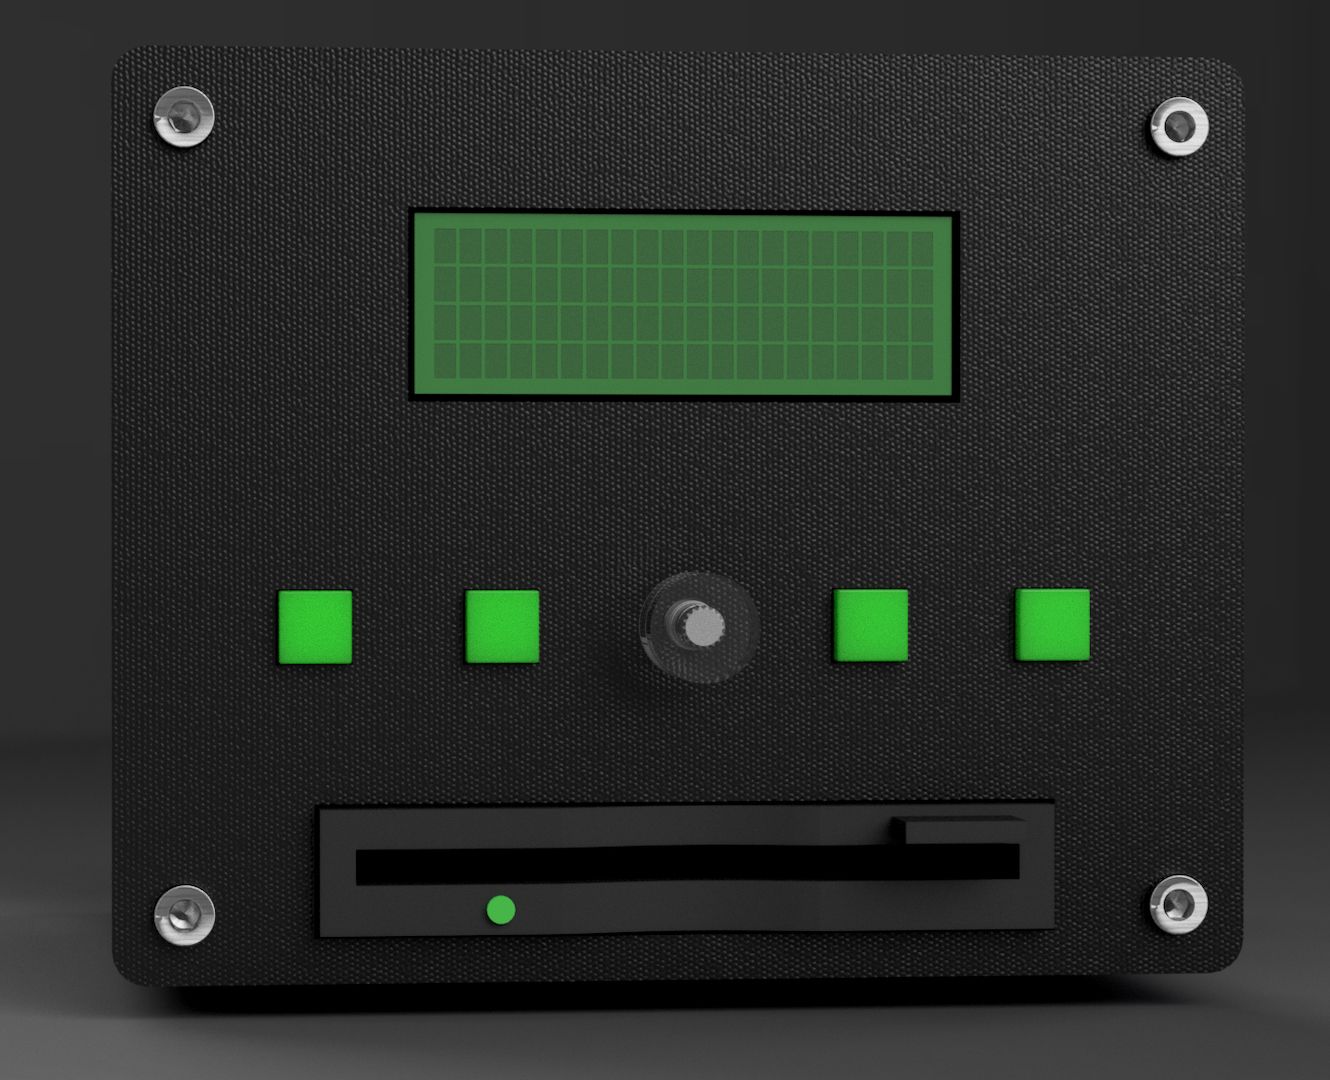
I started with the front panel as it would hold all the buttons and the encoder. As you can see I deviated somewhat from the concept as I realized the LCD has tons of baseboard padding that I would had to hide somehow. For that reason I couldn’t place the encoder to the right of the display without making the device unreasonably wide. Experimented with a couple of different aspect ratios and settled on something that’s “almost” square with visibly rounded edges. The reasoning here is that the device will have more depth due to the floppy so if the front panel was square it would break the “cube”, hence why it’s a tad wider than tall as it stands.
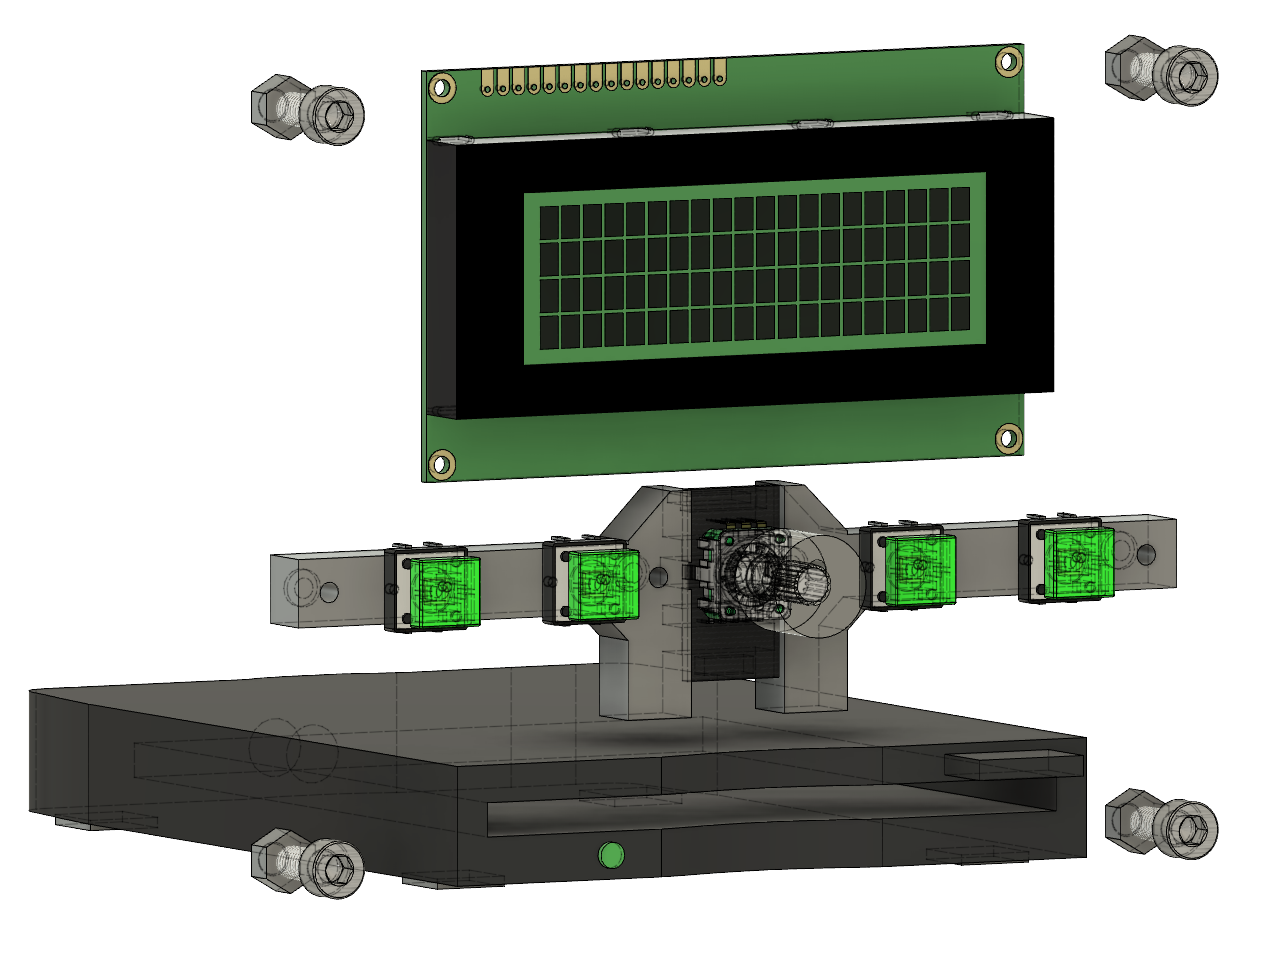
One thing that was really hard to figure out was how to properly mount the encoder and buttons without any visible screws on the front. Since the user presses the button inwards, the buttons needs to rest against something that holds either to an internal bracket or to the front panel. I settled on a sandwich concept that locks the button in place against the front panel. While this has some issues when mounting I think it was a reasonable compromise and could be printed in one part. It was also easy to design screw brackets into the PETG on the front panel.
The panel went through a lot more iterations compared to what’s shown here but it’s hard to show every iteration in a great way. I had to consider how the electronics would fit and where to put the Raspberry Pi for it all to make sense. Since the floppy is the deepest part of the device I placed it in the bottom in order to be able to build the rest of the inner workings on top of the device.
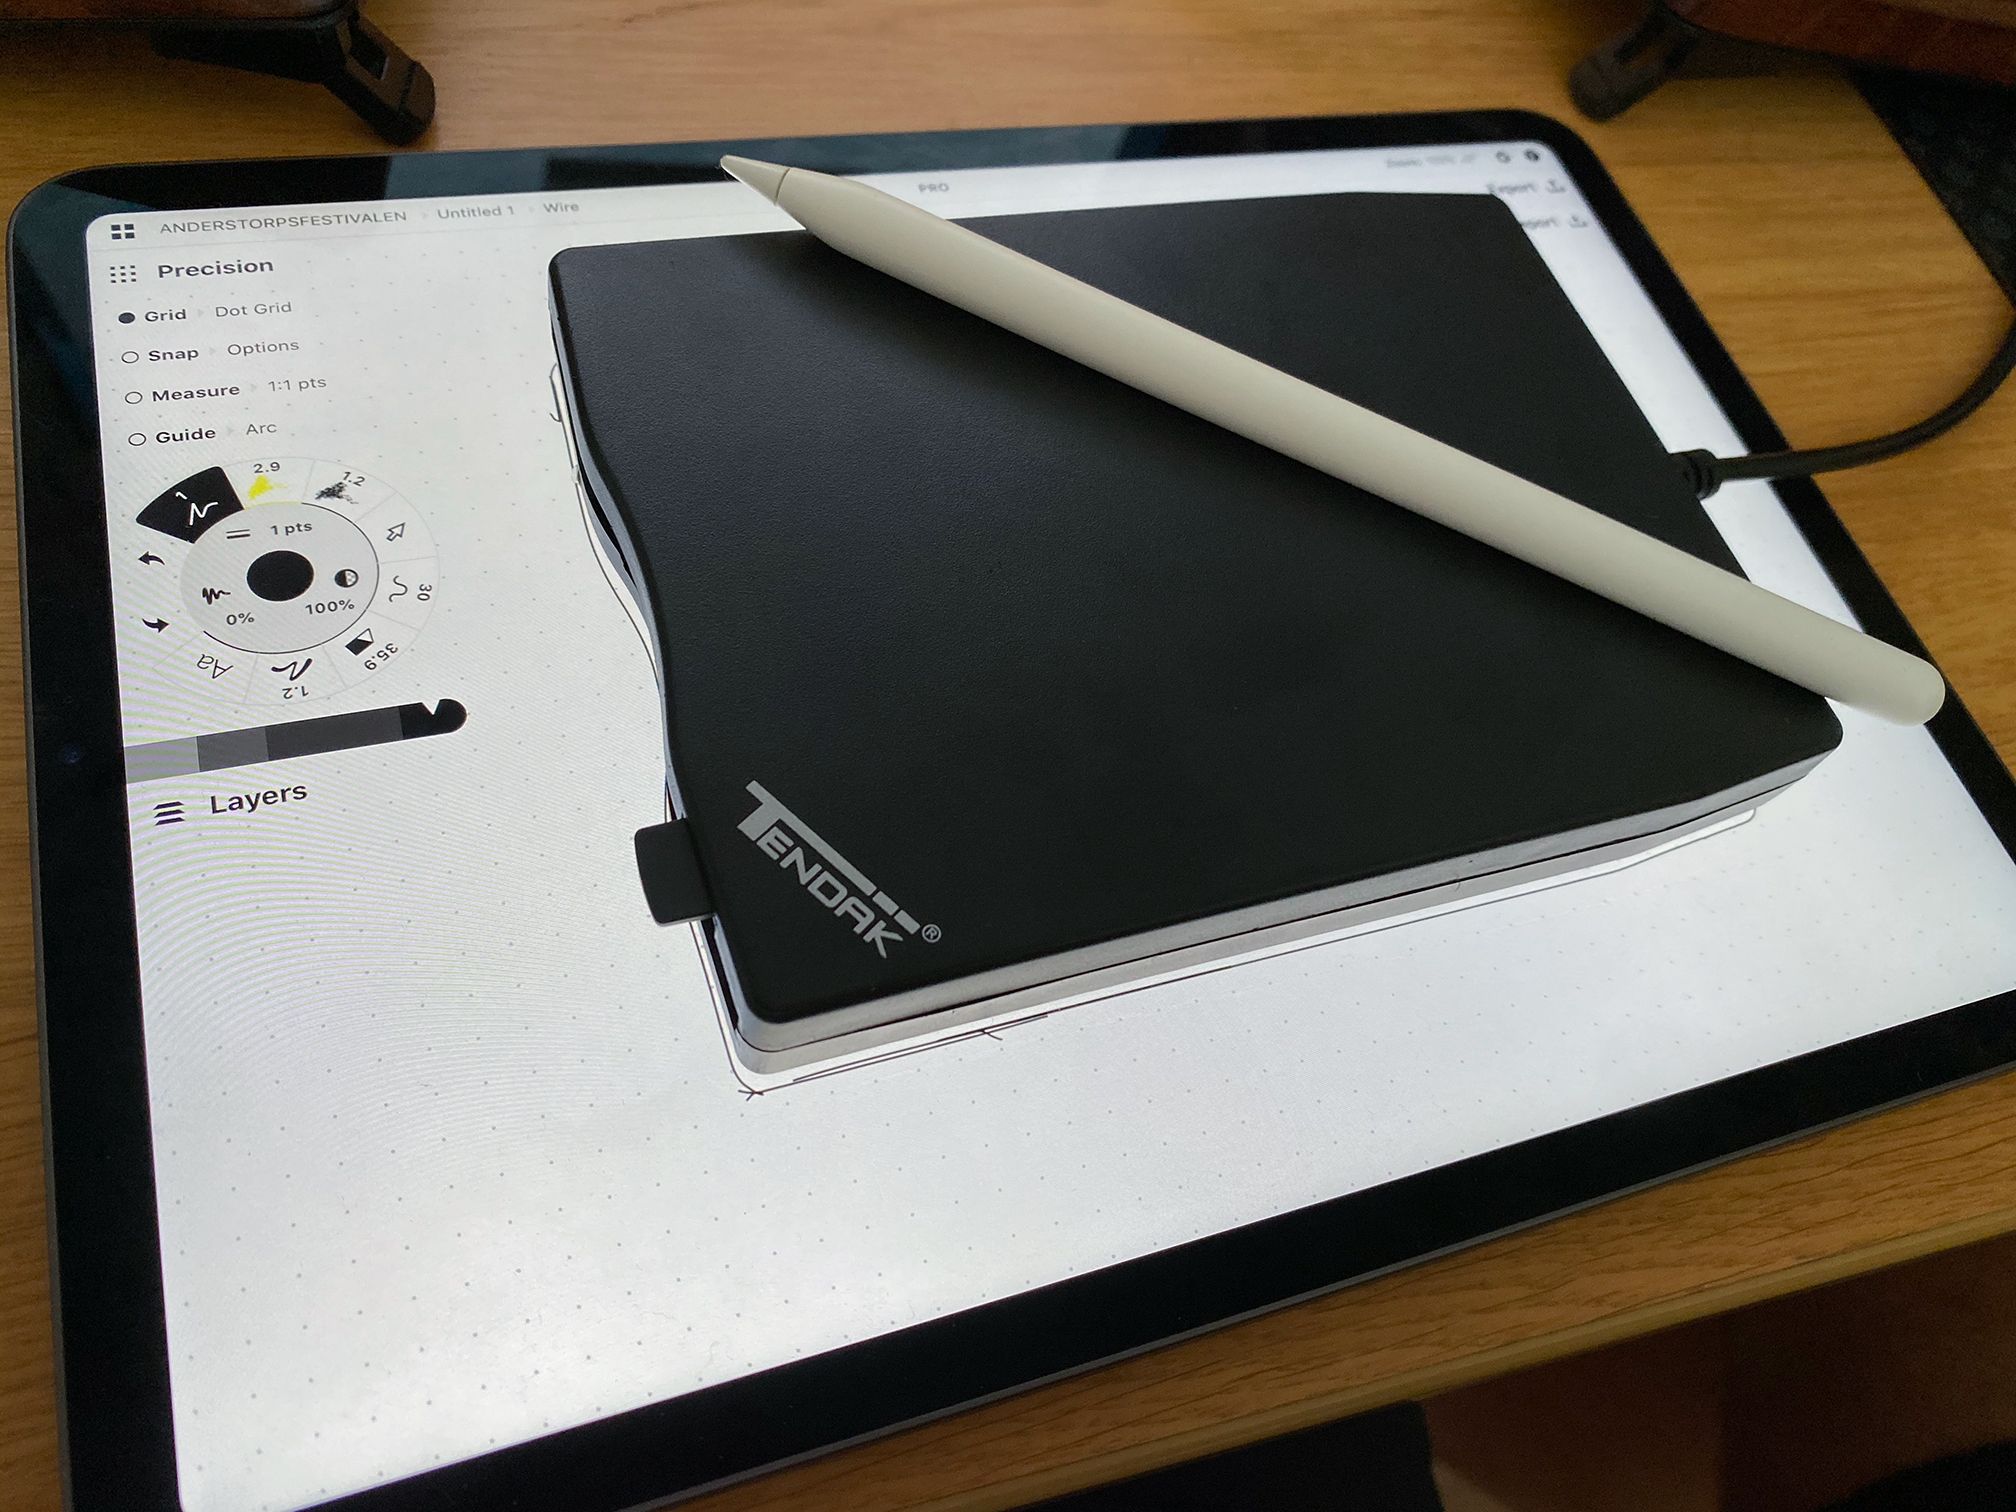
The next problem was how to accurately represent the USB Floppy in Fusion360. Since the floppy had some weird curves and I wanted the floppy to be properly sandwiched into the case in order for it to feel like it’s part of the box I had to come up with a creative solution to capture the curve. A real designer probably has some great tools or techniques to do this, however, since I’m not a real designer I ended up placing the floppy on the iPad and just tracing it in Concepts. From there I exported it into Illustrator, cleaned it up and imported it into Fusion360 from where I generated the volume from the drawing. Weirdly enough this worked.
With that done I sketched out a baseplate with walls that would hold the floppy in place and a layer plate which mounted on top of the floppy. Although this took a lot of iterations to get right with the fit and all the screws it was a pretty straightforward piece once I knew what components I wanted to use. Initially I envisioned the Raspberry Pi being mounted straight against the back panel with exposed connectors but it felt weird to go through all this effort only to expose that the device is just a Raspberry Pi with an ugly screen, so I added a buck converter together with a 3,5mm connector in order to fully enclose the Raspberry Pi.
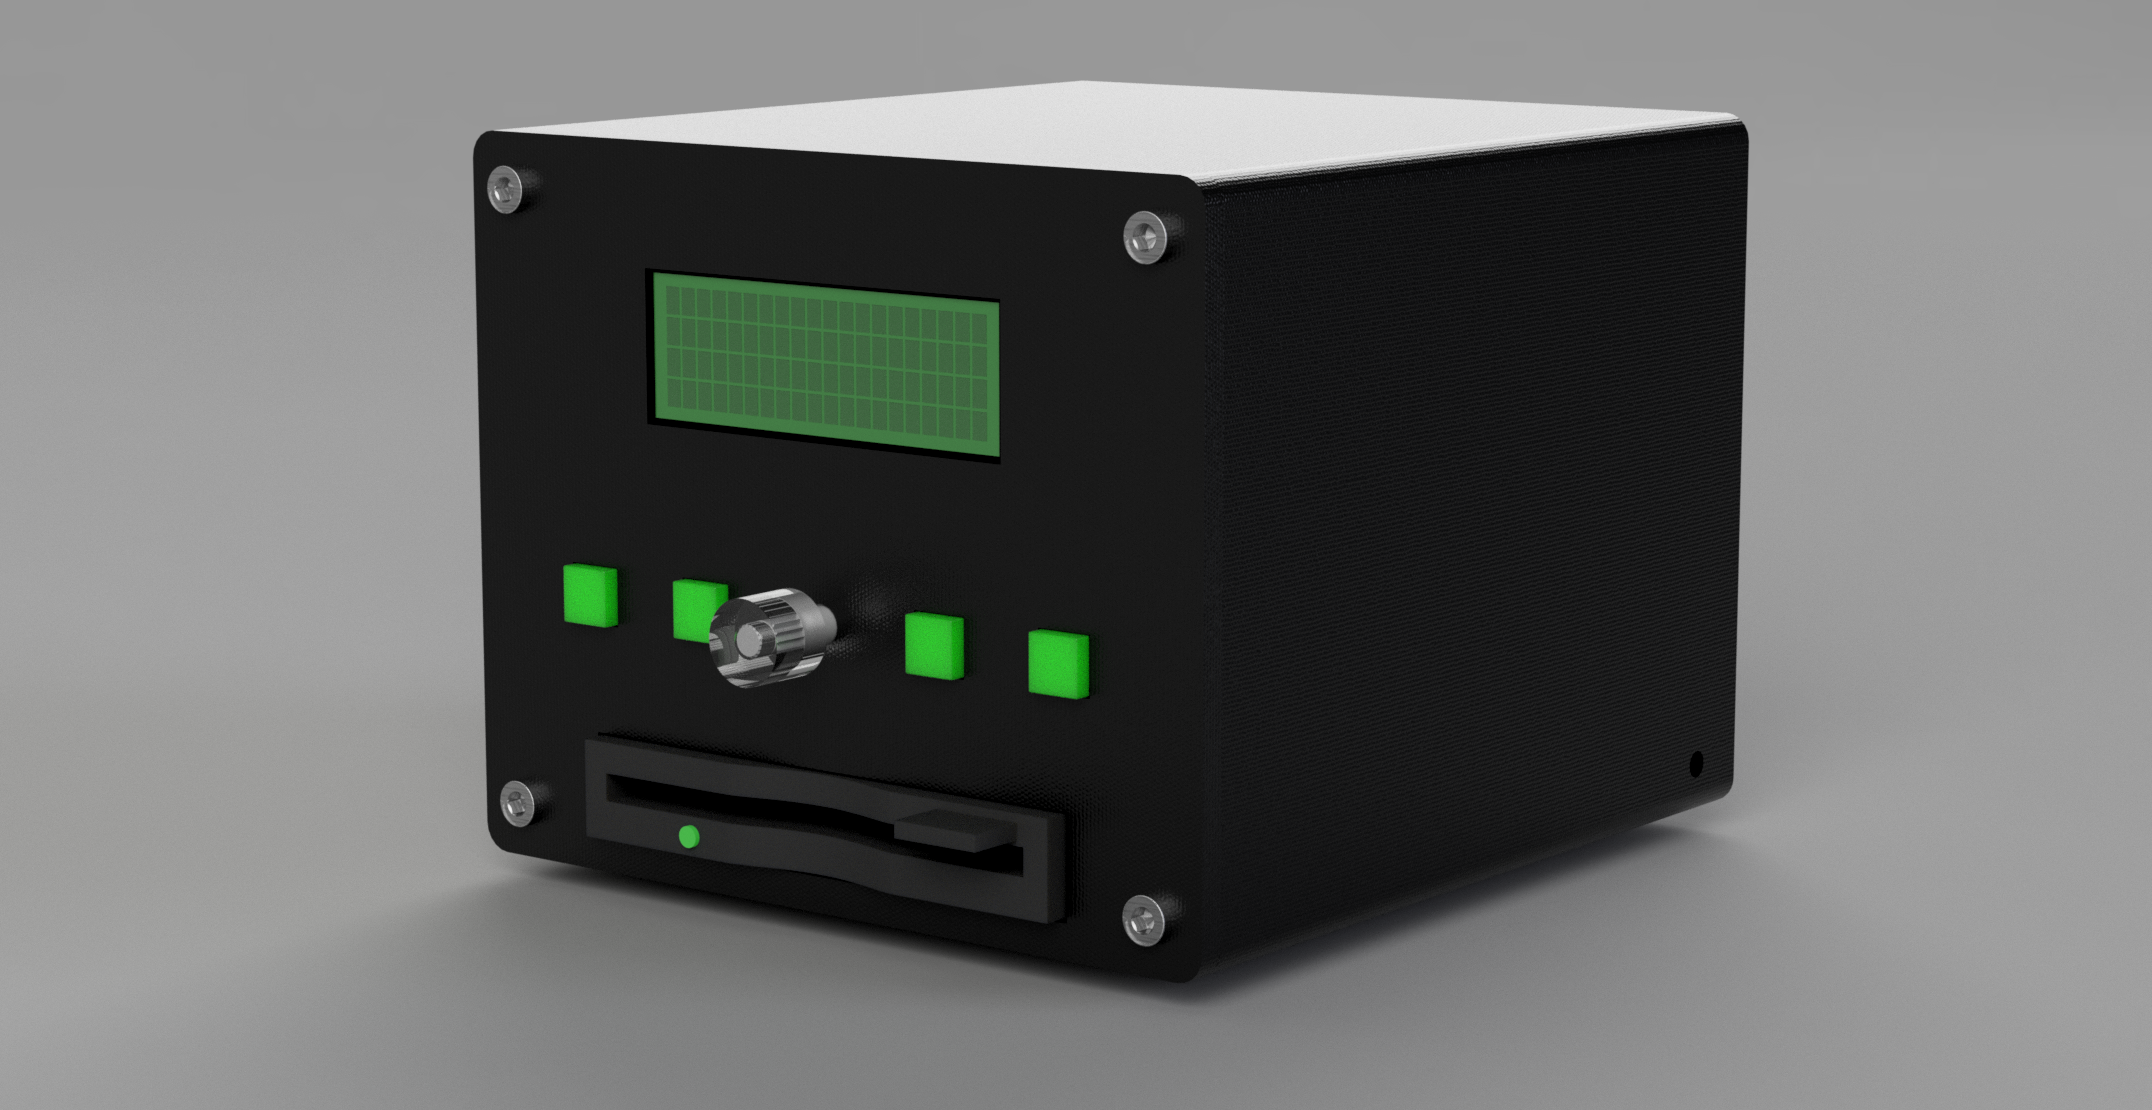
The last part was to add a cover with the correct sinks for M nuts and make sure that the rounded corners extrude all the way throughout the device. Here I experimented with a slanted case as it would be fasted to print but the device ended up too much like a 80s Toyota Supra with popup headlights so I skipped that idea and came to terms with the fact that this lid was going to take a good amount of time to print.
Making the panel work
Initially I envisioned this connecting straight to the GPIO of the RPI. It’s just 4 buttons, a serial display and an encoder with an RGBLED inside. On paper the RPI ticks all of these boxes, hardware PWM, interrupts, GPIO and serial output. Using all of these in Go is another story however. It turns out that the interrupt / PWM support for RPI is actually quite “new” in Linux with two different ways of approaching it. The old way was to basically memory map straight against the hardware and manually defining the interrupts with the new solution providing kernel interrupt support for these GPIO pins. Go is somewhere in between, the libraries either has great stability with no interrupts or really bad stability (as in userspace crashes when not run as root) using the interrupts.
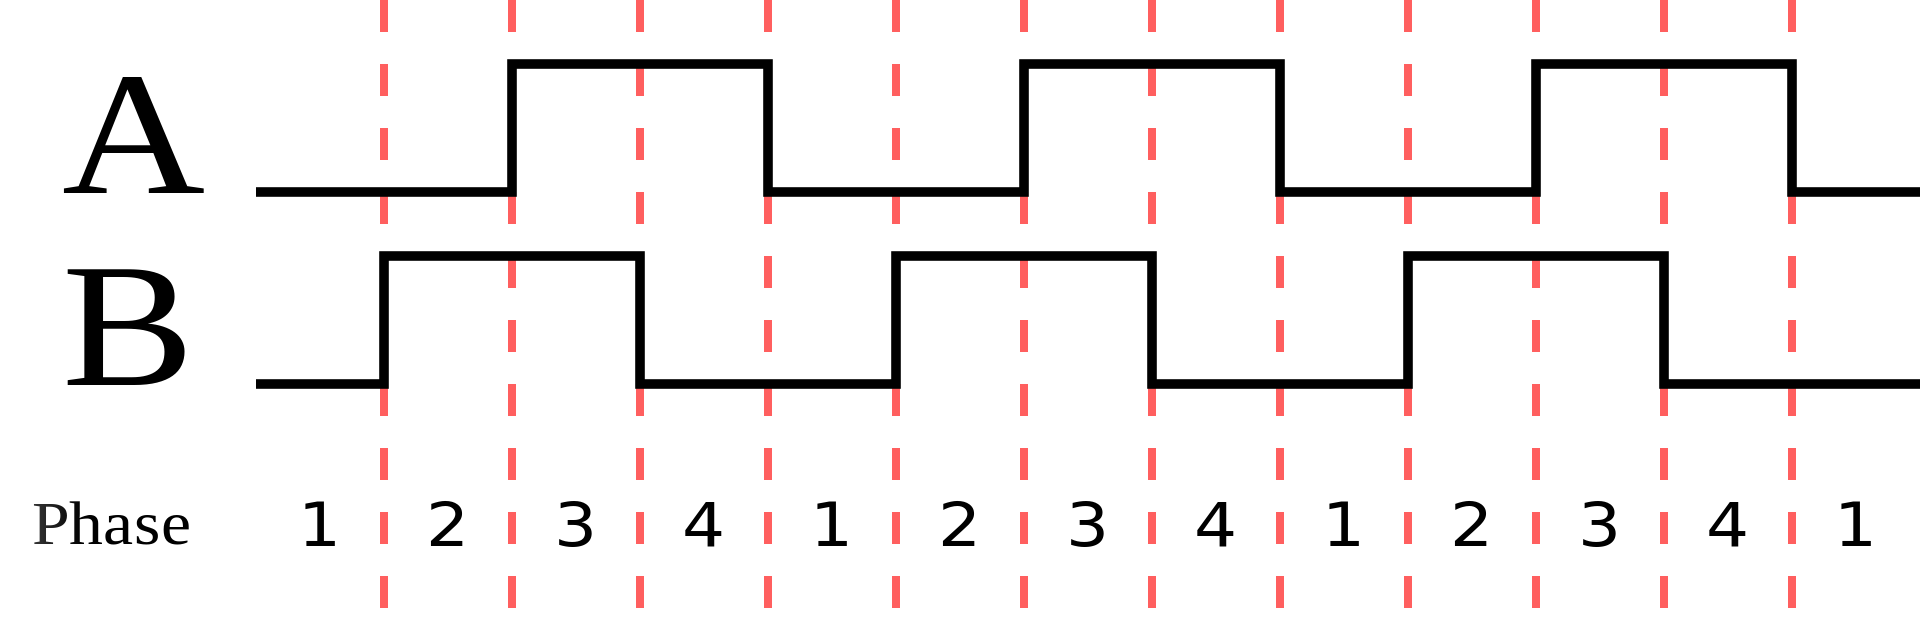
Why does interrupts matter so much? Can’t we just poll the GPIO fast enough for the user not to notice? The buttons aren’t the problem here but for anyone who used an encoder without interrupts know how weird they can feel. Encoders use something called quadrature encoding (also known as gray code) to represent the amount of distance and direction the encoder has moved when rotated. This means that we have to either poll the GPIO really fast to catch the nuances of something scrolling through a list without it feeling like the encoder is “skipping”. Using interrupts allows the microcontroller to instead tell us when the encoder gray code has changed which we can decode into perfectly tracked states of rotation.
After battling this back and forth for a couple of hours with the only viable solution looking like I would have to write my own library, using an Arduino just seemed… easier. Easily done. Wiring up an Arduino to do encoder interrupt and PWM is basically no lines of code. I played around with using Firmata but as before, the support in Go was lackluster so I defined a simple bi-directional serial protocol that I used to just report buttons and set LED color from Go. Serial support in Go is luckily extremely easy. On top of this the “LCD Backpack” that Adafruit shipped with the LCD had USB so I got a nice USBTTY to write against for the LCD. This made the Go code quite clean.
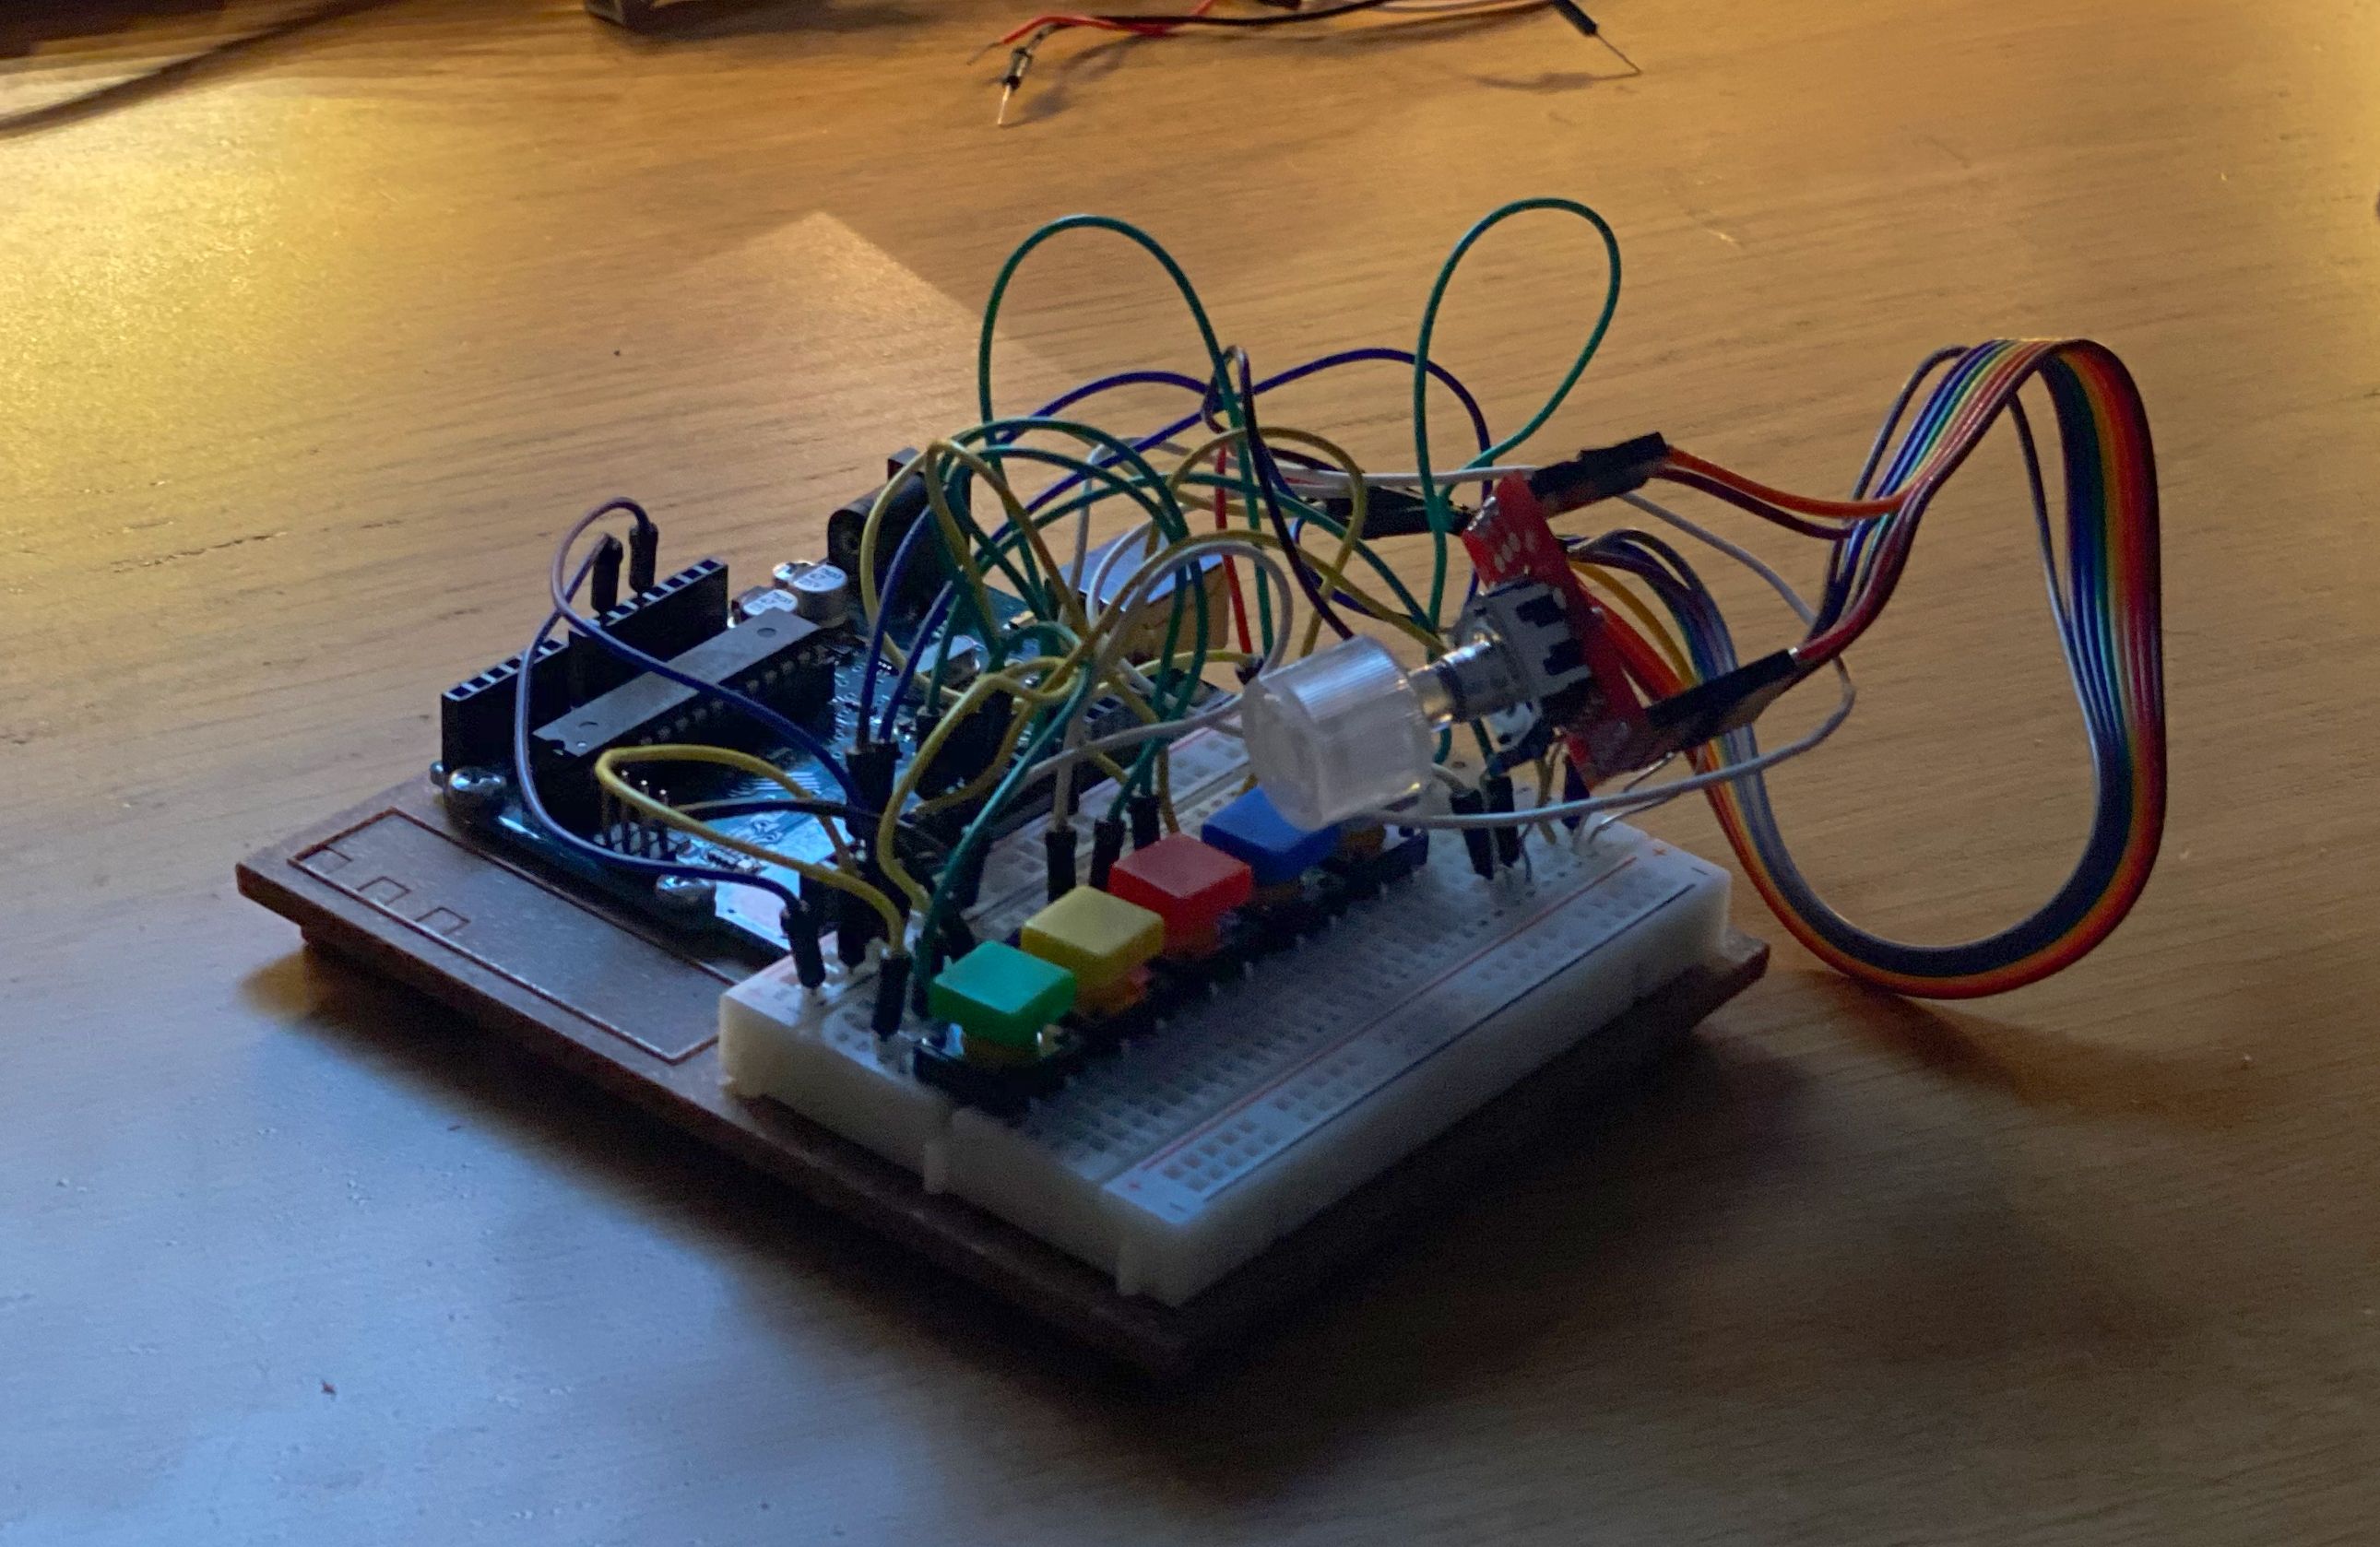
With this done I could wire up the encoder and the buttons on a breadboard in order to have a prototype panel to play with. It’s not a pretty sight but it worked for developing the serial protocol. The Arduino framework has tons of problems but it makes it easy to move the code from one microcontroller to another. Here I’m running on an Uno, later ported to a Arduino Nano for the actual package.
Here it is soldered down on a “hat” for the RPI with the Arduino Nano.
Replicating the audio synthesis
Now the challenge was how to go about generating actual audio. There were a number of options here. The first one was using a hardware MIDI chip such as the VS1053B but after hearing the audio quality I quickly realized that this didn’t sound at all close to what I wanted. Discovering this made it clear that I wanted the sounds of the MT-32/SC-55 but in another package which narrowed the scope to using SoundFonts. SoundFonts was introduced by Creative for their SoundBlaster AWE32 as a way of switching out the sounds on the soundcard, you would load a soundfont onto the device much similar to how you load a text font and the device would use the bank of samples with the surrounding settings to generate audio. Today there’s an array of soundfonts available as the format has taken on a life beyond Creative and there are many MT-32/SC-55 soundfonts available.
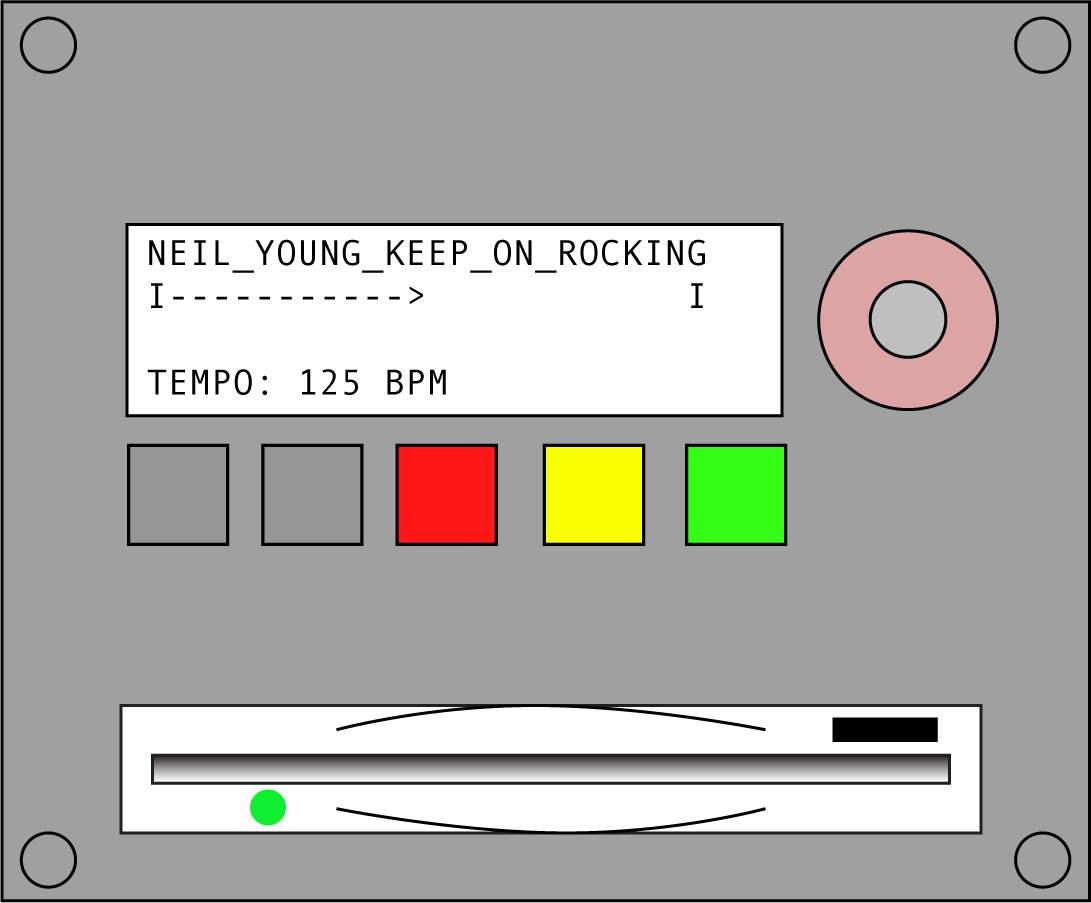
There is a great softsynth that uses soundfonts called FluidSynth. After experimenting with FluidSynth it was clear that the sound generation was spot on, it was able to re-create masterpieces like Neil Young - Rockin’ In The Free World from some jank MIDI file that has the least tight re-creation of this song I’ve ever experienced. To clarify, FluidSynth is fantastic but the MIDI file of this track is really bad, paired with the SC-55 sound it becomes golden. Just listen to this and you will be convinced.
Knowing this the next step was figuring out how to interact with FluidSynth. FluidSynth has a CLI that I could use but it quickly turned out that the CLI was hard to interface against programmatically. FluidSynth also ships with a C API which seemed to be easy enough to interface against. Go has a reasonably easy way of interfacing with C known as cgo. I found some rudimentary bindings on Github that lacked basically all the features I wanted so I forked the repo and started building my own bindings with a more Go-centric API. I added a ton of functionality which is now in my repo called fluidsynth2 on Github for anyone that ever finds themselves wanting to use this from Go.
Writing the controller software
With that issue out the way the remaining part was to write the MT-420 code, which ended up being abstractions for the various hardware devices, a bunch of specific logic around mounting a floppy in Linux year 2020 (harder than you might think) and general state management. The code is absolutely horrible as I wrote most of it before knowing how the hardware actually worked and mocked a lot of it against the terminal, later replacing the modules with actual implementations and discovering peculiarities about how the hardware actually worked that had me refactor code in sad ways. Feels good to see this initialization of the floppy interface though.
///////////////////////////////////////////// Floppy///////////////////////////////////////////
delayWriter("Warming up floppy", delay, display)
var storage storage.Storage
if *mockFS {
storage = mock.New(*mockPath)
} else {
storage = floppy.New(lconfig.Floppy.Device, lconfig.Floppy.Mountpoint)
}
storage.Init()
The code is structured in two main parts, the first one is to create the “devices” for the “controllers” to use. To easier develop I created “mock” versions of all devices (using Interfaces in Go) which means you can run the entire application in the terminal and use the keyboard to “emulate” the panel. I’m glad I did this as I almost lost my sanity multiple times trying to wrangle with the LCD display. These “devices” are then passed onto the controller which is a state machine pattern that I’ve written a couple of times in Golang at this point. Instead of writing a defined “list” of states I create a interface that the controller host can call on.
type Option interface {
Run(c *Controller, events <-chanstring, end chanbool) string
Name() string
}
The controller then has an index of all available “modules” and just calls the entrypoint module in the map and calls Run() with the required data. Each module is then responsible for executing the loop and returns a string, which contains the name of the next module. This means that the module can say “go back to X” and the controller will just call that module next loop. This pattern is simple but I’ve found it effective when using “blocking interfaces” such as humans interacting with the device.
The question here though is “Why use Golang?”. To be honest here I think the real reason is that I was lazy and thought that the scope of this was likely to be really small. That turned out to not be the case, especially with all the workarounds I had to do due to pains of interacting with the kernel in Go. Go is really good at solving problems where the hardware is irrelevant and less so dealing with devices like a USB floppy. While I appreciate the fast cross-compilation, approaching this again I would have written this in Rust instead, as the C interop alone would have saved me time on having to work on the FluidSynth bindings. It’s good to do one of these projects though, really pushing the bar of one’s comfort zone language to understand where the weaknesses are.
Demo
You can find all the code for this at my GitHub. The repo also contains the STL files if you want to go ahead and print this yourself.